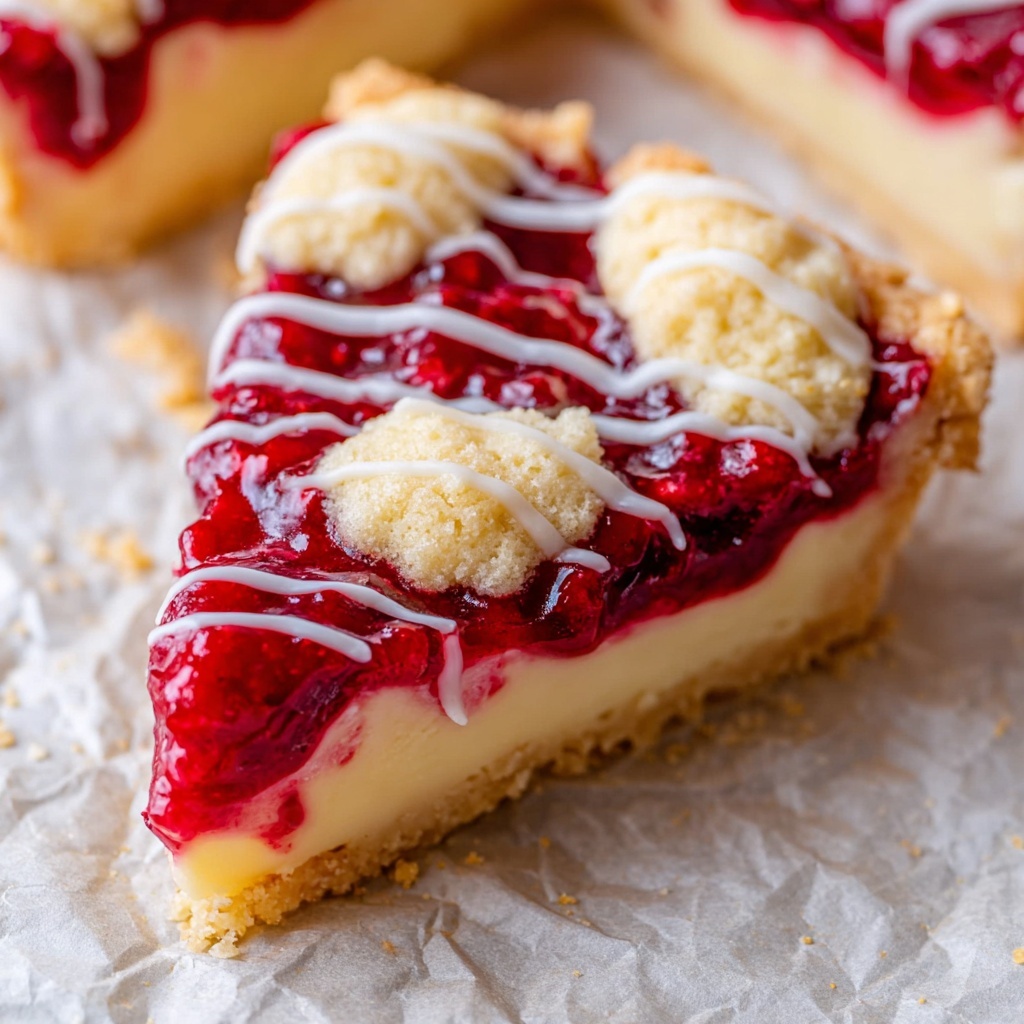
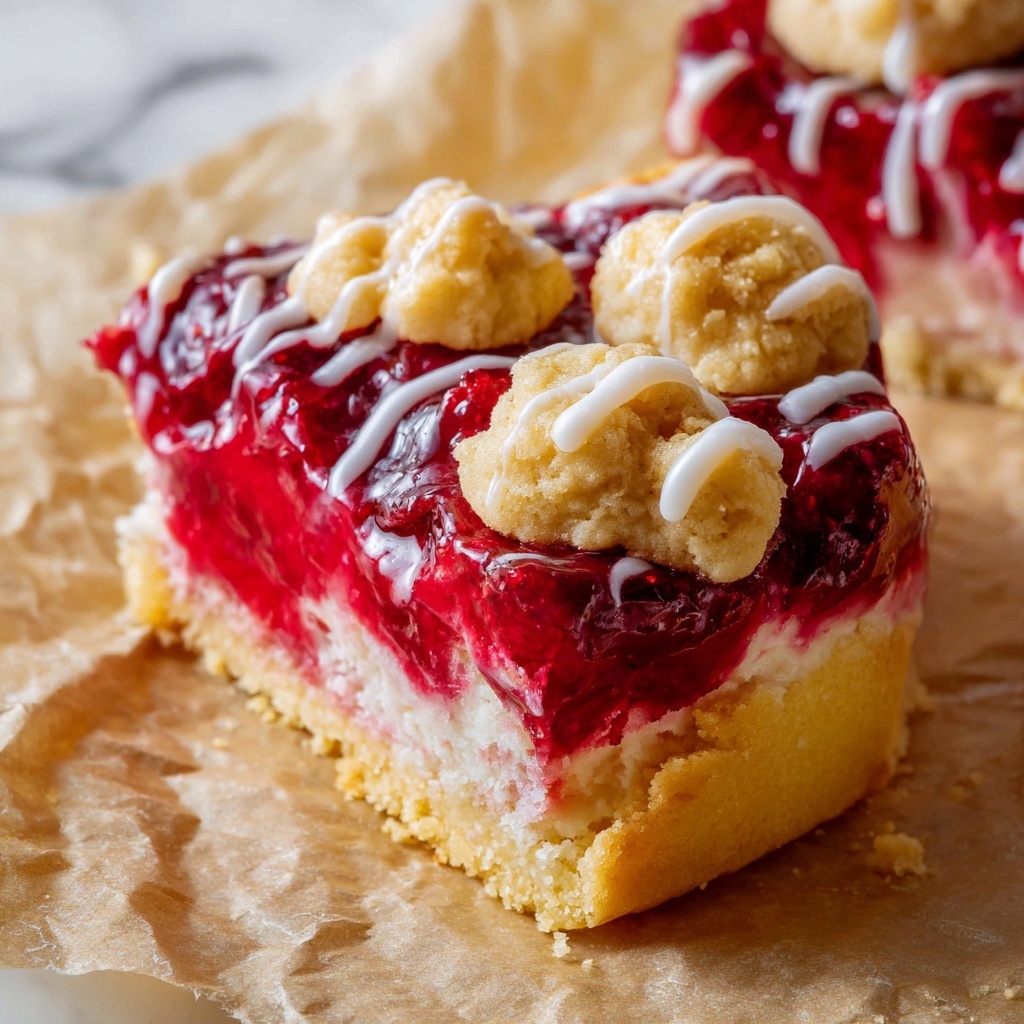
If you’re looking for a delightful and comforting treat that combines the nostalgic flavors of cherry pie with the convenience of a bar, then this Easy Homemade Cherry Pie Bars Recipe is absolutely for you. Bursting with luscious cherry pie filling sandwiched between buttery, flaky layers of shortbread crust, these bars are the perfect balance of sweet and tart, with a gorgeous golden finish and a drizzle of glaze to top it all off. Whether you want a crowd-pleasing dessert for a potluck or a sweet fix for an afternoon coffee break, these cherry pie bars bring homemade charm without fuss, making them a fast favorite you’ll return to again and again.

Ingredients You’ll Need
Don’t be fooled by the simplicity of the ingredients in this recipe; each one plays an essential role in creating that perfect texture and flavor harmony. From the rich butter that forms the flaky crust to the vibrant cherry pie filling that bursts with fruity goodness, these pantry staples come together to make magic.
- 2 cups butter (softened, 4 sticks): The star of the shortbread crust, providing richness and tenderness.
- 1 & 1/2 cups granulated sugar: Sweetens the dough and helps achieve a light, fluffy texture.
- 1/2 teaspoon almond extract: Adds subtle nutty warmth that complements cherries beautifully.
- 2 teaspoons vanilla extract: Enhances and rounds out all the flavors in the dough.
- 1 egg: Binds ingredients together while adding moisture.
- 4 cups all purpose flour (spooned and leveled): Gives structure to the bars without making them tough.
- 1/2 teaspoon baking powder: Keeps the crust tender and slightly airy.
- 1 & 1/2 teaspoons kosher salt: Balances sweetness and deepens flavor.
- 2 (21-oz) cans cherry pie filling: The luscious, juicy heart of this dessert.
- 1 cup powdered sugar: For the sweet glaze that dresses the bars beautifully.
- 1-2 tablespoons milk: Adjusts glaze consistency perfectly.
- 1/4 teaspoon vanilla extract or almond extract: To flavor the glaze, matching your preference.
How to Make Easy Homemade Cherry Pie Bars Recipe
Step 1: Prepare Your Oven and Pan
Set your oven to 375 degrees F and get your 9×13 inch baking pan ready by applying nonstick spray or butter. An even easier way is lining the pan with parchment paper, allowing you to lift the bars out effortlessly once baked. If you choose foil, make sure to grease it well to prevent sticking.
Step 2: Cream the Butter and Sugar
In a large bowl or stand mixer, beat 2 cups of softened butter until creamy and smooth. Then add 1 and 1/2 cups granulated sugar and continue beating until the mixture turns light and fluffy, scraping the sides often. This step is crucial for that tender, melt-in-your-mouth base.
Step 3: Flavor and Bind the Dough
Incorporate 1/2 teaspoon almond extract, 2 teaspoons vanilla extract, and 1 egg into your whipped butter and sugar, mixing well. These flavors create a rich, fragrant background that pairs beautifully with the cherry filling.
Step 4: Combine Dry Ingredients
Mix 1/2 teaspoon of baking powder and 1 and 1/2 teaspoons kosher salt with 4 cups of all purpose flour in two parts. Begin by adding half the flour to your wet mixture, followed by the remainder once the first half is evenly incorporated. Stir gently and avoid overmixing to keep the dough tender and flaky.
Step 5: Press the Base Layer
Transfer two-thirds of your dough to the prepared baking pan, pressing it evenly across the pan’s bottom and slightly up the sides. Wetting your hands a little helps manage the sticky dough efficiently. For best texture, chill this crust for about 20 minutes before baking.
Step 6: Bake the Shortbread Crust
Bake the crust at 375 degrees F for 20 to 23 minutes, or until the edges turn a beautiful golden brown. Once baked, reduce your oven’s heat to 350 degrees F in preparation for the next step.
Step 7: Add the Cherry Pie Filling
Remove the crust from the oven and spread both cans of cherry pie filling evenly over the top. The bright, juicy cherries will bring the bars’ fruity center to life, offering a perfect contrast to the buttery crust.
Step 8: Top with Remaining Dough
Take the chilled remaining one-third of dough, break it into medium-sized chunks about the size of a quarter, and scatter them over the cherry layer. Don’t worry about perfect coverage or uniform shapes; these rustic chunks bake into a beautifully textured top.
Step 9: Bake the Completed Bars
Place the bars back into the oven at 350 degrees F and bake for 40 to 45 minutes until the topping is golden brown. Once baked, allow the bars to cool completely on a wire rack, or if you’re eager, cool them in the fridge or freezer to speed things along.
Step 10: Prepare and Drizzle the Glaze
Whisk powdered sugar with 1 to 2 tablespoons of milk and 1/4 teaspoon of vanilla or almond extract to form a smooth glaze. Drizzle this luscious topping generously over the bars and let it set for about 30 minutes. A quick chill helps the glaze firm up nicely.
Step 11: Serve and Enjoy
Cut the bars into delightful squares and serve them up with vanilla ice cream if you want to elevate the experience. These bars taste divine at room temperature, warmed slightly in the microwave, or chilled — it’s hard to go wrong!
How to Serve Easy Homemade Cherry Pie Bars Recipe
Garnishes
Adding simple garnishes like a sprinkle of powdered sugar, fresh cherries, or even a handful of toasted sliced almonds adds visual appeal and bursts of extra texture that make the bars feel like a special treat.
Side Dishes
A scoop of creamy vanilla or almond ice cream is a classic side that balances the rich crust and tart cherries beautifully. You could also pair the bars with a dollop of whipped cream or fresh fruit salad for a refreshing contrast.
Creative Ways to Present
For gatherings, cut the bars into bite-sized pieces and serve them on a decorative platter with fresh mint leaves for a pop of color. Or layer them in a dessert trifle with whipped cream and chopped nuts for an unexpected twist.
Make Ahead and Storage
Storing Leftovers
Keep any leftover cherry pie bars at room temperature covered for up to 24 hours. After that, it’s best to store them in the refrigerator where they will stay fresh for 3 to 5 days, maintaining their moist texture and sweet cherry goodness.
Freezing
These bars freeze wonderfully. Wrap them well in plastic wrap followed by foil to avoid freezer burn. When you’re ready, thaw them overnight in the fridge or let them sit at room temperature until soft and ready to enjoy.
Reheating
If you prefer warm bars, reheating in the microwave for 15 to 20 seconds works perfectly. Just be careful not to overheat the bars, so they remain tender with the cherry filling warm and gooey.
FAQs
Can I use fresh cherries instead of canned pie filling?
Absolutely! If using fresh cherries, you’ll want to cook them down with sugar and a bit of cornstarch until thickened to mimic the canned pie filling texture. This gives a fresher, vibrant flavor but requires a bit more effort.
What if I don’t have almond extract?
No worries at all. You can simply increase the vanilla extract slightly or leave out the almond extract entirely. The bars will still have a rich and lovely flavor.
Can these bars be made gluten-free?
Yes! Substitute the all-purpose flour with a gluten-free flour blend suited for baking. You might need to adjust the amount slightly depending on the blend but the texture and taste remain delicious.
Is it necessary to chill the dough before baking?
Chilling the dough is recommended for a buttery flaky crust with great texture, but if you’re short on time, you can bake right away. Just expect a slightly different texture—still tasty and satisfying.
How do I get the glaze to the right consistency?
Start by adding 1 tablespoon of milk to the powdered sugar and whisking well. Add more milk in tiny increments until the glaze is smooth but not runny — it should drizzle easily but hold shape once on the bars.
Final Thoughts
If you’re ready to wow friends, family, or just treat yourself, this Easy Homemade Cherry Pie Bars Recipe is the way to go. It’s approachable, comforting, and deliciously nostalgic all at once, making it one of those recipes you’ll be thrilled to have in your dessert repertoire. Give it a try—you’ll wonder how you ever lived without these cherry dream bars!