
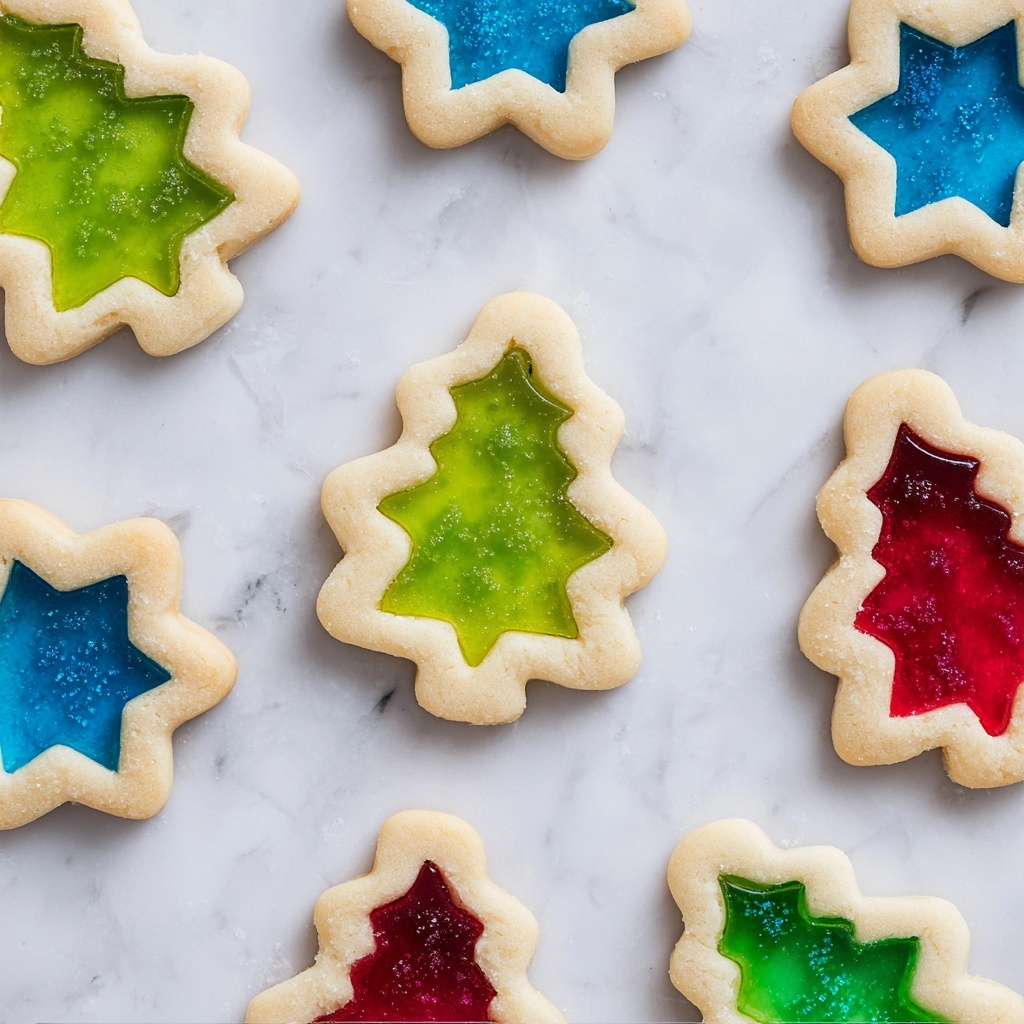
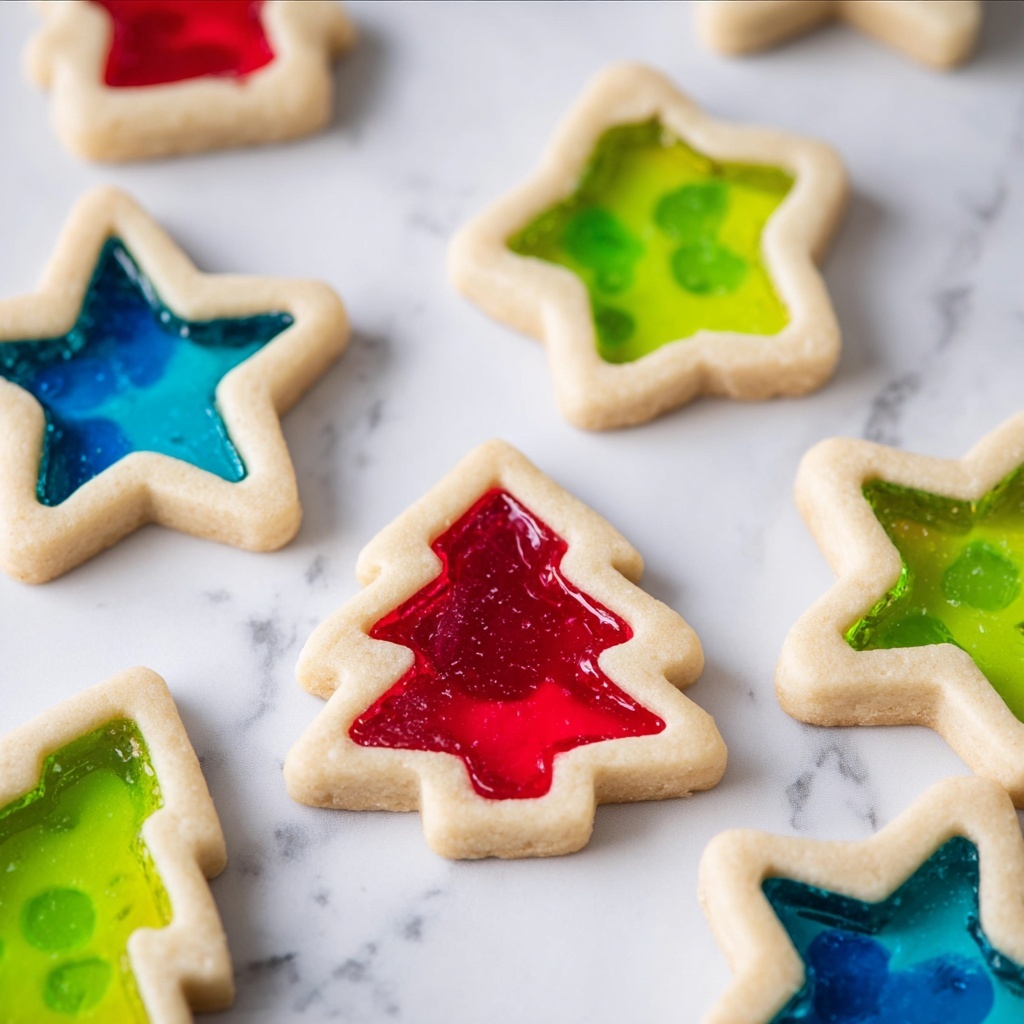
If you’ve never had the joy of biting into dazzling, jewel-like cookies that are as delightful to look at as they are to eat, then you’re in for a treat with this Stained Glass Cookies Recipe. These charming cookies feature a buttery, tender base that cradles colorful, translucent candy centers that catch the light like tiny edible stained glass windows. Perfect for holidays, celebrations, or just when you want to add a bit of sparkle to your day, these cookies are a fun blend of simple ingredients transformed into a truly memorable bite. Let me walk you through this magical recipe so you can share the joy of Stained Glass Cookies too!
Ingredients You’ll Need
All the ingredients in this Stained Glass Cookies Recipe are straightforward, pantry-friendly, and essential to create that perfect balance of flavor and texture. Each one brings a necessary touch—from the rich butter giving softness to the chewy candy centers providing those beautiful stained glass panes.
- Unsalted butter (¾ cup, room temperature): Provides richness and a tender crumb without added salt that could overpower.
- Granulated sugar (¾ cup): Adds sweetness and helps with the cookie’s crisp edges.
- Sea salt (¼ teaspoon): Enhances flavor complexity and balances sweetness.
- Large eggs (2, room temperature and beaten): Bind everything together and contribute to the cookie’s moist texture.
- Vanilla extract (1½ teaspoons): Gives a warm, aromatic depth that complements the candy centers.
- All-purpose flour (2½ cups plus ¼ cup divided): The sturdy base that holds the dough together and supports the stained glass “windows.”
- Jolly Ranchers Candies (2 cups, crushed): The stars of the show — crushed into small chunks to create those colorful, glossy centers.
How to Make Stained Glass Cookies Recipe
Step 1: Make the Cookie Dough
Start by creaming the unsalted butter and sugar together until the mixture is light and fluffy—this is crucial for a soft yet crisp cookie texture. Beat in the eggs one at a time to maintain the right consistency. Add the vanilla extract for a fragrant hint. Gradually mix in the flour and sea salt to form a dough that’s smooth but still pliable enough to roll out without cracking.
Step 2: Chill and Roll the Dough
Wrap your dough in plastic and let it chill in the refrigerator for at least 30 minutes. This resting period firms up the dough, making it easier to handle and ensuring the cookies keep their shape during baking. Once chilled, roll the dough out to about ¼-inch thickness on a floured surface—this thickness strikes the perfect balance between sturdy edges and delicate candy windows.
Step 3: Cut and Create Windows
Use your favorite cookie cutters to cut out shapes. Then, carefully cut out smaller shapes inside the center of each cookie to create the “window.” This is where your crushed Jolly Ranchers will go, so making these smaller cutouts cleanly is key to that stained glass effect.
Step 4: Add Your Candy “Glass”
Fill the window spaces of each cookie with the crushed Jolly Ranchers. The candies will melt during baking and spread evenly, transforming into those radiant candy panes that make this recipe so special. Be sure the candy pieces aren’t too large to avoid bubbling over.
Step 5: Bake and Cool
Bake your cookies in a preheated oven at 350°F (175°C) for about 10 to 12 minutes, or until the edges are lightly golden and the candy centers have melted completely. Let them sit on the baking sheet for a few minutes before transferring to a wire rack to cool fully—this allows the candy to harden perfectly into glass-like windows.
How to Serve Stained Glass Cookies Recipe
Garnishes
For an extra special touch, dust the edges of your Stained Glass Cookies with a hint of powdered sugar just before serving. You could also drizzle a thin line of white chocolate around the cookie borders to accentuate their shape and add a luscious contrast to the candy centers.
Side Dishes
These cookies pair beautifully with a warm cup of tea, a rich hot chocolate, or even a glass of milk to balance the sweetness. Serving them alongside a simple fruit salad can add some fresh flavor and keep the overall treat lively and well-rounded.
Creative Ways to Present
Arrange your Stained Glass Cookies Recipe on a decorative platter with fairy lights underneath for a truly magical effect. You could also package them individually in clear cellophane bags tied with ribbon—they make wonderful handmade gifts that friends and family will adore for their beauty and taste.
Make Ahead and Storage
Storing Leftovers
Store your cookies in an airtight container at room temperature where they’ll stay fresh for up to a week. The candy “windows” will maintain their glossy shine, and the cookie base will remain tender but slightly crisp.
Freezing
You can freeze unbaked cookie dough wrapped tightly in plastic wrap; thaw it overnight before rolling and cutting. Baked cookies freeze well too—place them in a single layer on a baking sheet to freeze, then transfer to a freezer-safe container. Defrost at room temperature when ready to enjoy.
Reheating
These cookies are best served at room temperature, but if you want to warm them slightly, pop them in a low oven (250°F) for 3-5 minutes. This softens the candy just a bit and enhances their aroma without melting the stained glass centers again.
FAQs
What type of candy works best for stained glass cookies?
Hard candies like Jolly Ranchers are ideal because they melt evenly and create vibrant, translucent centers. Avoid candies with fillings or creams as they won’t melt properly.
How can I prevent the candy from spilling over during baking?
Make sure you crush the candies into small chunks so they melt uniformly. Also, avoid overfilling the cutout windows and use cookie cutter sizes that give ample edge support.
Can I use sugar substitutes in this recipe?
While you might substitute sugar in the cookie dough with alternatives, the hallmark stained glass center requires traditional hard candies, which are generally sugar-based, to achieve that glassy effect.
Are these cookies suitable for kids to help make?
Absolutely! Kids love pressing the dough and adding the colorful candy. Just supervise closely during the baking process since the candy becomes very hot and melted.
Can I make different shapes for the stained glass windows?
Definitely! Let your creativity run wild by using mini cookie cutters or even crafting custom shapes with a small knife. The more unique the shapes, the prettier your stained glass effect will be.
Final Thoughts
This Stained Glass Cookies Recipe is pure joy in cookie form—a perfect marriage of classic buttery sweetness and colorful candy brilliance that brightens any gathering or cozy moment at home. Once you try making these vibrant treats, you’ll find endless reason to bake them again and again. So grab your ingredients, roll up your sleeves, and create your own edible stained glass masterpieces—you won’t regret it!
Print
Stained Glass Cookies Recipe
- Prep Time: 30 minutes
- Cook Time: 12 minutes
- Total Time: 42 minutes
- Yield: 24 cookies
- Category: Dessert
- Method: Baking
- Cuisine: American
Description
These Stained Glass Cookies are a festive and colorful treat perfect for holidays and special occasions. Soft buttery sugar cookies are cut out with shapes and filled with crushed Jolly Rancher candies that melt to create a vibrant, stained glass effect. Bright, sweet, and crunchy in the middle, these cookies delight both kids and adults alike.
Ingredients
Cookie Dough
- ¾ cup unsalted butter (room temperature)
- ¾ cup granulated sugar
- ¼ teaspoon sea salt
- 2 large eggs (room temperature and beaten)
- 1 ½ teaspoons vanilla extract
- 2 ½ cups all-purpose flour (plus ¼ cup, divided)
Filling
- 2 cups Jolly Ranchers Candies (crushed into small chunks)
Instructions
- Prepare the Dough: In a large mixing bowl, cream together the room temperature unsalted butter and granulated sugar until light and fluffy. Add the beaten eggs and vanilla extract, mixing well to combine. Gradually add 2 ½ cups of all-purpose flour and sea salt, mixing until a soft dough forms. If the dough is too sticky, incorporate the reserved ¼ cup flour as needed. Wrap the dough in plastic wrap and refrigerate for at least 30 minutes to firm up.
- Roll and Cut: Preheat your oven to 350°F (175°C). On a lightly floured surface, roll out the chilled dough to approximately ¼ inch thickness. Use cookie cutters to cut out your desired shapes. For each cookie, use a smaller cutter to create a window in the center, removing that dough piece to make space for the candy filling.
- Add the Candy Filling: Place the cut-out cookies on a parchment-lined baking sheet. Fill each cookie’s window with crushed Jolly Rancher candies, distributing evenly but keeping the candy contained within the cut-out area. The candy will melt and spread during baking, forming the stained glass effect.
- Bake the Cookies: Bake the cookies in the preheated oven for about 10 to 12 minutes, or until the edges are just beginning to turn golden and the candy centers have melted completely. Keep an eye on the candies to ensure they don’t burn. Remove from oven and allow cookies to cool completely on the baking sheet to let the candy harden.
Notes
- Use room temperature butter and eggs for easier mixing and better dough texture.
- Crush the Jolly Ranchers finely so they melt evenly without spreading too much.
- Make sure the cookies cool completely on the baking sheet before moving to avoid cracking the stained glass candy.
- Store cookies in an airtight container at room temperature for up to one week.
- Be cautious when removing the cut-out dough pieces; handle gently to maintain the window shape.


