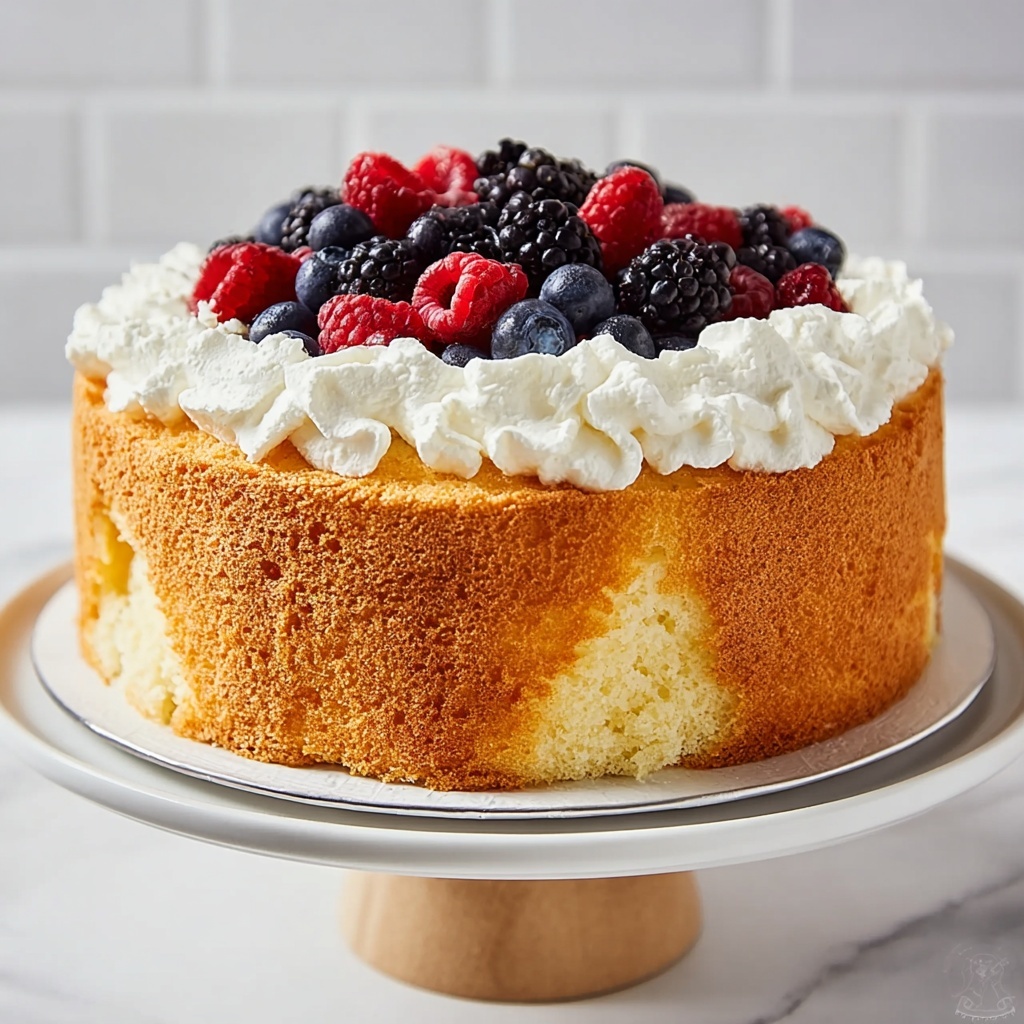
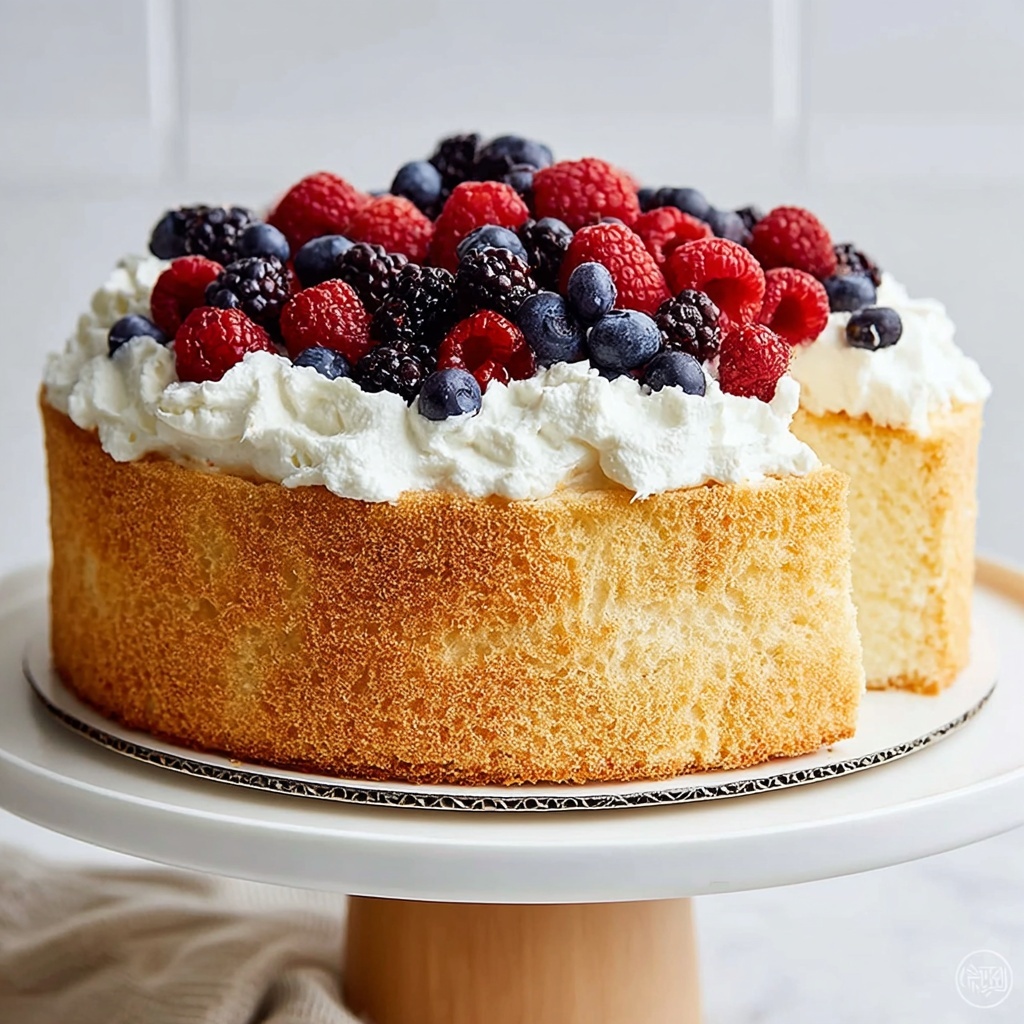
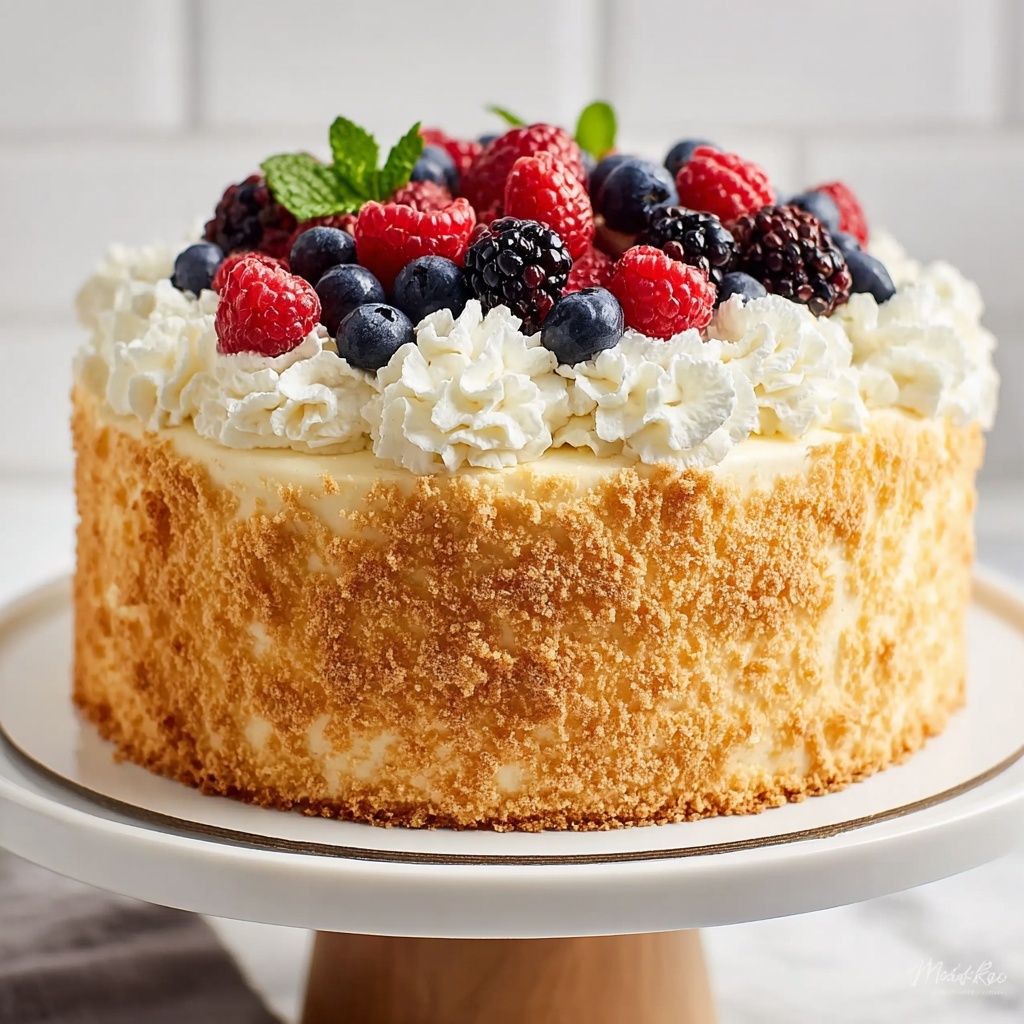
If you have a sweet tooth but need to avoid gluten, this Gluten-Free Angel Food Cake Recipe is going to become your new best friend. Light, fluffy, and incredibly airy, this cake feels like biting into a cloud, yet it boasts a surprisingly rich vanilla flavor that balances perfectly with its delicate texture. Whether you’re serving it at a celebration or a casual afternoon tea, it’s absolutely delightful, and the best part is how simple the ingredients come together to create something truly magical.
Ingredients You’ll Need
Every ingredient in this recipe plays a crucial role in achieving the perfect rise, tender crumb, and sweet taste that define an angel food cake. These essentials are straightforward but incredibly effective at creating that melt-in-your-mouth texture you’re craving.
- Gluten-free baking flour blend with binder: Provides the base and structure for the cake while keeping it light and airy without gluten.
- Corn starch: Helps lighten the texture further and adds to the fluffiness of the finished cake.
- Granulated sugar: Sweetens the cake and, when finely processed, helps with stability when whipping egg whites.
- Egg whites (~10-11 large eggs): The heart of the angel food cake that lends its signature airy lift and volume.
- Cream of tartar: Stabilizes the egg whites as you whip them, ensuring a lofty rise.
- Salt: Enhances all the flavors, even in a subtly sweet cake like this.
- Vanilla extract: Adds warmth and a classic sweet aroma that complements the cake perfectly.
- Whipped cream and fresh berries (for serving): Not required in the batter but perfect for topping your slices with a fresh and creamy touch.
How to Make Gluten-Free Angel Food Cake Recipe
Step 1: Preheat the Oven
Start by setting your oven to 350°F. This straightforward step ensures the oven reaches the perfect temperature, allowing your gluten-free angel food cake to bake evenly and develop that golden-brown exterior we all love.
Step 2: Combine Your Dry Ingredients
In a bowl, whisk together the gluten-free flour blend and corn starch. This mixture is the secret to getting the right texture without gluten. Mixing them well keeps the dry ingredients light and prevents lumps when folding into the egg whites later.
Step 3: Make Super-Fine Sugar
Pop your granulated sugar into a food processor and pulse until it’s super-fine. This step is key because finer sugar dissolves more easily in the egg whites, helping create a glossy, stable meringue that holds its air brilliantly.
Step 4: Beat the Egg Whites
Using an electric mixer, beat your egg whites with the cream of tartar and salt until they begin to foam. This initial whipping gets the air incorporated early on. Then add vanilla, which adds that irresistible flavor that elevates this simple cake to something extraordinary.
Step 5: Add the Sugar Gradually
Slowly add the superfine sugar while continuing to beat the egg whites until medium peaks form with a glossy sheen. Patience here rewards you with the perfect meringue texture, essential for that cloud-like crumb.
Step 6: Fold in Dry Ingredients
Gently fold your dry flour and starch mixture into the egg whites in three additions. Take care here to just combine without deflating the meringue, as those little air pockets are what give this gluten-free angel food cake its signature lightness.
Step 7: Pour and Smooth
Pour the batter straight into an ungreased, nonstick angel food cake pan. Smooth out the top to make sure it bakes evenly. The ungreased pan lets the batter cling to the sides, helping it climb, rise, and expand beautifully while baking.
Step 8: Bake to Perfection
Bake for 45 to 47 minutes until the cake turns a lovely golden brown. The cake will feel springy to the touch when it’s done, signaling that the delicate structure has set just right.
Step 9: Cool Upside Down
Once out of the oven, invert the pan over a bottle or funnel to cool. This classic cooling method preserves the angel food cake’s volume and fluffiness by preventing it from collapsing as it cools.
How to Serve Gluten-Free Angel Food Cake Recipe
Garnishes
While the cake itself is perfect on its own, adding a generous dollop of whipped cream and a handful of fresh berries creates a vibrant, luscious finish. The cream adds richness and the berries bring just the right punch of sweetness and tartness, turning every bite into a celebration.
Side Dishes
This Gluten-Free Angel Food Cake Recipe pairs beautifully with fresh fruit salads, a drizzle of tangy raspberry sauce, or even a scoop of vanilla bean ice cream. These light accompaniments complement the airy cake without overpowering its delicate flavor.
Creative Ways to Present
For a show-stopping dessert, try layering slices of the cake with whipped cream and berries in individual glass parfaits. Or turn slices into elegant mini trifles by alternating cake cubes, fruit, and mousse. No matter how you plate it, this gluten-free angel food cake impresses instantly.
Make Ahead and Storage
Storing Leftovers
Store any leftover cake in an airtight container at room temperature for up to two days to maintain its soft texture. If the environment is warm, refrigerate, but be sure to bring it to room temperature before serving for the best flavor.
Freezing
You can freeze leftover slices by wrapping them tightly in plastic wrap and then placing them in a freezer bag. Freeze for up to one month, and thaw overnight in the refrigerator to preserve the cake’s delicate crumb and moisture.
Reheating
Since angel food cake is best served fresh or slightly chilled, reheating is generally not necessary. If you prefer a warm slice, briefly microwave a piece for 10 to 15 seconds, just enough to take the chill off without drying it out.
FAQs
Can I use egg substitute instead of egg whites?
Egg whites play a vital role in providing the structure and lift for this gluten-free angel food cake, so substitutes usually do not produce the same light and airy texture. If you need an alternative, aquafaba (chickpea brine) can sometimes be used, but expect slightly different results.
Is this cake completely dairy-free?
Yes, this Gluten-Free Angel Food Cake Recipe does not require any dairy ingredients, making it naturally dairy-free. Just be mindful to use whipped cream or toppings that fit your dietary preference if you want it completely dairy-free.
Can I make this cake in a regular cake pan?
Angel food cakes require a special pan with a removable bottom and no greasing to help the batter cling and rise correctly. Using a regular cake pan may result in a denser, less fluffy cake and make it difficult to remove.
Why is the pan left ungreased?
Leaving the pan ungreased allows the batter to cling to the sides as it rises in the oven. This is essential to achieve the tall, airy structure unique to angel food cakes. Greasing the pan would prevent this, causing the cake to collapse.
How can I tell when the cake is perfectly baked?
The cake should be golden brown, spring back gently when pressed, and a toothpick inserted comes out clean. Additionally, the sides should pull slightly away from the pan, signaling it’s ready to cool upside down.
Final Thoughts
This Gluten-Free Angel Food Cake Recipe is truly a gift for anyone craving a light, sweet treat without gluten. It’s a recipe that combines simple ingredients with straightforward steps to create a showstopping dessert that feels special yet effortless. Give it a try and enjoy the joy of biting into one of the fluffiest cakes you’ll ever make!
Print
Gluten-Free Angel Food Cake Recipe
- Prep Time: 15 minutes
- Cook Time: 45 minutes
- Total Time: 1 hour
- Yield: 10 slices
- Category: Dessert
- Method: Baking
- Cuisine: American
- Diet: Gluten Free
Description
A light and airy gluten-free angel food cake that is perfect for those avoiding gluten but still wanting a classic, fluffy dessert. This cake is made using a gluten-free flour blend, egg whites, and a touch of vanilla, resulting in a delicate and sweet treat, best served with whipped cream and fresh berries.
Ingredients
Dry Ingredients
- 3/4 cup gluten free baking flour blend WITH binder
- 1/4 cup corn starch
- 1–1/2 cups granulated sugar
- 1–1/2 teaspoons cream of tartar
- 1/4 teaspoon salt
Wet Ingredients
- 1–1/2 cups egg whites (~10–11 large eggs)
- 2 teaspoons vanilla extract
For Serving
- Whipped cream
- Fresh berries
Instructions
- Preheat oven: Preheat the oven to 350°F (175°C) to ensure it reaches the right temperature for baking the cake evenly.
- Mix dry ingredients: In a bowl, whisk together the gluten-free flour blend and corn starch until thoroughly combined. Set this mixture aside for later use.
- Prepare sugar: Place the granulated sugar in a food processor and pulse until it becomes super-fine, which will help it dissolve more easily into the egg whites.
- Beat egg whites: Using an electric mixer, beat the egg whites along with cream of tartar and salt until the mixture becomes foamy. Then add the vanilla extract to infuse flavor.
- Add sugar gradually: While continuing to beat the egg whites, slowly incorporate the super-fine sugar until you achieve glossy, medium peaks, indicating the perfect meringue consistency.
- Fold in dry ingredients: Gently fold the flour mixture into the egg white mixture in three separate additions. Be careful to fold just until combined to maintain airiness in the batter.
- Prepare the pan: Pour the batter into an ungreased nonstick angel food cake pan. Smooth the top to ensure even baking.
- Bake the cake: Bake for 45 to 47 minutes or until the cake turns golden brown and a toothpick inserted comes out clean.
- Cool the cake: Invert the cake pan and cool the cake upside down on a bottle or funnel. This helps maintain its height and prevents collapse.
- Release and serve: Once completely cooled, gently release the cake from the pan, slice, and serve with whipped cream and fresh berries for a delightful presentation.
Notes
- Make sure the egg whites are free from any yolk to ensure they whip up properly.
- Do not grease the cake pan, as angel food cake needs to cling to the sides as it rises.
- Folding should be done gently and carefully to avoid deflating the batter.
- Using fresh egg whites at room temperature helps achieve better volume.
- Serve the cake shortly after cooling for best texture and flavor.
