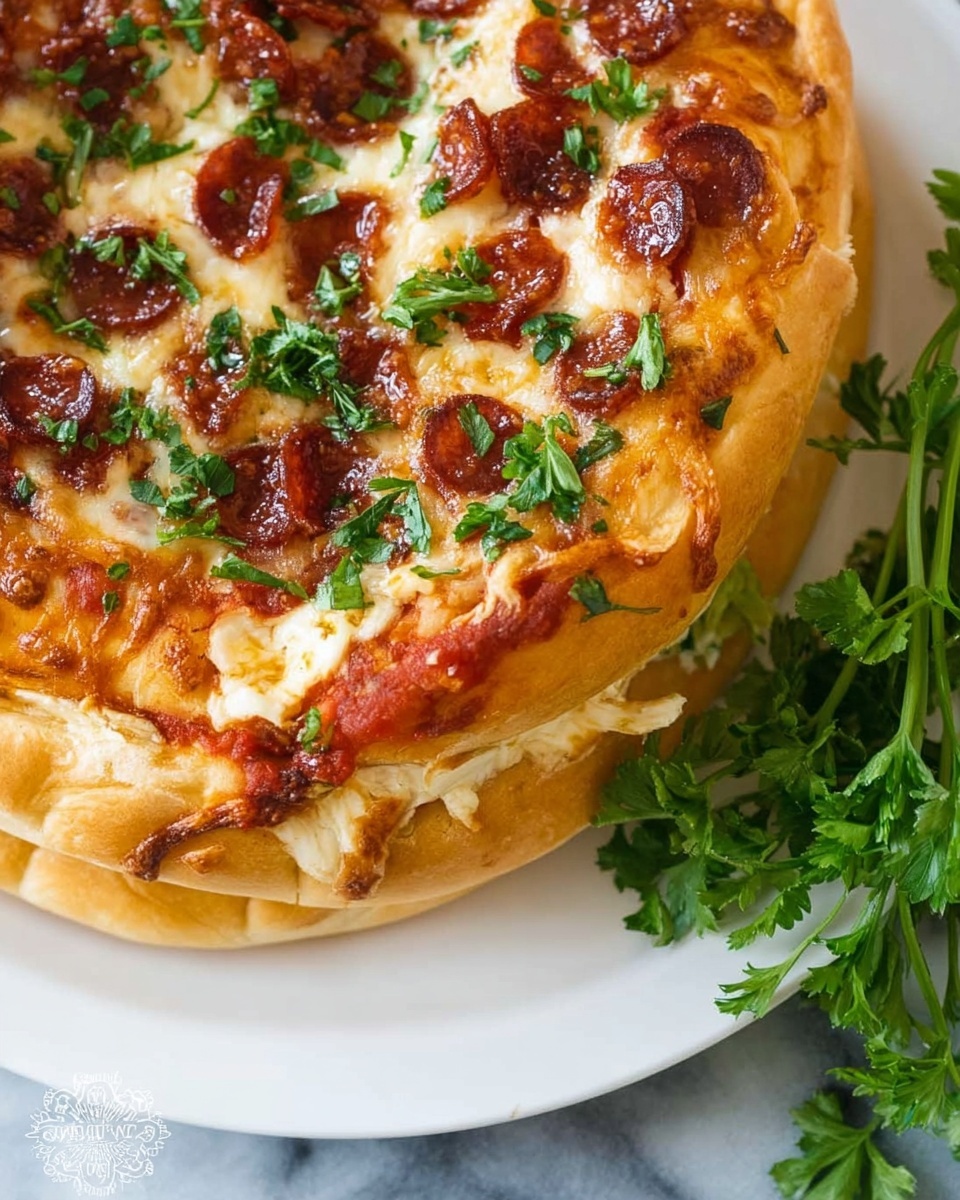
If you have ever dreamed of combining the fun of pizza with the comforting ease of pull-apart bread, you are going to love this Pull Apart Pizza Bread Recipe. It is an irresistibly cheesy, savory masterpiece that brings together warm, gooey mozzarella, zesty pizza sauce, and pepperoni, all tucked inside soft, golden bread you can pull apart piece by piece. Perfect for sharing at any gathering or just treating yourself to an easy weeknight delight, this recipe transforms classic pizza flavors into a playful and satisfying loaf that everyone will devour.
Ingredients You’ll Need
Gathering a handful of simple, straightforward ingredients makes this Pull Apart Pizza Bread Recipe a breeze, yet each ingredient plays an essential role in layering flavors and textures that make this dish so special.
- Pizza dough (13 ounces): This forms the soft and pillowy base that pulls apart perfectly when baked.
- Pizza sauce (3/4 cup): Adds that classic tangy tomato punch which ties all the toppings together.
- Shredded mozzarella cheese (1 ½ cups): Melts to gooey, stringy perfection, giving every bite that luscious cheesy pull.
- Mini pepperoni (1 cup): Offers a spicy, savory burst that complements the cheese and sauce beautifully.
- Egg (1 whole): Part of the egg wash that creates a shiny, golden crust.
- Minced garlic (1 teaspoon): Infuses the crust with aromatic flavor while brushing the egg wash.
- Dried oregano (¼ teaspoon): Brings a hint of herbal warmth to the egg wash, enhancing the pizza vibe.
- Salt (¼ teaspoon): Balances flavors and ensures the egg wash is seasoned just right.
- Optional melted butter (2 tablespoons) and minced parsley: To generously brush on top for a rich finish and fresh color.
How to Make Pull Apart Pizza Bread Recipe
Step 1: Prepare and Roll the Dough
Start by preheating your oven to 350 degrees F so it’s ready to go when your bread is shaped. On a floured surface, roll out your pizza dough into a roughly 15 by 9-inch rectangle. The rolling helps create an even thickness, giving you a perfect canvas to layer all your toppings on. For neat edges and a nice shape, trim off the edges to make the rectangle as straight as possible—this makes stacking the pieces easier in the pan.
Step 2: Add the Sauce, Cheese, and Pepperoni
Next, spread the vibrant pizza sauce evenly across the dough, leaving a small border around the edges. This layer of sauce brings just the right tang and moisture to balance the dish. Sprinkle the shredded mozzarella generously, covering that saucy canvas in cheesy goodness. Finally, scatter the mini pepperoni over the top, giving each bite a little spicy, savory kick that’s so addictive.
Step 3: Slice and Stack the Dough
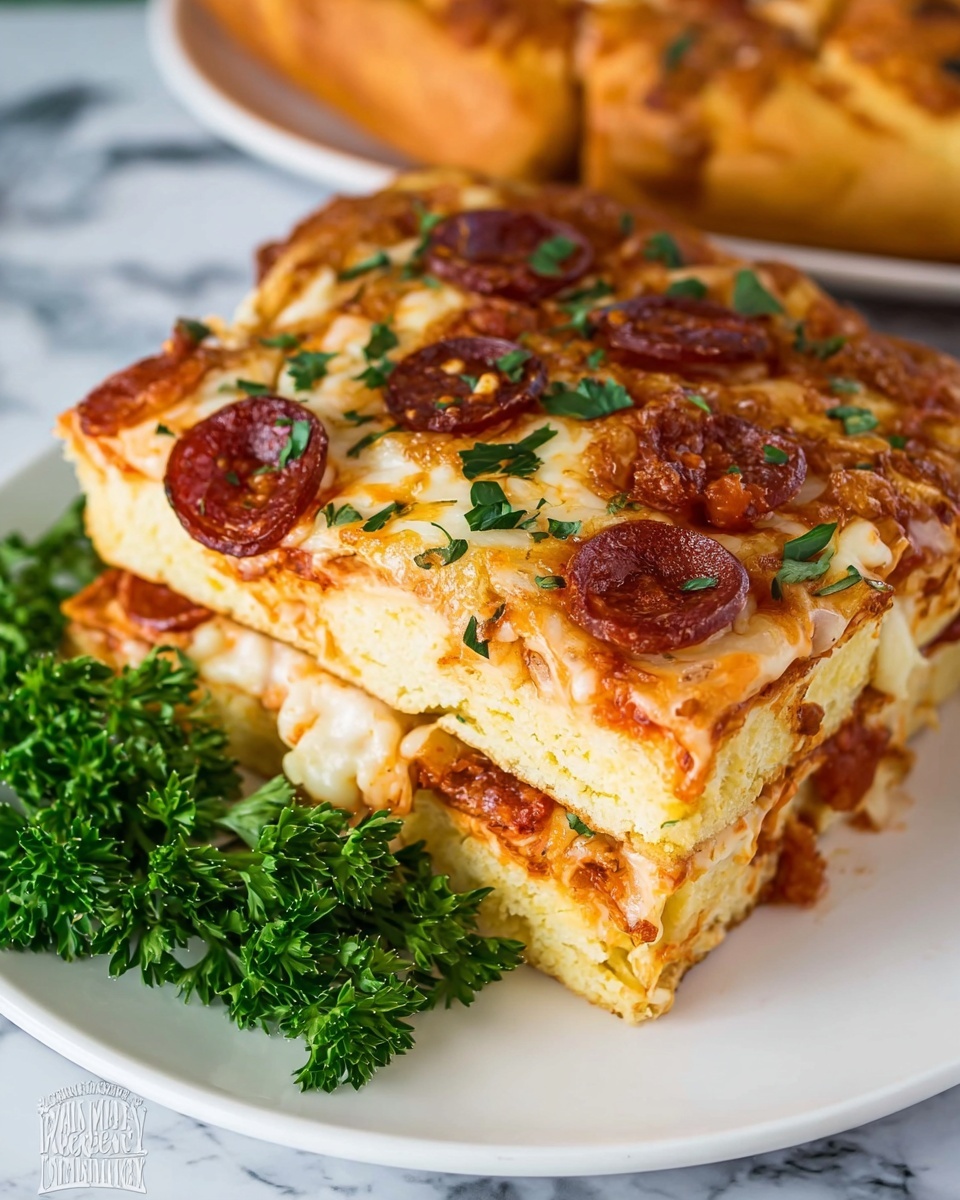
Using a pizza cutter, slice the dough lengthwise into six long, even strips. Then, divide those strips into two groups with three strips each to make stacking manageable and stable. Cut each strip widthwise into three equal squares, turning those delicious pizza-filled rectangles into bite-sized pieces. Lightly grease an 8×4-inch loaf pan and turn it vertically so you can stack the squares snugly inside, creating layers of yummy, cheesy pizza bread that pull apart effortlessly once baked.
Step 4: Brush with Egg Wash
In a small bowl, whisk together the whole egg, minced garlic, dried oregano, and salt to create a flavorful egg wash. Brushing this mixture generously over your stacked bread in the loaf pan not only gives it a beautiful, glossy golden crust but also infuses garlic and herb aromas that will have everyone’s mouths watering as it bakes.
Step 5: Bake to Golden Perfection
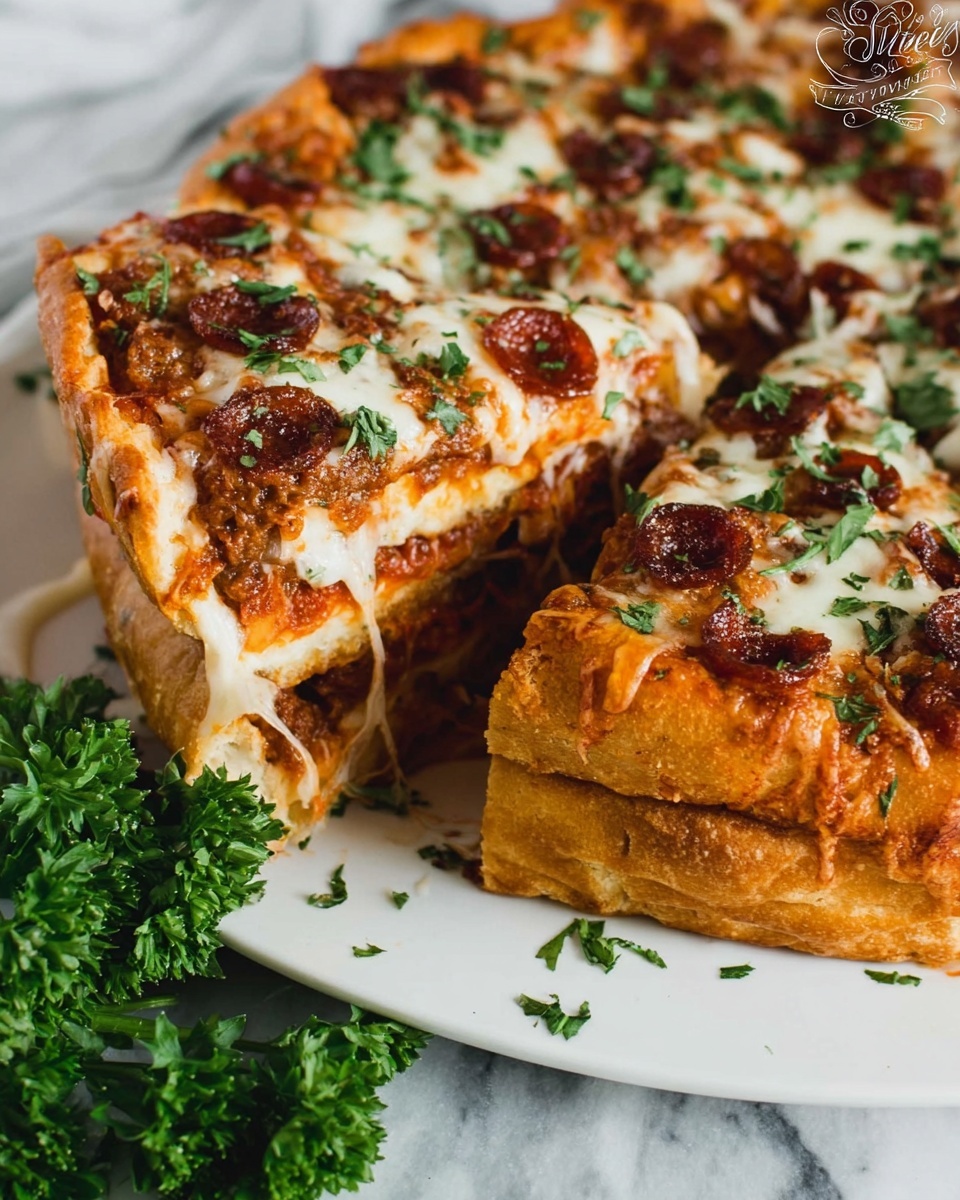
Place the loaf in the preheated oven and bake for 33 to 40 minutes. You’re looking for a beautiful golden brown crust that’s cooked through without burning. This slow baking allows the cheese to melt perfectly and the pepperoni to release its oils into the surrounding bread. Once baked, remove it from the oven and let it cool slightly—this resting time makes it easier and less messy to pull apart those delicious little squares.
Step 6: Optional Butter Glaze Finish
If you want to take this Pull Apart Pizza Bread Recipe to the next level, about 5 minutes before the end of baking, brush the top with melted butter. Return it to the oven to finish baking, which enhances the crust with a rich buttery flavor and an irresistible sheen. Once out, sprinkle with minced parsley for a burst of fresh color and a hint of herbal brightness that balances the richness.
How to Serve Pull Apart Pizza Bread Recipe
Garnishes
A generous sprinkle of freshly chopped parsley instantly lifts the appearance and flavor of this dish, adding a subtle earthiness that contrasts beautifully with the savory cheese and pepperoni. You can also offer a side of grated Parmesan or a dusting of red pepper flakes for guests who love an extra punch.
Side Dishes
This pull-apart pizza bread pairs beautifully with crisp green salads, like a peppery arugula salad with lemon vinaigrette or a simple Caesar salad. A bowl of marinara sauce on the side invites dipping, making the bread feel even more indulgent and perfect for sharing with family or friends at your next movie night or casual get-together.
Creative Ways to Present
Try serving this bread in a rustic wooden board or inside a cast-iron skillet for a cozy, inviting vibe. For a party, line a large platter with parchment paper and sprinkle extra shredded cheese in between for a pretty, festive touch. You can also stuff the bread squares with different fillings like sautéed mushrooms or olives before stacking to customize the recipe to your taste buds.
Make Ahead and Storage
Storing Leftovers
If you find yourself with leftovers (though this Pull Apart Pizza Bread Recipe rarely lasts long!), wrap them tightly in plastic wrap or foil and store in an airtight container in the refrigerator for up to 3 days. The bread keeps its flavor well and can be enjoyed cold or reheated.
Freezing
This pizza bread freezes beautifully. Wrap it tightly in foil and place it in a freezer-safe bag or container. When you’re ready, thaw it overnight in the refrigerator. Freezing lets you prep ahead for busy days or unexpected gatherings without sacrificing taste or texture.
Reheating
To enjoy leftovers or thawed bread, reheat in a 350-degree F oven for 10-15 minutes to restore that fresh-baked crispiness. You can also use a toaster oven for smaller portions. Avoid microwaving if you want to keep the crust crisp and avoid sogginess.
FAQs
Can I use store-bought pizza dough for this recipe?
Absolutely! Store-bought pizza dough works perfectly and saves time without compromising the texture or flavor of your Pull Apart Pizza Bread Recipe.
What if I don’t have mini pepperoni?
No worries at all. You can slice regular pepperoni into smaller pieces or substitute with cooked sausage, sliced olives, or your favorite pizza topping to customize the flavors.
Is it possible to make this recipe vegetarian?
Definitely! Simply skip the pepperoni and add plenty of delicious vegetables like bell peppers, mushrooms, or spinach to keep it flavorful and fresh.
How do I keep the bread from getting soggy?
Spreading the sauce evenly but not too thickly, and ensuring the bread bakes fully at the right temperature, helps avoid sogginess. Letting the bread cool briefly before pulling apart also keeps textures in check.
Can I add extra cheese or different kinds of cheese?
Go for it! Adding different cheeses like cheddar, provolone, or Parmesan can add a new dimension of flavor. Just keep your total volume of cheese balanced so the bread bakes up well.
Final Thoughts
This Pull Apart Pizza Bread Recipe is one of those magical dishes that turns everyday ingredients into a crowd-pleasing sensation. It’s warm, cheesy, a little bit indulgent, and endlessly fun to tear apart piece by piece. I can’t wait for you to make it, share it, and enjoy all those happy smiles as everyone dives in. Trust me, once you try this recipe, it’s going to become a beloved staple in your recipe collection.