If you have been searching for a fun, festive, and utterly delightful way to impress your friends and family with homemade bread, then this DIY Wreath Bread Recipe is exactly what you need. This beautiful bread, shaped like a holiday wreath, is not only visually stunning but also boasts a soft, chewy texture that will have everyone asking for seconds. From the warm aroma that fills your kitchen to the satisfying crunch of the golden crust, this bread is a showstopper worthy of any table. Plus, it’s easier to make than you might think, using simple pantry staples that come together in a rewarding hands-on baking experience.
Ingredients You’ll Need
Every great recipe starts with great ingredients, and this DIY Wreath Bread Recipe is no exception. The ingredients are straightforward but crucial for achieving the perfect crust and tender crumb. Each one plays a vital role in the final taste, texture, and appearance of your wreath bread.
- 1 3/4 cups warm water (100˚F): This activates the yeast and ensures the dough develops a lovely soft texture.
- 1/2 tsp molasses: Adds a subtle touch of sweetness and helps with browning the crust beautifully.
- 2 1/2 cups unbleached all-purpose flour: Provides structure while keeping the bread light and tender.
- 2 1/3 cups unbleached bread flour: Adds extra gluten strength to give the bread a nice chew and airy crumb.
- 2 tsp salt: Enhances the flavors and balances the sweetness of the molasses perfectly.
- 1 1/4 tsp instant yeast (quick rise): Speeds up the rising process and creates those irresistible air bubbles inside.
How to Make DIY Wreath Bread Recipe
Step 1: Mix Your Liquids
Start by combining the warm water and molasses in a large measuring cup, stirring gently until the molasses dissolves completely. This mixture will serve as the magic starter, activating the yeast to give your dough that perfect lift and delicate sweetness.
Step 2: Combine Dry Ingredients and Form Dough
In a large mixing bowl, whisk together the all-purpose flour, bread flour, salt, and instant yeast until well blended. Next, add your water and molasses mixture all at once and stir with a spatula until the dough begins to come together. Now, here’s where the fun starts: knead the dough by hand for about 4 minutes. The dough should feel soft and sticky but avoid sticking to clean fingertips. If it feels too sticky, sprinkle in flour one tablespoon at a time — usually, 2 to 3 extra tablespoons will do the trick to make it manageable but still moist.
Step 3: Let It Rise with Love
Cover your bowl with plastic wrap and leave your dough to rise at room temperature for 4 hours, ideally 69˚F to 75˚F. Every hour, punch the dough down gently with a wet hand and fold it onto itself a few times. This process encourages a light, airy structure by redistributing the yeast and releasing excess gas, which is key for that perfect texture.
Step 4: Shape the Wreaths
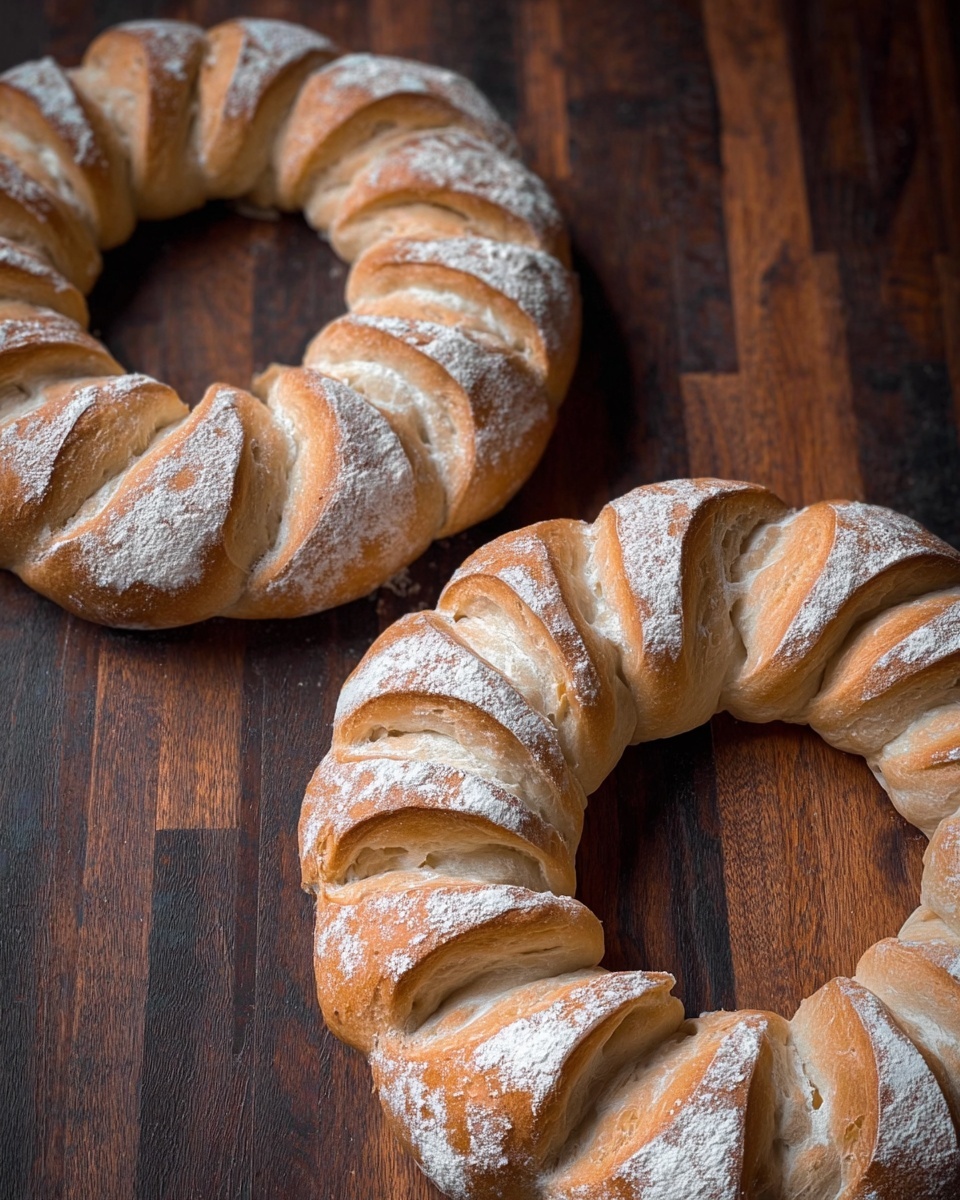
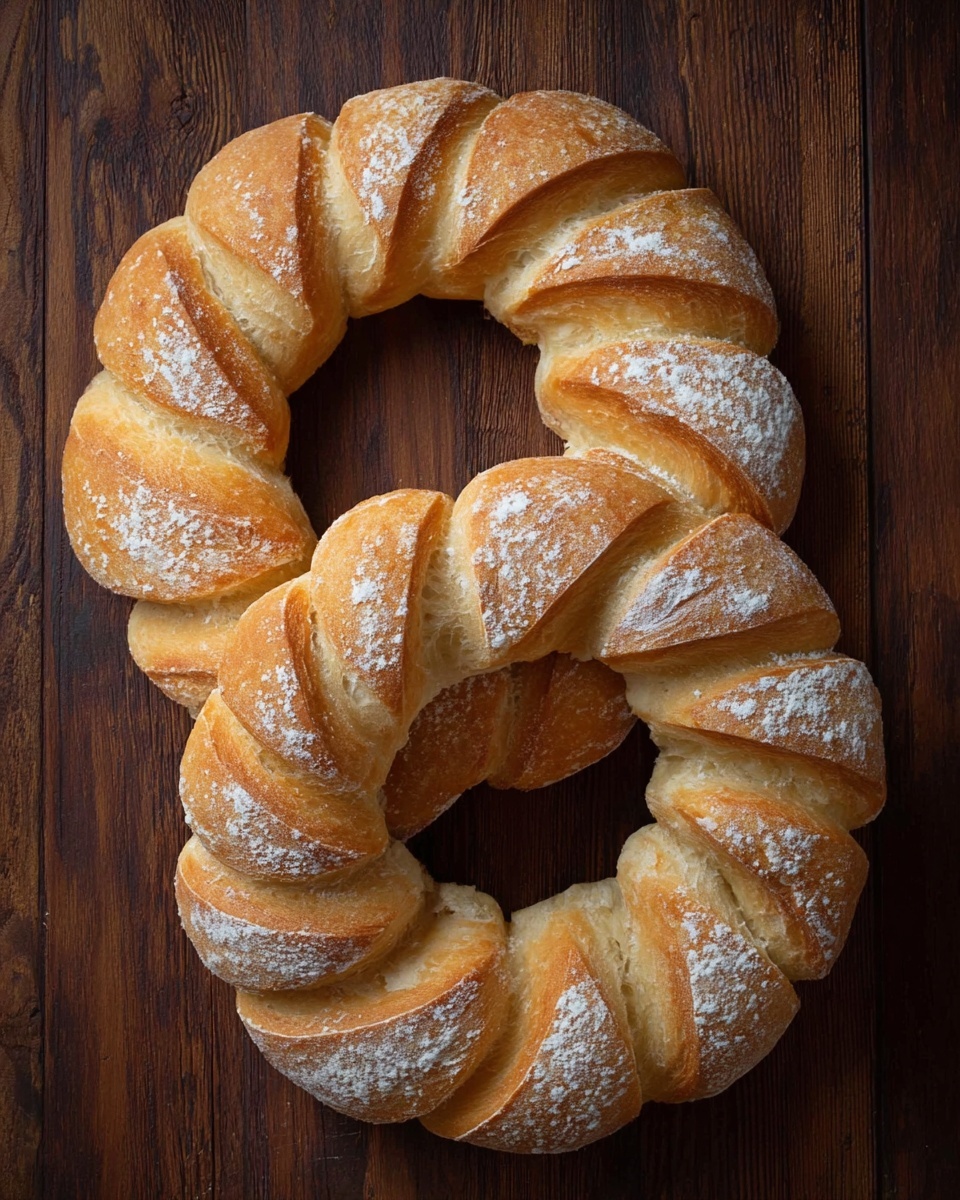
After the 4-hour rise, punch your dough down one final time. Pinch it in the center and divide it into two equal pieces. Dust two sheets of parchment paper generously with flour, then place each dough piece on its own sheet, turning them so they pick up some flour all around. Using your fingers, poke a hole through the center of each piece and start stretching the dough into a ring shape. The center hole should be about 5-6 inches in diameter, and the outside edge should stretch to around 9-10 inches. Let these wreaths rest on the parchment at room temperature for 30 minutes to relax the gluten for easier cutting.
Step 5: Prepare Your Oven
While the dough rests, get your oven preheated to 450˚F. Place an upside-down large baking sheet in the middle rack and set a cast iron or broiler pan on one side of the bottom rack. These pans are essential for creating the right environment for your wreath bread to bake with a crisp crust and moist crumb.
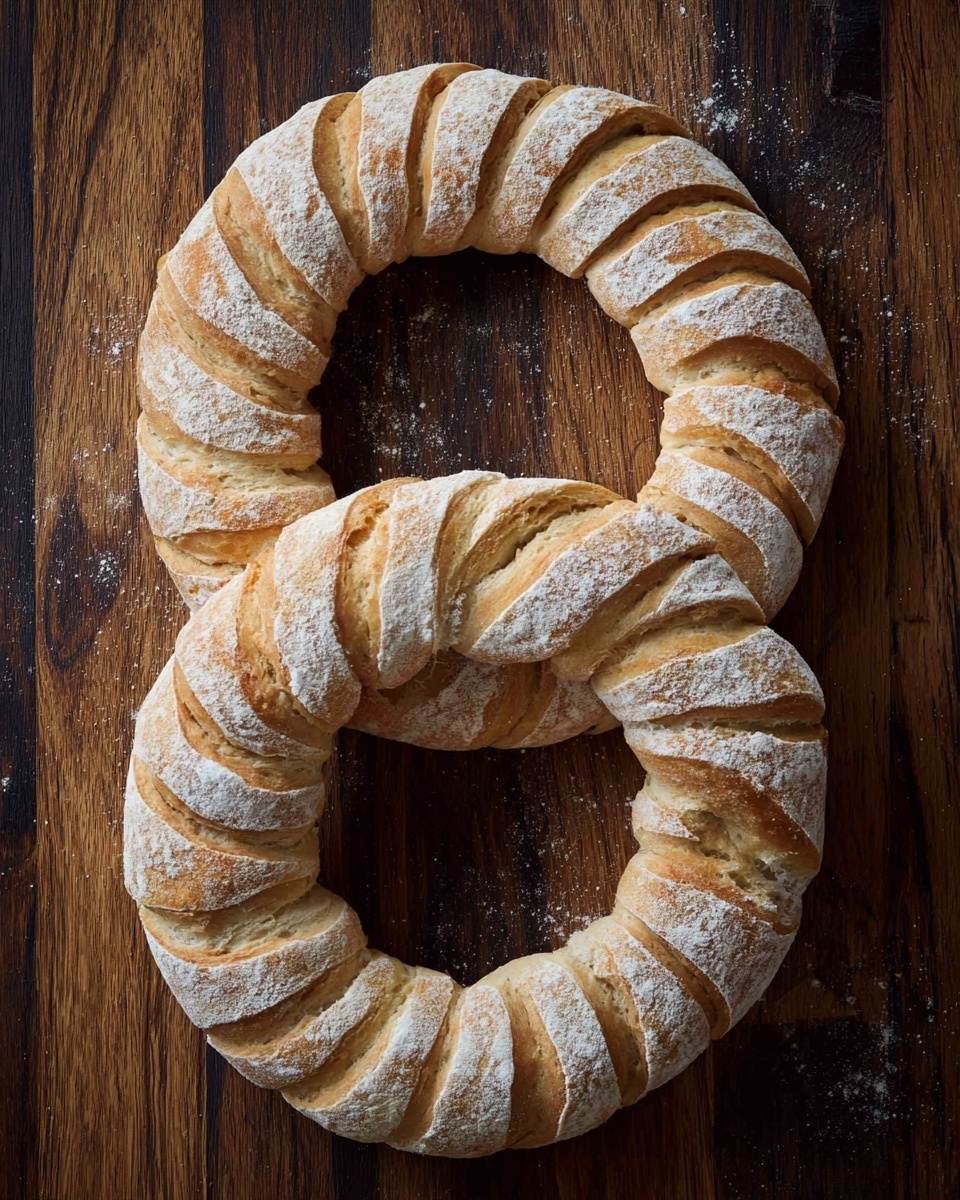
Step 6: Cut the Decorative Slits
Before baking, sprinkle flour lightly over the top of your dough wreath to keep things non-sticky. Holding scissors at a 45-degree angle to the parchment, make deep slits about 1 1/2 inches apart around the dough. As you cut, gently pull the pointed flaps away from the ring, creating that classic wreath look. Rotate the parchment as you go to maintain a consistent angle and spacing — it’s a satisfying step that transforms simple dough into a stunning centerpiece.
Step 7: Bake to Golden Perfection
Carefully transfer one wreath, along with its parchment paper, onto the hot upside-down baking sheet in your oven. Immediately pour 1 cup of ice cubes into the hot cast iron pan beneath (careful not to drip water onto glass surfaces). The steam from the ice cubes helps create a beautifully crispy crust. Bake for 20 minutes or until the top is a stunning golden brown. Repeat this step for the second wreath. Trust me, the aroma throughout your kitchen will be irresistible!
How to Serve DIY Wreath Bread Recipe
Garnishes
This wreath bread looks gorgeous on its own but shines even more with some simple garnishes. Try brushing the crust with melted butter and sprinkling a little coarse sea salt or fresh herbs like rosemary and thyme right after baking. It adds a lovely aroma and an extra layer of flavor that turns this bread into a star appetizer or side dish.
Side Dishes
Pair your DIY Wreath Bread with hearty soups, creamy cheeses, or a vibrant olive tapenade. It’s the perfect companion for dipping and spreading, making it ideal for holiday parties, cozy dinners, or any time you crave a comforting bite. The bread’s soft yet chewy texture makes it wonderful for soaking up rich broths or scooping up dips.
Creative Ways to Present
For an eye-catching presentation, serve the wreath bread on a wooden board surrounded by small bowls of flavored butters or infused olive oils. Add some fresh greens or colorful edible flowers tucked around the wreath for a festive touch. You can even thread in some fresh rosemary sprigs into the cuts before baking to give it a lovely aromatic flair that doubles as decoration.
Make Ahead and Storage
Storing Leftovers
Leftover wreath bread keeps beautifully at room temperature when stored in an airtight container or plastic bag for up to 2 days. To maintain its crisp crust, wrap it loosely in foil and place it in a bread box or paper bag. This way, you’ll enjoy the next day’s bread almost as fresh as the first.
Freezing
If you want to save some for later, this wreath bread freezes wonderfully. Wrap the cooled bread tightly in plastic wrap and then in foil to prevent freezer burn. You can freeze it for up to 3 months. When ready to enjoy, thaw at room temperature before reheating.
Reheating
To revive the magical texture and flavor of your wreath bread, preheat your oven to 350˚F. Remove any plastic wrap and place the bread directly on the oven rack or a baking sheet. Warm it for about 10-15 minutes until the crust crisps up and the inside feels soft and soft and warm, as if fresh from the oven.
FAQs
Can I use all-purpose flour instead of bread flour?
Yes, you can substitute all-purpose flour entirely, but keep in mind the texture might be slightly softer with less chew. Bread flour develops more gluten, which gives that perfect structure and springy feel to the wreath bread.
Do I really need to use molasses in this recipe?
Molasses adds a subtle richness and helps with the deep brown crust, but if you don’t have it, a light brown sugar substitute can work in a pinch. The flavor will be a little different but still delicious!
What’s the best way to shape the wreath for beginners?
Focus on making the dough rings even thickness for uniform baking. Using floured parchment paper to stretch the dough helps prevent sticking and makes handling easier. Don’t worry about perfect circles; the rustic look is part of the charm!
Can I add toppings like seeds or cheese?
Absolutely! Feel free to sprinkle sesame seeds, poppy seeds, or grated cheese on top before baking to add extra flavor and crunch. Just remember to do this right after making the slits and before popping it in the oven.
Is there a way to make this recipe quicker?
The long rising time really helps develop flavor and texture, but you can try a faster rise with warm conditions and instant yeast. Keep an eye on the dough so it doesn’t overproof, as this wreath bread benefits most from a slow, steady rise.
Final Thoughts
There is something truly special about making your own bread, especially a stunning DIY Wreath Bread Recipe that doubles as both a feast for the eyes and the taste buds. Whether you’re a seasoned baker or trying out a new project, this recipe offers a bit of magic in every bite and adds a heartwarming touch to your table. I encourage you to give it a try and enjoy the process — you might just find your new favorite homemade bread tradition!