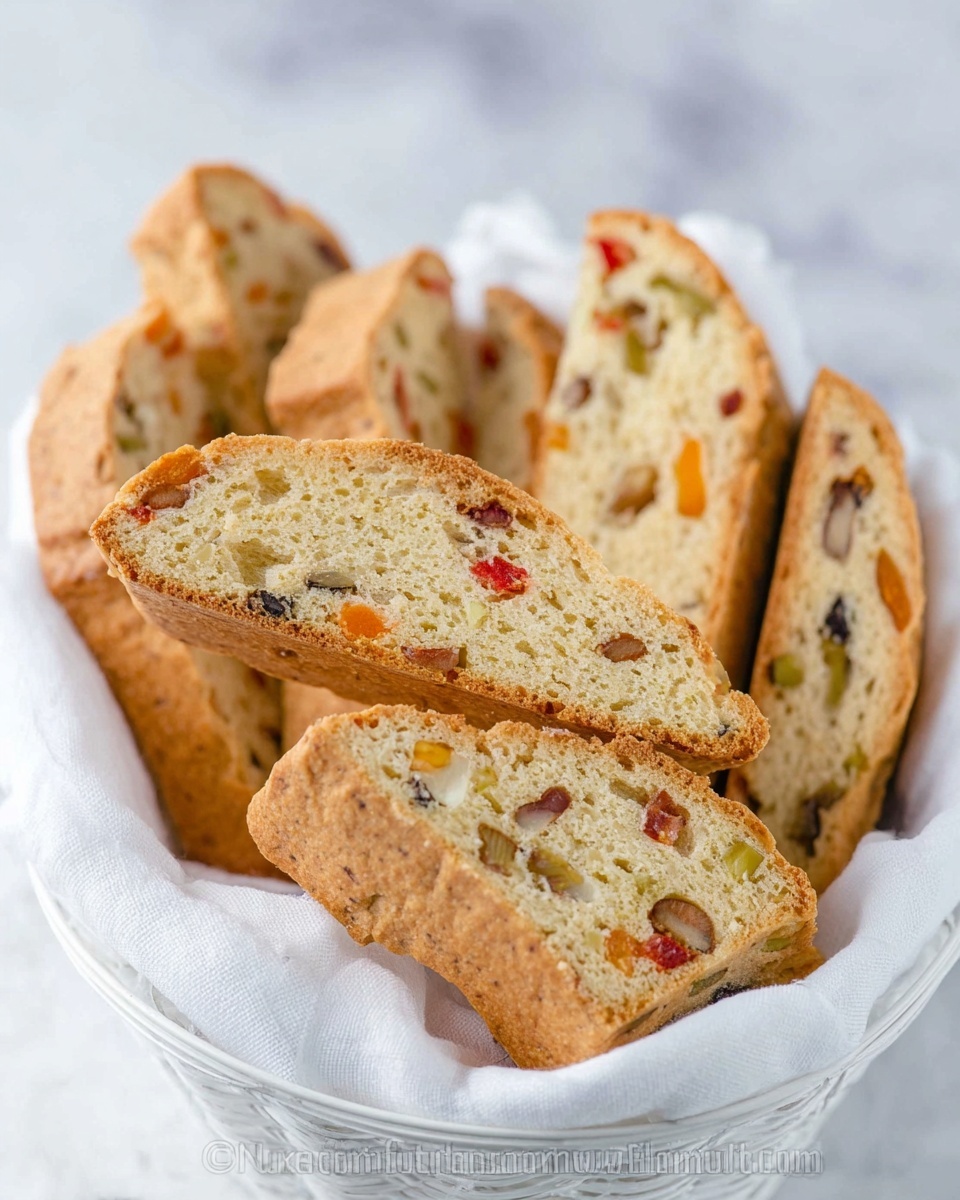
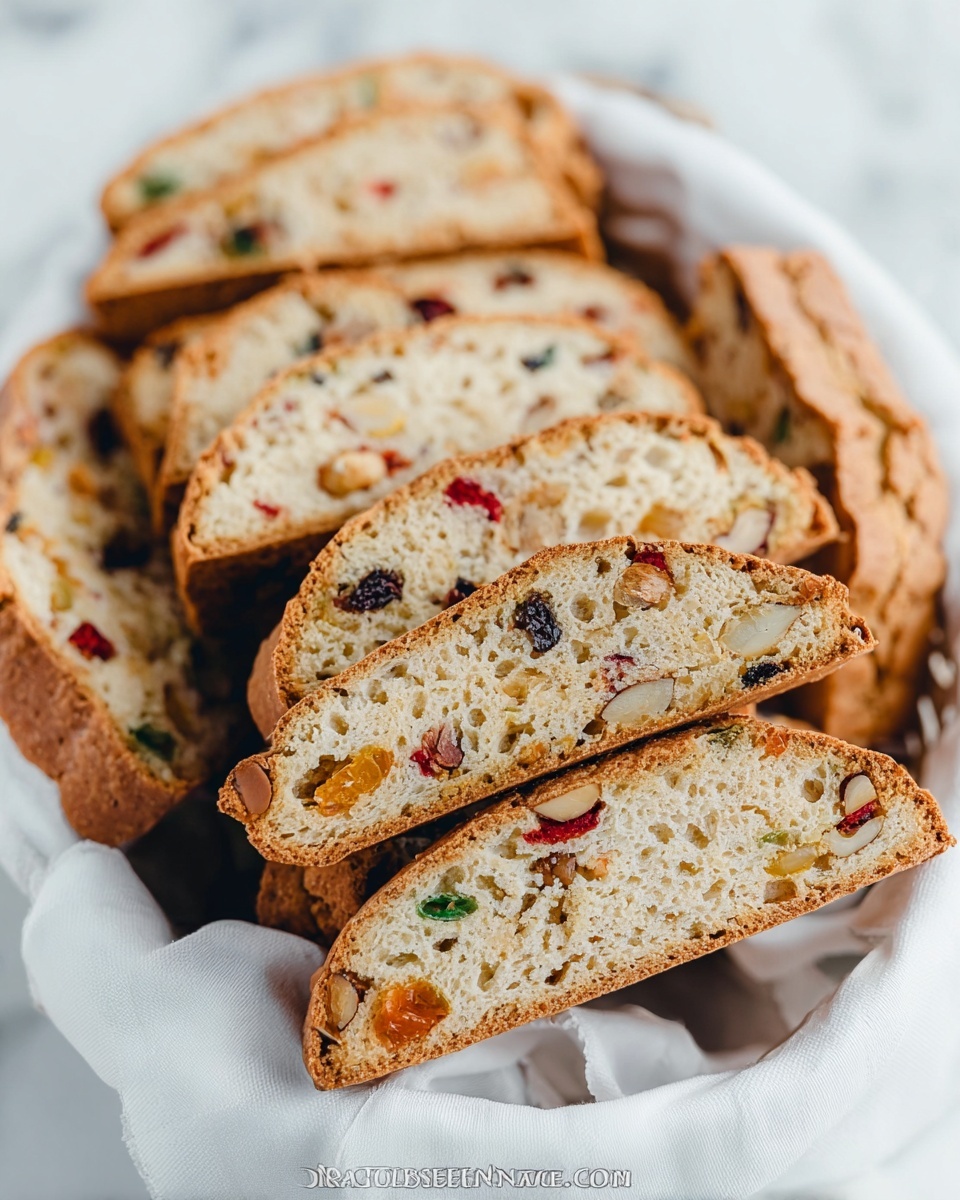
If you’re looking for a delightful treat that’s as beautiful as it is delicious, this Jeweled Biscotti Recipe is exactly what you need in your baking repertoire. Bursting with colorful nuts, dried fruits, and that perfect crispness, these biscotti add a festive sparkle to your cookie jar and the perfect crunch to your coffee or tea break. This recipe balances buttery richness with vibrant textures and flavors, creating a snack that’s as joyful to make as it is to eat.

Ingredients You’ll Need
Gathering the right ingredients is key to bringing out the unique character of this Jeweled Biscotti Recipe. Each element plays a vital role, from the creamy nuts to the sweet and tangy dried fruits, creating a symphony of taste and texture that will have everyone coming back for more.
- Shelled almonds (1 cup): These add a satisfying crunch along with a rich, nutty flavor that complements the sweetness.
- Shelled pistachios (1 cup): Their vibrant green hue and distinct taste bring a pop of color and subtle earthiness.
- Candied pineapple, chopped (1/3 cup): Adds chewiness with a tropical sweetness that brightens the biscotti.
- Dried apricots, chopped (1/3 cup): Offers a soft texture and a mild fruity tartness that balances the sugar.
- Candied cherries or dried craisins (1/3 cup): These introduce jewel-like bursts of color and deep cranberry flavor.
- Dried papaya (1/3 cup): Provides a chewy bite and a subtle tropical sweetness that ties the fruits together.
- Unsalted butter, softened (1 stick or 8 Tbsp): For richness and moisture, helping the biscotti stay tender despite the crunch.
- Granulated sugar (1 cup): Sweetens the dough and assists in creating a crunchy texture when baked.
- Real vanilla extract (2 tsp): Adds warm aroma and depth to the flavor profile.
- Large eggs, room temperature (3): Bind the dough together and provide structure.
- All purpose flour (3 1/4 cups): The base that gives biscotti their sturdy, crisp texture.
- Baking powder (2 1/4 tsp): Helps give a slight lift to the biscotti without compromising the crunch.
- Salt (1/4 tsp): Enhances all the flavors and balances the sweetness beautifully.
How to Make Jeweled Biscotti Recipe
Step 1: Toast the Nuts
Start by preheating your oven and toasting the almonds and pistachios until just fragrant. This step is essential for unlocking the nuts’ vibrant flavors and adding a toasty crunch to your biscotti. Spread them evenly on a baking sheet and watch how the aroma fills your kitchen – such a comforting moment!
Step 2: Cream Butter and Sugar
In a large bowl, beat the softened butter with granulated sugar until the mixture is light and fluffy. This aeration is the secret to a tender crumb inside the crisp biscotti shells. It’s also the step where your bakers’ intuition will shine, as the texture of this mixture sets the foundation for your dough.
Step 3: Add Vanilla and Eggs
Next, beat in the real vanilla extract and eggs one at a time, making sure each egg is fully incorporated before adding the next. This gradual mixing ensures a smooth, well-emulsified dough. The vanilla brings that warm, inviting fragrance that will make your kitchen smell like a bakery.
Step 4: Mix Dry Ingredients
Whisk together the all-purpose flour, baking powder, and salt in a separate bowl. Gradually add this to the wet ingredients, stirring gently to combine. The dry ingredients give your biscotti its structure, so be careful not to overmix—you want a dough that holds together but stays tender enough for slicing.
Step 5: Fold in the Nuts and Fruits
Gently fold in the toasted almonds, pistachios, candied pineapple, dried apricots, candied cherries (or craisins), and dried papaya. These “jewels” not only beautify the biscotti but also offer delightful bursts of flavor and texture in every bite. This is where the dough truly comes alive, studded with color and crunch.
Step 6: Shape and Bake
Divide the dough into two equal logs on a parchment-lined baking sheet. Shape each log into a long, flat rectangle, about 12 inches in length. Bake in your preheated oven until the logs are golden and firm to touch. This initial bake helps set the biscotti structure before the critical slicing step.
Step 7: Slice and Final Bake
Allow the logs to cool slightly, then slice them diagonally into 1/2-inch thick pieces using a serrated knife. Arrange the slices cut side down on the baking sheet and bake again until the biscotti are crisp and perfectly dry. This second bake is key to achieving that signature biscotti crunch that we all adore.
How to Serve Jeweled Biscotti Recipe
Garnishes
While the Jeweled Biscotti are stunning on their own, sprinkling a light dusting of powdered sugar or drizzling melted white chocolate over them adds a touch of elegance and sweetness that enhances their festive vibe. You could also press a few extra pistachio crumbs on top before the drizzle for added texture and a pretty green sparkle.
Side Dishes
These biscotti pair exceptionally well with your favorite hot beverages. Think steaming mugs of cappuccino, rich espresso, or a comforting cup of chai tea. For an extra indulgent treat, serve alongside a small bowl of mascarpone cheese or whipped cream lightly flavored with orange zest, creating a perfect dip for these crunchy delights.
Creative Ways to Present
Bring a little flair when serving Jeweled Biscotti by arranging them in a glass jar layered with cinnamon sticks or dried orange peel for an aromatic experience. They also shine beautifully as part of a dessert board paired with rustic cheeses and fresh fruit. For gifting, wrap them up in cellophane tied with a colorful ribbon – their jewel-like appearance makes them a show-stopping homemade present.
Make Ahead and Storage
Storing Leftovers
Biscotti are famously shelf-stable, making leftovers easy to keep without losing quality. Store them in an airtight container at room temperature to maintain their delightful crispness. They’ll stay fresh and enjoyable for up to two weeks, perfect for nibbling throughout the day or sharing with friends.
Freezing
If you want to make a big batch of this Jeweled Biscotti Recipe, go ahead and freeze them. Place the cooled biscotti in a freezer-safe zip-top bag or container, separating layers with parchment paper to prevent sticking. Frozen biscotti keep well for up to three months, so you can enjoy them anytime.
Reheating
To bring frozen biscotti back to their fresh-baked crunch, simply warm them in a preheated oven at 300°F for 5-7 minutes. This quick reheating crisps them perfectly without drying them out, reviving their wonderful texture and aroma as if they just came out of the oven.
FAQs
What makes this biscotti “jeweled”?
The term “jeweled” comes from the colorful mix of candied and dried fruits studding the dough, resembling precious jewels that add both a visual appeal and a burst of fruity flavor in every bite.
Can I substitute the nuts with other types?
Absolutely! Walnuts, pecans, or hazelnuts can be used in place of almonds or pistachios if you want to tailor the flavor. Just be sure to toast them lightly for the best taste and crunch.
Is it necessary to bake the biscotti twice?
Yes, the double-bake process is essential for biscotti’s signature crunch. The first bake sets the dough, and after slicing, the second bake dries them out so they become crisp and perfect for dipping.
How long will biscotti stay fresh?
Stored properly in an airtight container, biscotti can stay fresh for up to two weeks at room temperature. They are a great make-ahead cookie that maintains their crunch over time.
Can I make this recipe gluten-free?
You can substitute the all-purpose flour with a gluten-free blend, but be sure to check that your baking powder is gluten-free as well. The texture may vary slightly, but it will still be delicious.
Final Thoughts
There’s something truly magical about this Jeweled Biscotti Recipe that makes baking feel special and joyful, whether it’s a gift for someone you love or a treat to savor yourself. The combination of colorful fruits, crunchy nuts, and that buttery, vanilla-infused dough is simply irresistible. I encourage you to try this recipe soon and enjoy the sparkle it brings to your kitchen and your day!