If you are looking for a delightful treat that combines the creamy goodness of cheesecake with the nostalgic flavor of banana pudding, you have to try this Banana Pudding Cheesecake Cones: A Unique and Creamy Dessert Worth Sharing Recipe. Imagine biting into a crisp cone filled with velvety banana pudding cheesecake filling, topped with crunchy vanilla wafers and fresh banana slices—this dessert is as fun to eat as it is delicious. Perfect for warm days, parties, or just a special moment to indulge, these cones bring a creative twist to traditional desserts that your friends and family will adore.
Ingredients You’ll Need
The magic of the Banana Pudding Cheesecake Cones: A Unique and Creamy Dessert Worth Sharing Recipe lies in a handful of simple yet essential ingredients. Each component plays a special role—cream cheese adds richness, instant banana pudding mix brings unmistakable flavor, and whipped topping keeps everything light and airy. The cones themselves provide a satisfying crunch, making each bite an exciting contrast in texture.
- 6 sugar cones or waffle cones: Classic crispy vessels that hold all the creamy filling with ease.
- 1 (8 oz) package cream cheese, softened: For smooth richness that gives cheesecake its signature texture.
- 1 (3.4 oz) package instant banana cream pudding mix: Brings that unmistakable banana flavor and creamy body.
- 1 cup cold milk: Essential to get the pudding mix to the perfect fluffy consistency.
- 1 cup whipped topping (e.g., Cool Whip): Adds lightness and airiness to the filling, balancing the cream cheese beautifully.
- ½ cup crushed vanilla wafers: For a sweet, crunchy topping that echoes the classic banana pudding dessert.
- 1 banana, sliced (optional, for garnish): Fresh slices bring a pop of natural sweetness and color.
- 1 tablespoon powdered sugar (optional): Enhances sweetness without overpowering the delicate banana flavor.
- ½ teaspoon vanilla extract (optional): Adds depth and warmth to the flavor profile.
How to Make Banana Pudding Cheesecake Cones: A Unique and Creamy Dessert Worth Sharing Recipe
Step 1: Whip the Cream Cheese and Pudding Mix
Start by beating the softened cream cheese together with the instant banana cream pudding mix. Use a hand mixer for the smoothest, creamiest results. This step builds the foundation of your filling, ensuring it’s perfectly blended without lumps.
Step 2: Add Cold Milk Slowly
Pour the cold milk little by little while continuing to mix. This gradual addition thins and lightens the mixture, turning it into that luscious, fluffy pudding texture everyone loves.
Step 3: Fold in Whipped Topping
Gently fold the whipped topping into the mixture using a spatula. This keeps the filling airy and soft, giving it that light cheesecake feel that melts in your mouth.
Step 4: Stir in Optional Sweeteners
If you want to add an extra layer of flavor, mix in powdered sugar and vanilla extract here. Both ingredients are optional but highly recommended for a well-rounded sweetness and richness.
Step 5: Prepare to Fill the Cones
Transfer the creamy filling to a piping bag or a zip-top plastic bag with the corner cut off. This makes it easier to fill the cones neatly and create the beautiful swirl that looks like soft-serve ice cream on top.
Step 6: Fill the Cones
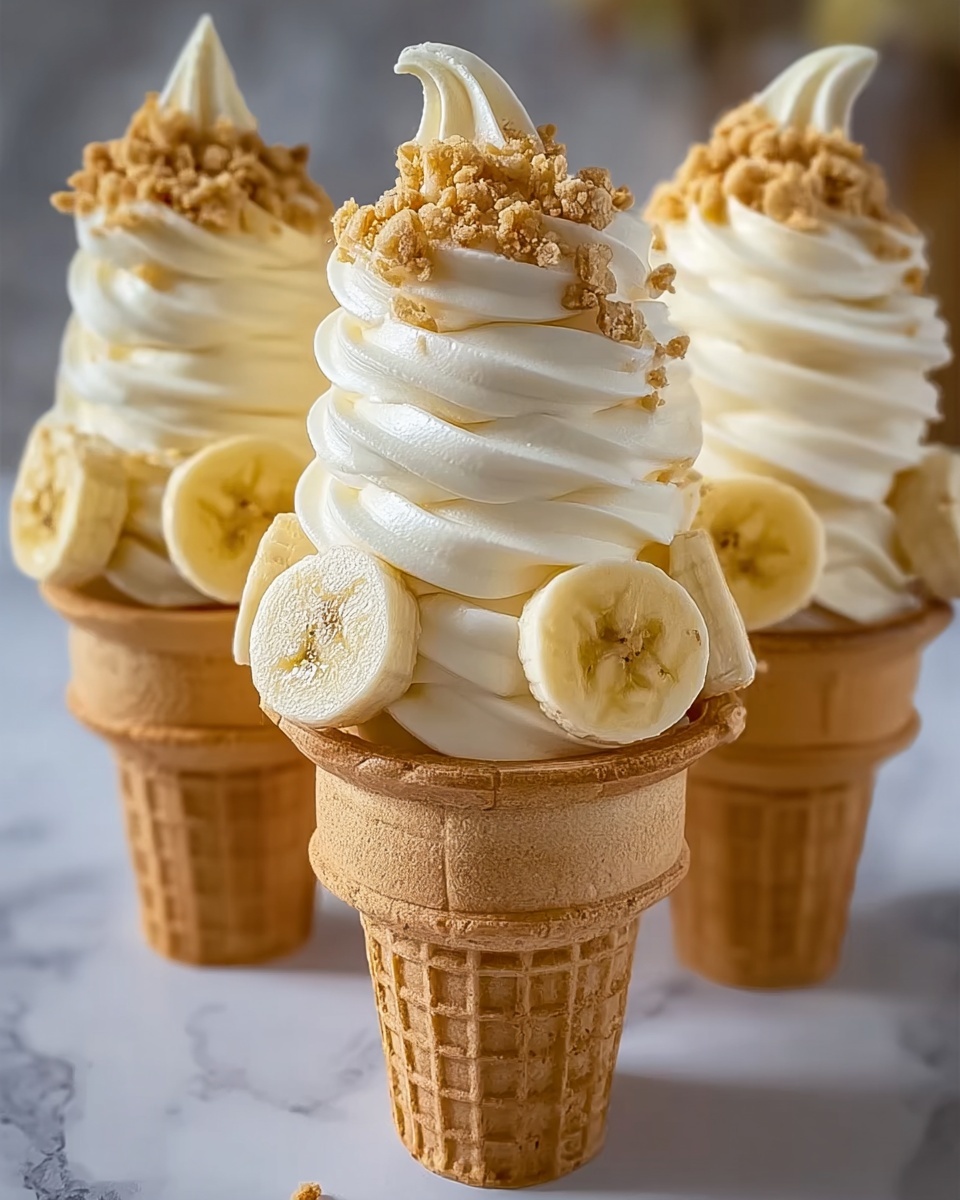
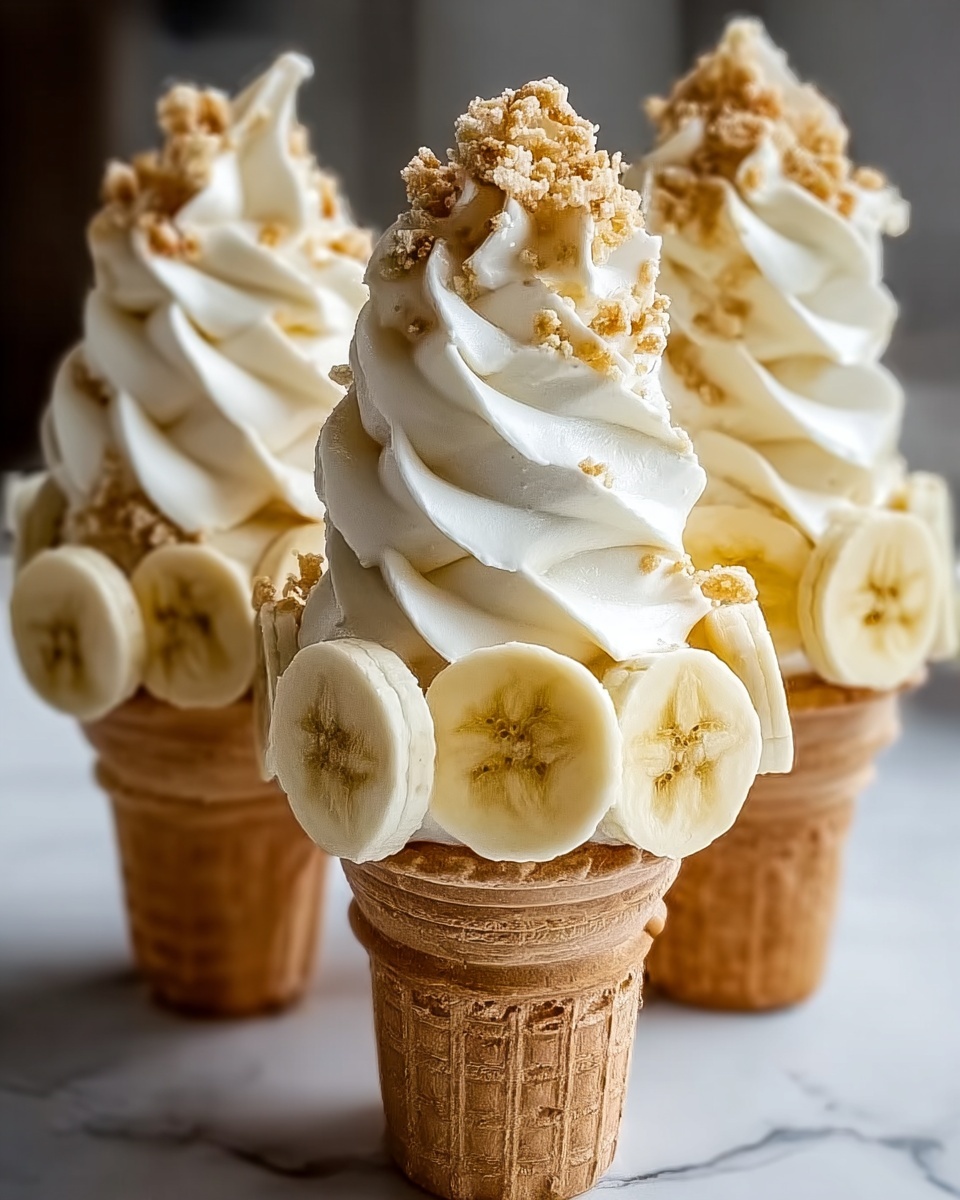
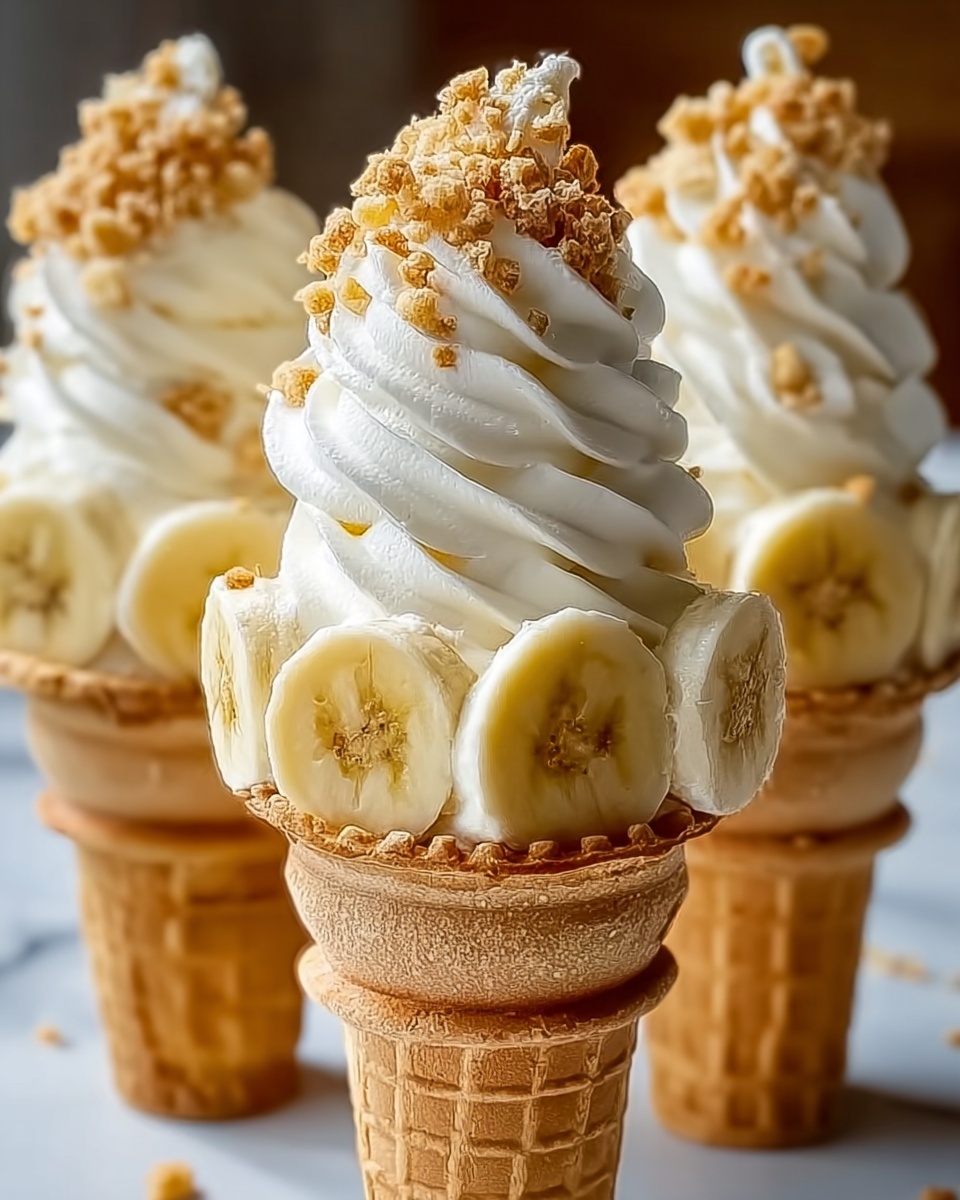
Pipe the banana pudding cheesecake filling into each cone, starting from the bottom and moving up. Fill generously so every bite is perfect, and finish with a pretty swirl on top.
Step 7: Add Crushed Vanilla Wafers
Sprinkle crushed vanilla wafers on top for that irresistible crunch and a lovely nod to the classic banana pudding dessert we all love.
Step 8: Garnish and Enjoy
Top with thin banana slices if you’re serving immediately. It adds a fresh, fruity note and beautiful presentation. Now your Banana Pudding Cheesecake Cones: A Unique and Creamy Dessert Worth Sharing Recipe is ready to wow!
How to Serve Banana Pudding Cheesecake Cones: A Unique and Creamy Dessert Worth Sharing Recipe
Garnishes
A handful of simple garnishes can elevate these cones. Besides the optional banana slices and crushed wafers, you might try a drizzle of caramel or a sprinkle of chopped nuts like pecans for contrast. Each garnish adds texture, flavor, and visual appeal that makes serving them all the more fun.
Side Dishes
Pair these cheesecake cones with a cup of coffee or a glass of chilled milk for a satisfying dessert experience. If you’re serving a party, fresh fruit skewers or a light citrus salad provide a refreshing balance to the creamy sweetness.
Creative Ways to Present
Think outside the box! Serve your cones standing upright in a decorative cone holder or a tall glass filled with sugar or sprinkles to keep them steady. For an elegant touch, you can also place them on individual small plates lined with doilies, especially when serving guests.
Make Ahead and Storage
Storing Leftovers
If you have any leftovers from your Banana Pudding Cheesecake Cones: A Unique and Creamy Dessert Worth Sharing Recipe, store them in an airtight container in the fridge. Because the cones can get soft over time, it’s best to keep the filling separate and fill cones just before serving to maintain that crisp texture.
Freezing
Freezing these cones is not recommended because the cream cheese filling may become grainy and the cones can lose their crunch. However, you can freeze the filling alone in a covered container for up to one month and refresh the texture by folding in a bit of fresh whipped topping when thawed.
Reheating
This dessert is best enjoyed cold or at room temperature. Avoid reheating as it can change the texture and cause the cheesecake filling to lose its delightful creaminess. Just let it sit out for 10-15 minutes if it’s too cold from the fridge for optimal flavor and consistency.
FAQs
Can I use regular pudding instead of instant banana pudding mix?
Instant banana pudding mix works best here because it thickens quickly and holds the texture needed for piping into cones. Regular pudding may be too runny and won’t set the same way, but if you must, chill it thoroughly and add more cream cheese to balance.
Can I make this recipe dairy-free?
Yes, you can substitute dairy-free cream cheese and whipped toppings, and use a nondairy milk alternative. The flavors will be slightly different but still delicious and creamy.
How far ahead can I prepare the cones?
The filling can be made a day in advance and stored refrigerated. However, for best cone crispness, fill just before serving.
Are waffle cones better than sugar cones?
Both work wonderfully, so it comes down to personal preference. Sugar cones tend to be crispier, while waffle cones are softer and offer a richer flavor.
Can I add other fruits to this dessert?
Absolutely! While bananas are classic, try diced strawberries, blueberries, or even mango. Just be mindful that extra moisture from fruit might affect the cone’s crunch.
Final Thoughts
I truly hope you give this Banana Pudding Cheesecake Cones: A Unique and Creamy Dessert Worth Sharing Recipe a try soon. It’s one of those special treats that brings smiles and a little bit of magic to any occasion. The playful presentation combined with comforting flavors makes it a wonderful dessert to share with friends and family. Happy baking and even happier eating!