If you are looking to wow your guests with something fresh, vibrant, and effortlessly elegant, the Grilled Feta and Citrus Endive Salad Bites Recipe is exactly what you need. This dish perfectly balances the smoky, creamy richness of grilled feta with the bright zestiness of citrus and the satisfying crunch of endive leaves. Every bite bursts with layers of flavor, from the sweet honey glaze to the aromatic herbs and toasted nuts. It’s a small plate that packs a big punch, ideal for sharing and for those moments when you want to enjoy something light but truly special.
Ingredients You’ll Need
The beauty of this recipe lies in its simplicity and the quality of the ingredients. Each component plays a crucial role—whether it’s the creamy feta, the zesty citrus, or the crunchy nuts—bringing unique textures and flavors that make this dish so delightful and colorful.
- 6 ounce block of feta: Use a firm, high-quality feta for grilling that won’t crumble too much.
- 1 tablespoon honey: Adds a touch of sweetness that contrasts beautifully with the salty feta.
- Few sprigs of fresh thyme: Fresh herbs provide an earthy aroma that elevates the cheese.
- 3 Belgian endives: Their crisp, slightly bitter leaves serve as perfect edible cups.
- 1 grapefruit: Offers a tangy citrus note that brightens the bite.
- 1 navel orange: Adds sweetness and juicy freshness to complement the grapefruit.
- 1/4 cup pomegranate seeds: For a pop of ruby-red color and juicy tartness.
- 1/3 cup nuts (pine nuts, pistachios, and slivered almonds): Provides a crunchy contrast and nutty depth.
- 1/4 cup chopped basil: Fresh basil adds a fragrant herbal note.
- 1 tablespoon chopped chives: A mild onion flavor to lift the salad.
- Pinch of salt and pepper: To season and balance the flavors.
- 1/4 cup olive oil: Binds everything together with smooth richness and helps infuse the herbs.
How to Make Grilled Feta and Citrus Endive Salad Bites Recipe
Step 1: Prepare the Grill and Feta
Start by heating your grill or grill pan to medium heat to ensure gentle cooking without burning the feta. Place the feta on a sheet of aluminum foil, drizzle with honey, and scatter fresh thyme sprigs on top. Seal the foil into a neat package to lock in moisture and flavor. Set the wrapped feta on the grill and let it cook for 16 minutes, allowing it to soften and soak up the sweet and herby notes.
Step 2: Prep the Endive Leaves and Centers
While the feta is grilling, take the Belgian endives and trim off their bases. Carefully peel off the leaves, striving to keep them whole and intact since these will serve as the crunchy vessel for your salad bites. Save the small, tight centers you trim off and finely chop them—these will add wonderful texture and taste when mixed into the nut and herb dressing.
Step 3: Segment the Citrus
Peel and segment the grapefruit and navel orange into small bite-sized pieces. This makes them easier to layer onto the endive leaves and ensures each bite will have a burst of juicy citrus flavor without overpowering the other ingredients.
Step 4: Toast and Chop the Nuts
In a dry frying pan over medium heat, toast your choice of nuts—pine nuts, pistachios, and slivered almonds work beautifully here. Keep an eye on them and stir frequently until they turn lightly golden and release their nutty aroma, around 10 minutes. Allow to cool slightly before chopping them roughly to add a delightful crunch.
Step 5: Combine the Dressing
In a mixing bowl, combine the chopped endive centers, toasted nuts, chopped basil, chopped chives, salt, pepper, and olive oil. Stir well to meld the flavors into a herbaceous and flavorful dressing that will tie all elements of the salad bites together beautifully.
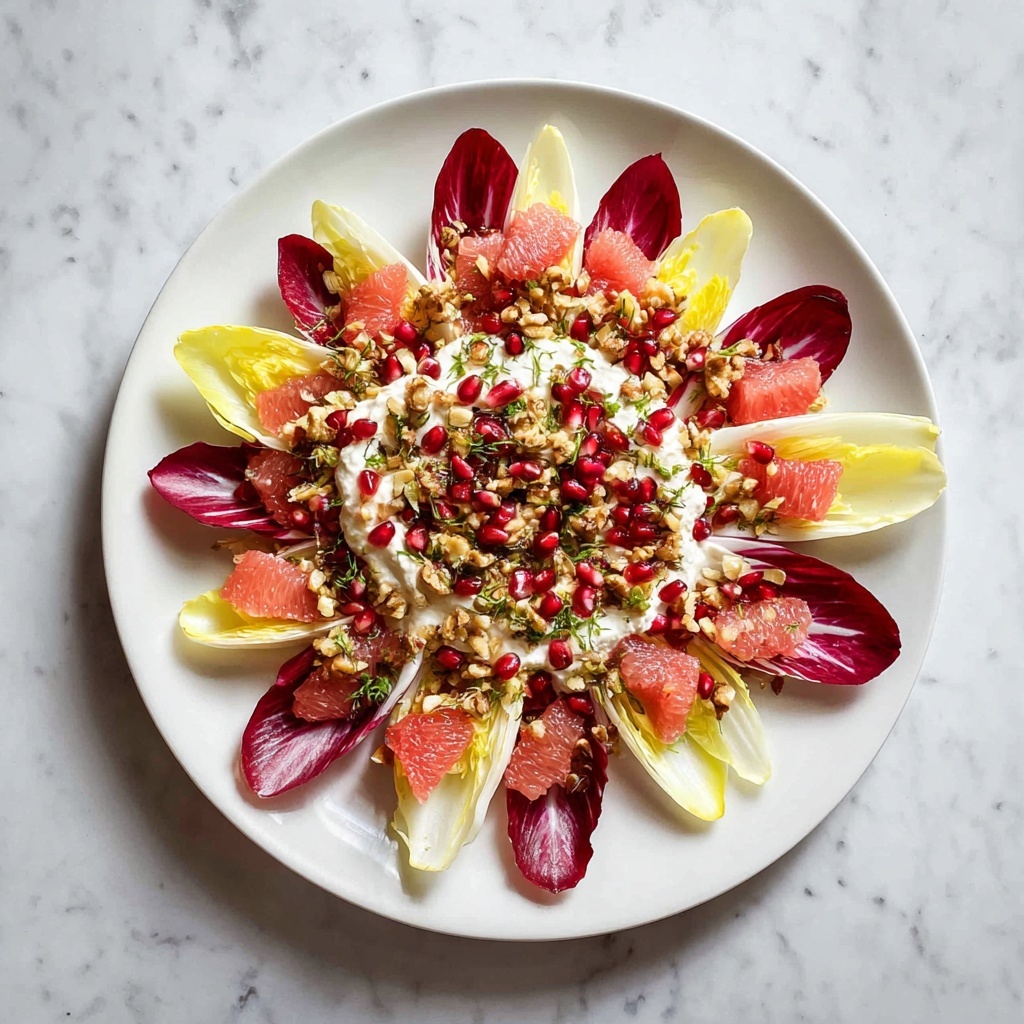
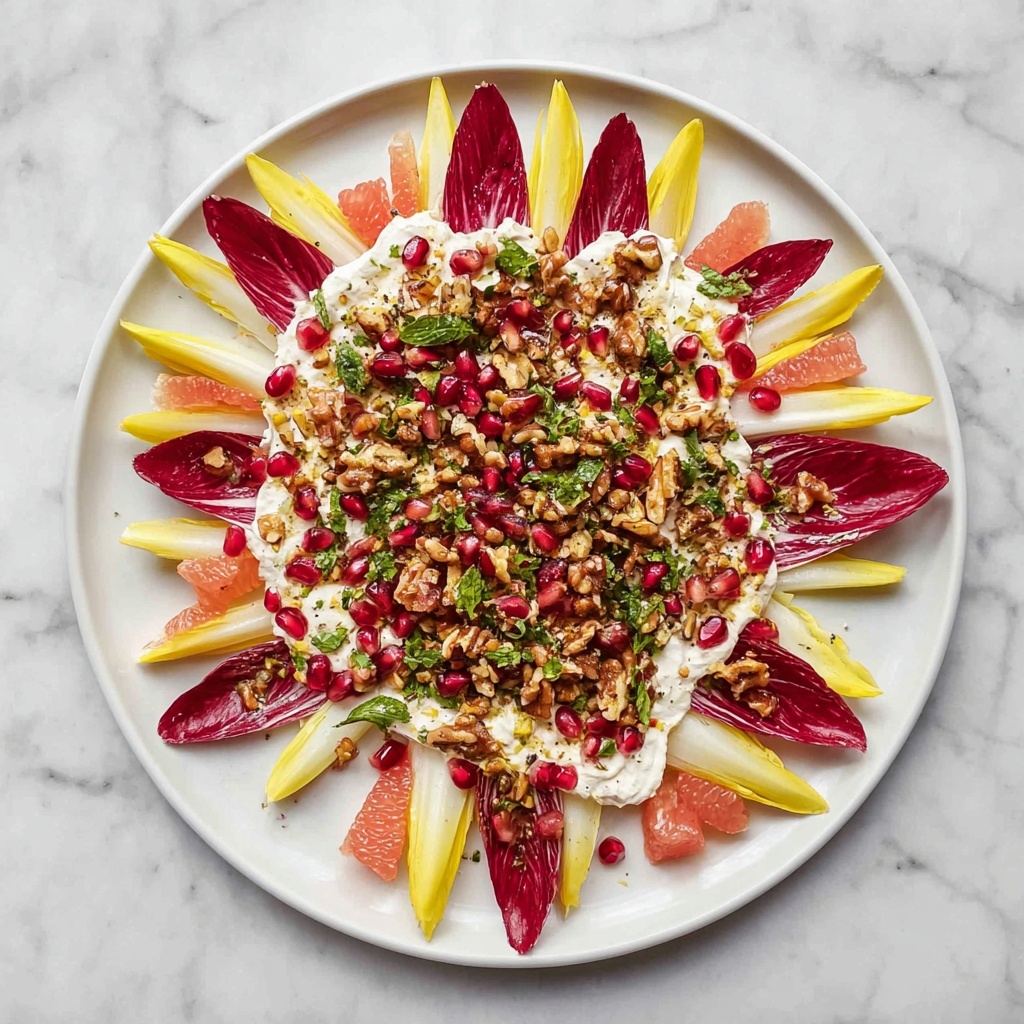
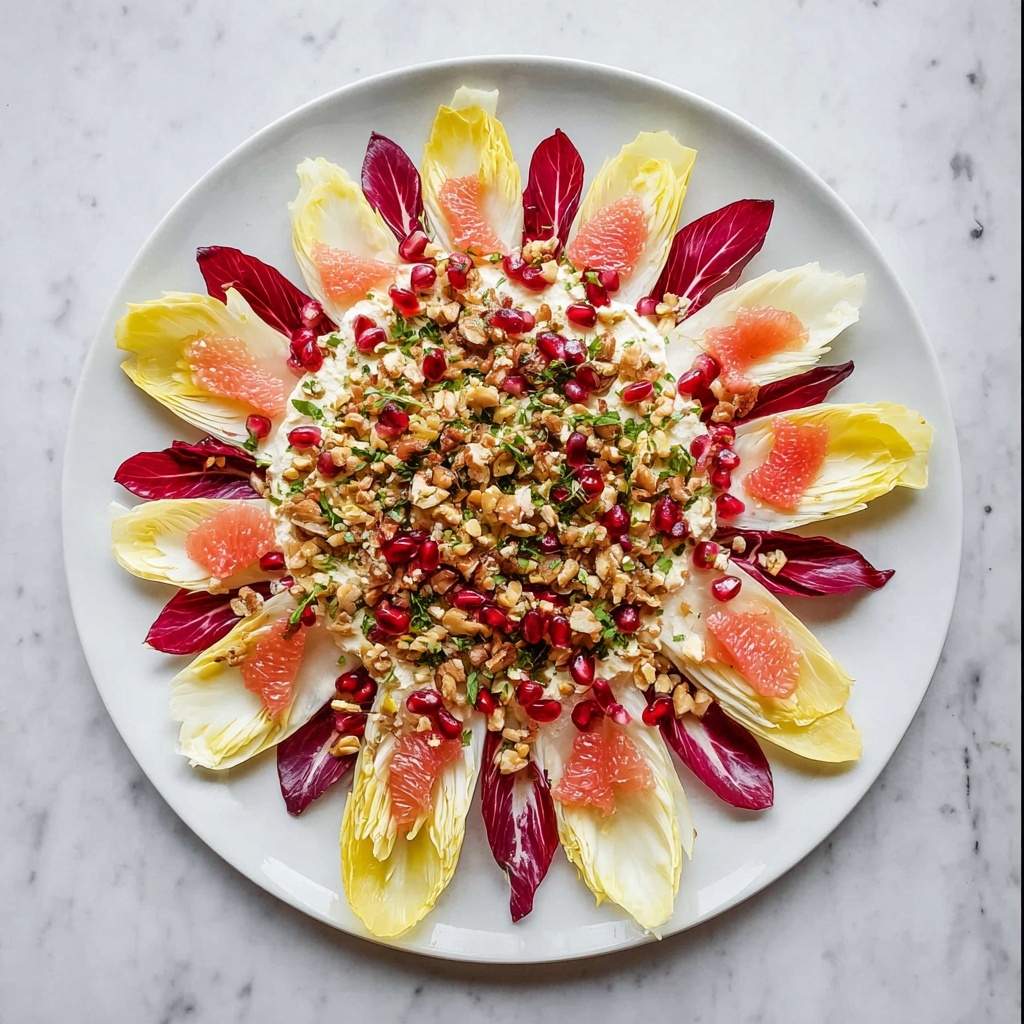
Step 6: Assemble the Salad Bites
Arrange the endive leaves in a circular pattern on a serving platter, creating a welcoming ring around the grilled feta in the center. Layer the endive leaves with the citrus segments, pomegranate seeds, and the nut-herb dressing. Finally, sprinkle the grilled feta with a little more of the dressing to make it irresistible and ready to scoop up with the endive leaves.
Step 7: Serve and Enjoy
Now comes the best part—serving the Grilled Feta and Citrus Endive Salad Bites Recipe while everything is fresh and vibrant. Encourage your guests to scoop up the creamy feta alongside the crunchy and zesty bites for a perfect flavor balance that’s both refreshing and indulgent.
How to Serve Grilled Feta and Citrus Endive Salad Bites Recipe
Garnishes
To add an extra visual and flavor boost, sprinkle some finely chopped fresh herbs like mint or additional thyme over the top. A few extra pomegranate seeds and a light drizzle of high-quality olive oil can also dress up the presentation beautifully. For a subtle crunch, a little flaky sea salt on the feta brings out its creaminess even more.
Side Dishes
These salad bites work wonderfully as a stand-alone appetizer or alongside light sides like crusty artisan bread or a fresh green salad. A chilled glass of crisp white wine such as Sauvignon Blanc or a sparkling rosé complements the citrus and feta flavors perfectly, making your meal feel like a true celebration.
Creative Ways to Present
Try serving the Grilled Feta and Citrus Endive Salad Bites Recipe in individual small bowls or on a wooden board with different nuts and herbs scattered around for a rustic feel. Alternatively, you can place each layered endive leaf on a mini platter for elegant finger-food servings at parties. Using colorful ceramic dishes also highlights the vibrant hues of the citrus and pomegranate, inviting everyone to dig in.
Make Ahead and Storage
Storing Leftovers
If you happen to have leftovers, store the grilled feta separately in an airtight container in the refrigerator to keep its texture and flavor intact. Keep the citrus and endive salad components chilled but stored apart if possible, as mixing them early could cause the leaves to wilt. Consume leftovers within 1-2 days for optimal freshness.
Freezing
This recipe is best enjoyed fresh and does not freeze well due to the delicate nature of the grilled feta and fresh endive leaves. Freezing may alter the texture of the cheese and cause the citrus to become mushy upon thawing, so it’s better to prepare this dish just before serving whenever possible.
Reheating
If you want to gently reheat the grilled feta, unwrap it from the foil and warm it in a low oven (around 300°F) for about 5-7 minutes. Avoid using the microwave as it may make the feta rubbery. The salad components are best served cold or at room temperature and should not be reheated.
FAQs
Can I use regular lettuce instead of Belgian endive?
Belgian endive is uniquely crisp and slightly bitter, which contrasts wonderfully with the sweet and salty flavors in this salad. While you could use other crisp lettuces like radicchio or romaine, they won’t quite have the same sturdy shape or flavor profile for holding the toppings as well.
What type of feta works best for grilling?
Choose a firm, block-style feta rather than crumbly or marinated feta. A thicker, denser feta holds its shape better on the grill and melts gently without breaking apart.
Is there a substitute for pomegranate seeds?
If pomegranate seeds are not available, try using fresh red currants or finely diced red grapes for pop and sweetness. They provide a similar burst of juicy tartness and vibrant color.
Can this recipe be made vegan?
The core of this recipe centers around grilled feta, so for a vegan twist, consider using a firm plant-based feta alternative and substitute honey with maple syrup. The fresh herbs, citrus, and nuts still provide fantastic flavor and texture.
How do I make the nut mixture without pine nuts or pistachios?
You can customize the nut mix based on what you have. Toasted walnuts, pecans, or cashews work beautifully and will add a lovely crunch and depth to the salad’s flavor.
Final Thoughts
There is something truly special about the Grilled Feta and Citrus Endive Salad Bites Recipe that never fails to impress. It’s the kind of dish that brings people together around the table, sparking conversation and delight with every bite. I encourage you to give it a try and experience firsthand how these simple but high-impact ingredients can transform into a stunning appetizer or light meal. Trust me, once you do, this recipe will become one of your favorites to serve again and again.