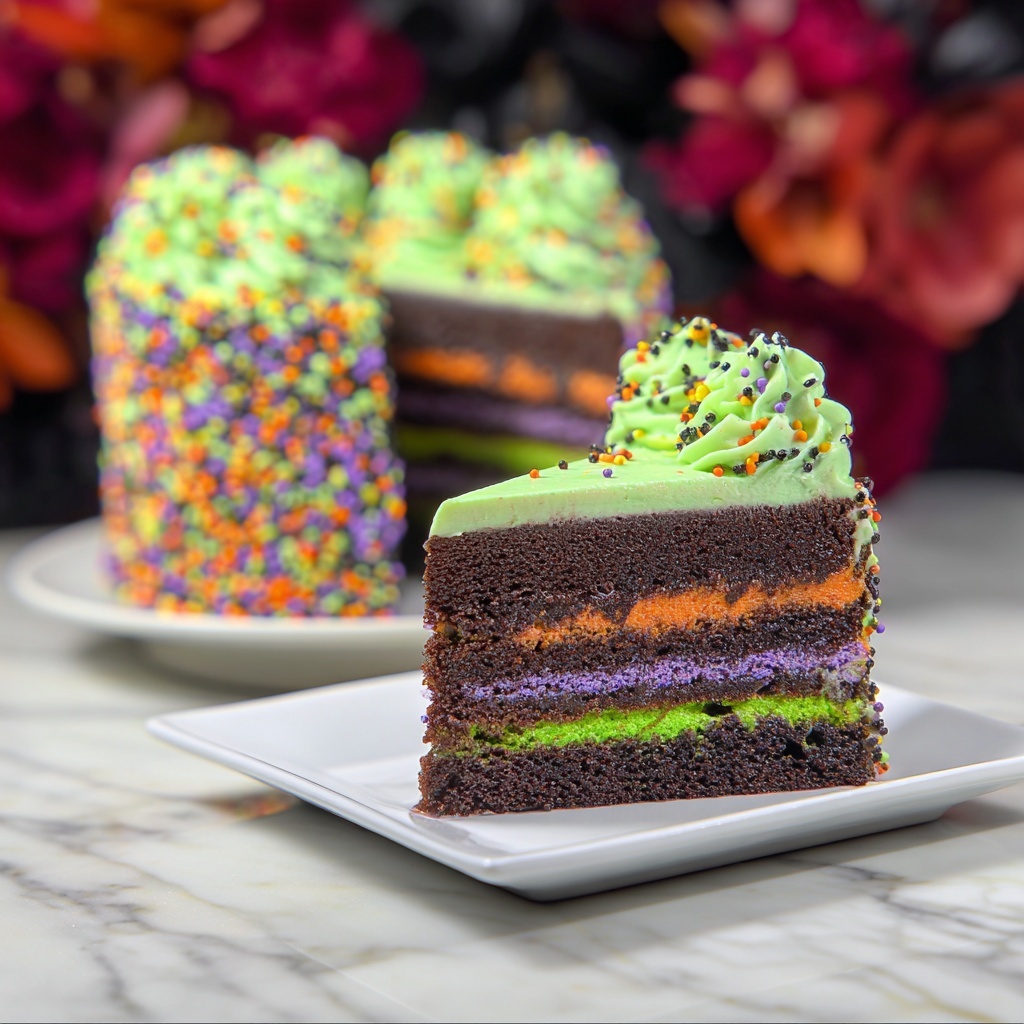
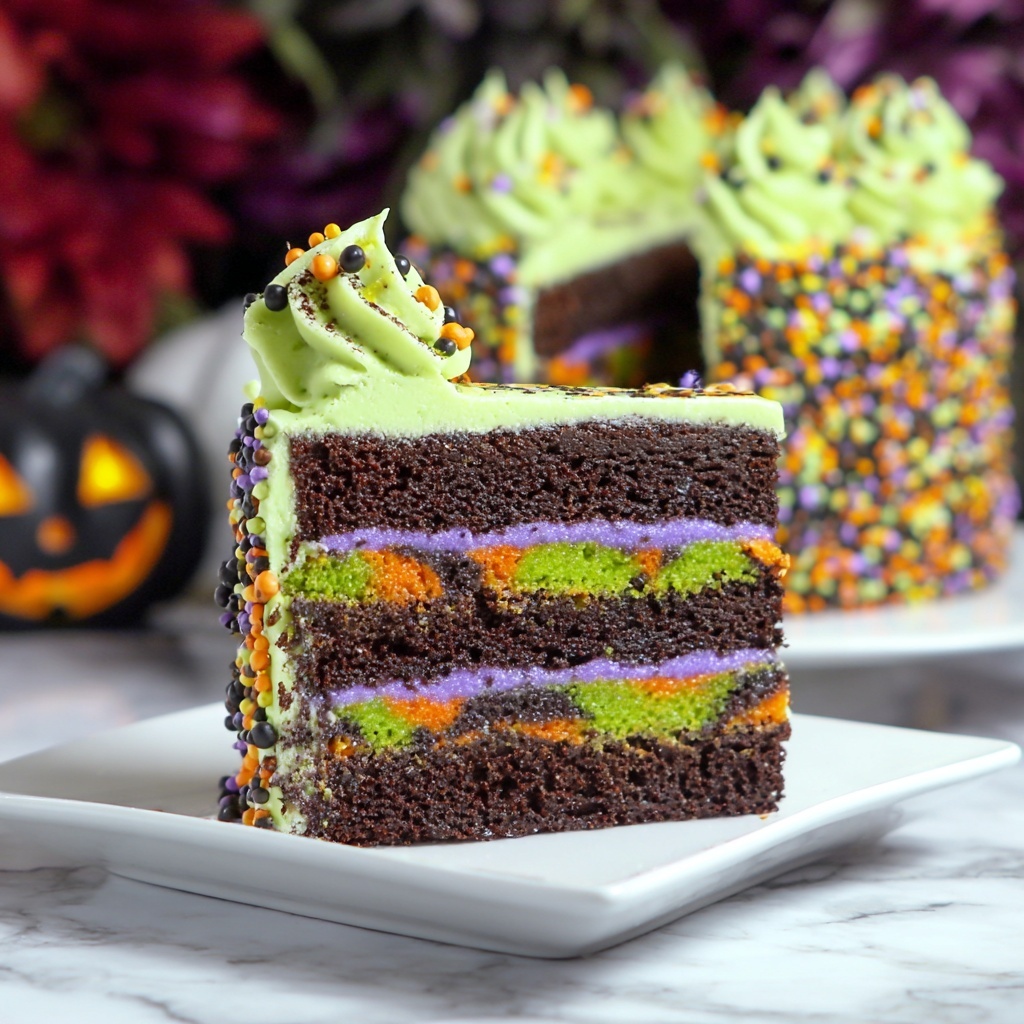
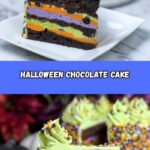
If you want to bring some serious festive fun to your Halloween celebration, nothing beats the rich decadence of a homemade Halloween Dark Chocolate Cake with Spooky Decorations Recipe. This show-stopping cake combines layers of deeply chocolatey, moist cake with luscious, colorful frosting and eerie decorations that are sure to impress both kids and adults alike. Every bite delivers the perfect balance of indulgence and spooky charm, making it the star dessert for your Halloween party table.

Ingredients You’ll Need
The ingredients for this Halloween Dark Chocolate Cake with Spooky Decorations Recipe are straightforward, yet handpicked to ensure rich flavor, vibrant colors, and a smooth texture. Each element from the cake mix to the specialty sprinkles brings something crucial to the table, making this cake as delicious as it is fun to create.
- 2 boxes of Dark Chocolate Cake mix: Provides a quick, foolproof base with intense chocolate flavor.
- 6 large eggs: Helps structure and moisture, essential for tender cake layers.
- 2 cups water: Hydrates the batter, balancing the richness.
- 2/3 cup canola oil: Adds moistness and helps keep the cake soft.
- 3 9-inch round cake pans: Perfect size for beautiful layered cakes.
- 1 10-inch round cake board: Provides sturdy support for assembling and decorating.
- 1 cake leveler: Essential for trimming domed cakes into flat, stackable layers.
- 3 cups unsalted sweet cream butter (softened): The base for creamy, flavorful frosting.
- 6 cups powdered sugar: Sweetens and thickens the frosting for perfect spreadability.
- 5-7 tablespoons heavy whipping cream: Adds a silky texture to frosting and enhances richness.
- 1 tablespoon pure vanilla extract: Adds depth and warmth to the buttercream.
- Green, purple, and orange gel food coloring: Brings eye-catching Halloween vibrancy to the frosting.
- 1 large piping bag with star tip: For decorative frosting patterns that wow.
- 3 disposable piping bags: Useful for handling different colored frostings separately.
- 3 bowls: For mixing and coloring your frosting efficiently.
- 1 angled spatula: The secret weapon for smooth, even frosting application.
- Wilton Halloween sprinkles: Classic spooky shapes to decorate your cake fabulously.
- Red edible eyes sprinkles: Adds a creepy-cute touch to the finished design.
- Wilton bloody skull and bones sprinkles: For an eerie, Halloween-ready vibe.
- Tube of green glitter piping gel: Adds sparkle and dimension to your spooky decorations.
How to Make Halloween Dark Chocolate Cake with Spooky Decorations Recipe
Step 1: Prepare Your Pans and Preheat the Oven
Start by preheating your oven to 350 degrees Fahrenheit to ensure it’s at the perfect baking temperature. Spray your 9-inch cake pans thoroughly with baking spray to prevent sticking and make sure your layers will come out perfectly after baking.
Step 2: Mix the Cake Batter
Follow the cake mix instructions on the boxes carefully. This usually involves combining the chocolate cake mix with the eggs, water, and oil. Mix just until combined to keep those layers tender and moist.
Step 3: Divide Batter into Pans
Evenly pour the batter into the three prepared pans to create uniform layers. Getting equal thickness will help your cake stack beautifully, making decorating easier and more professional-looking.
Step 4: Bake the Cake Layers
Place the pans on the center rack of your oven and bake for 25 to 35 minutes. Check with a toothpick inserted into the center—when it comes out clean, your cakes are perfectly baked. The rich aroma at this point is already a delight!
Step 5: Cool the Cakes Completely
Remove the cakes from the oven and let them cool fully in their pans for about 15-20 minutes, then transfer to a wire rack. Letting the layers cool completely before decorating is key to avoid melting your frosting.
Step 6: Level the Cakes
Once cooled, use a cake leveler to trim away the domed tops of each cake layer. This step creates flat, even surfaces that stack neatly, providing a smooth canvas for your spooky decorations.
Step 7: Prepare the Buttercream Frosting
In a large bowl, beat the softened butter until creamy, then gradually add powdered sugar and vanilla extract. Alternate adding heavy cream to reach the ideal frosting consistency: smooth, fluffy, and easy to spread. Divide the frosting into three bowls and tint each with your chosen gel food color—green, purple, and orange—for that classic Halloween flair.
Step 8: Assemble and Frost the Cake
Place the first cake layer on the cake board, spread a thick layer of colored frosting, then repeat with the second and third layers. Use your angled spatula to apply a crumb coat to seal in crumbs, chill briefly, then finish with a final smooth layer of frosting colored as you desire.
Step 9: Add Spooky Decorations
Fill piping bags fitted with star tips with the colorful frostings to pipe ghosts, spiders, or web patterns. Embellish with Wilton Halloween sprinkles, red edible eyes, and bloody skull and bones sprinkles for maximum spookiness. Finally, drizzle the green glitter piping gel to add a shimmering eerie glow that’ll captivate your guests.
Step 10: Final Touches and Chill
After decorating, chill the cake for at least an hour to set the frosting and decorations. This final step ensures clean slices and a stunning presentation when it’s time to serve your Halloween Dark Chocolate Cake with Spooky Decorations Recipe.
How to Serve Halloween Dark Chocolate Cake with Spooky Decorations Recipe
Garnishes
Enhance the spooky vibe by adding extra edible eyes or sprinkles around the cake plate. A light dusting of cocoa powder or a drizzle of fudge sauce adds richness and a dramatic touch.
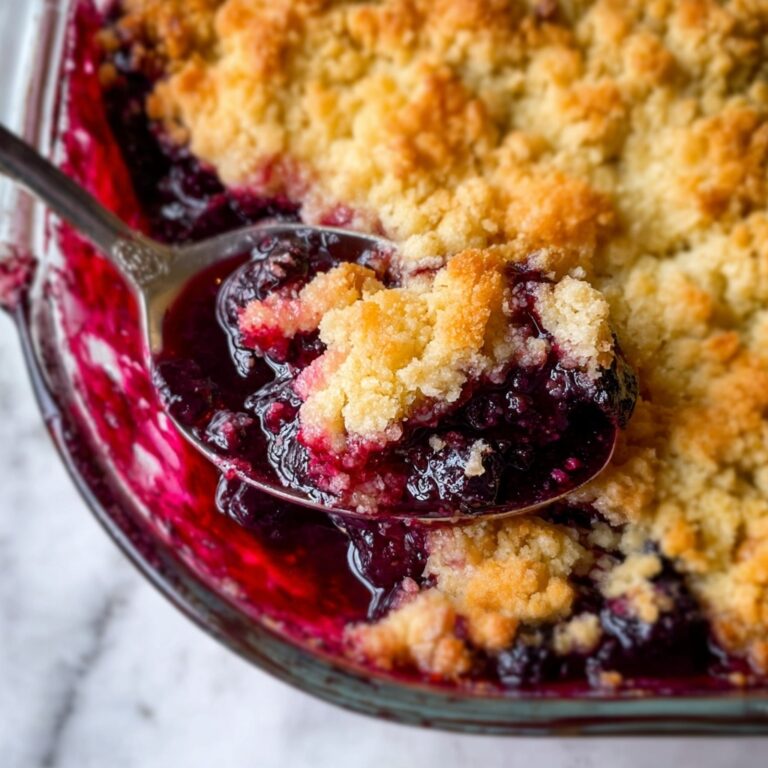
Side Dishes
Serve the cake alongside fresh berries like raspberries or blackberries for a tart contrast, or offer whipped cream for an extra creamy bite that complements the dense chocolate layers perfectly.
Creative Ways to Present
Serve this cake on a themed Halloween cake stand or plate decorated with cobwebs and tiny plastic spiders. Surround the cake with pumpkin-shaped candies or arrange dark chocolate bats around the base for a spooky centerpiece that wows every guest.
Make Ahead and Storage
Storing Leftovers
Keep the leftover cake covered tightly with plastic wrap or stored in an airtight container in the refrigerator. Proper storage keeps the frosting moist and the flavors fresh for up to 4 days.
Freezing
You can freeze this Halloween Dark Chocolate Cake with Spooky Decorations Recipe by wrapping each layer separately in plastic wrap and foil, then freezing. When ready to use, thaw layers overnight in the fridge before assembling or serving.
Reheating
For best results, this cake is served chilled or at room temperature. If you prefer the flavors to bloom, allow slices to sit at room temperature for 30 minutes before serving; avoid microwaving as it may distort the frosting and decorations.
FAQs
Can I use a homemade chocolate cake instead of box mix?
Absolutely! If you prefer from-scratch cakes, use your favorite dark chocolate cake recipe. The decorations and frosting will work beautifully either way.
How do I prevent the cake layers from drying out?
Be careful not to overbake and always cool the layers completely before frosting to retain moisture. Wrapping leftover cake properly also prevents drying.
What are good alternatives to canola oil?
You can substitute canola oil with vegetable oil or melted coconut oil, but stick to neutral flavors to keep the chocolate taste front and center.
Can I make the frosting without heavy cream?
Yes, you can substitute milk or even water if needed, though the frosting won’t be quite as creamy or rich. Heavy cream helps achieve that luxurious texture.
How do I get bold, vibrant frosting colors?
Gel food coloring is the key to vibrant, intense colors without thinning your frosting. Add a little at a time until you hit your desired shade.
Final Thoughts
Nothing beats the thrill of sharing this Halloween Dark Chocolate Cake with Spooky Decorations Recipe with friends and family. It’s fun to make, decadent to eat, and guaranteed to steal the show at any Halloween gathering. So grab your ingredients, unleash your creativity with those spooky decorations, and enjoy every delicious moment of this unforgettable treat!
Print
Halloween Dark Chocolate Cake with Spooky Decorations Recipe
- Prep Time: 2 hours
- Cook Time: 30 minutes
- Total Time: 2 hours 30 minutes
- Yield: 10 servings
- Category: Dessert
- Method: Baking
- Cuisine: American
Description
This Halloween Cake is a festive, rich dark chocolate layered cake perfect for spooky celebrations. It features moist chocolate cake layers made from boxed mix, lavishly frosted with a vibrant, colorful buttercream tinted in Halloween-themed shades and decorated with themed sprinkles and edible accents to bring festive fun to your dessert table.
Ingredients
Cake Ingredients
- 2 boxes of Dark Chocolate Cake mix
- 6 large eggs
- 2 cups water
- 2/3 cup canola oil
- 3 9-inch round cake pans
Frosting Ingredients
- 3 cups unsalted sweet cream butter, softened
- 6 cups powdered sugar
- 5–7 tablespoons heavy whipping cream
- 1 tablespoon pure vanilla extract
- Green, purple, and orange gel food coloring (Americolor Electric Green, Electric Purple, Electric Orange)
Decoration Supplies
- 1 large piping bag with star tip
- 3 disposable piping bags
- 3 bowls
- 1 angled spatula
- 1 10-inch round cake board
- 1 cake leveler
- 1 container Wilton Halloween sprinkles
- 1 package red edible eyes sprinkles
- 1 container Wilton bloody skull and bones sprinkles
- 1 tube green glitter piping gel
Instructions
- Preheat and Prepare Pans: Preheat your oven to 350°F (175°C), then spray the three 9-inch round cake pans thoroughly with PAM baking spray to ensure the cakes release easily after baking.
- Mix Cake Batter: Follow the directions on the back of the two boxes of dark chocolate cake mix, combining the mix with eggs, water, and canola oil as specified to create a smooth batter.
- Divide Batter: Evenly distribute the cake batter among the three prepared 9-inch pans, smoothing the tops for even baking.
- Bake the Cakes: Bake the cake layers in the preheated oven for 25-35 minutes, or until a toothpick inserted into the center comes out clean, indicating they are fully baked.
- Cool Cakes: Remove the cakes from the oven and allow them to cool completely in their pans for about 15 minutes, then turn them out onto a cooling rack to cool fully before leveling and decorating.
- Level Cakes: Once cooled, use a cake leveler to trim off the domed tops from each cake layer to ensure flat, even surfaces for stacking the layers neatly.
- Prepare Frosting: In a large bowl, beat together the softened butter, powdered sugar, vanilla extract, and 5 tablespoons of heavy whipping cream until creamy and smooth. Add additional heavy cream as needed to reach desired consistency.
- Color Frosting: Divide the buttercream evenly into three bowls and tint each one with a few drops of green, purple, and orange gel food coloring, stirring to achieve vibrant colors.
- Assemble Cake: Place one leveled cake layer onto the cake board. Spread a generous layer of one colored frosting over the top, then repeat stacking and frosting with the remaining layers, alternating the colored frostings for a fun Halloween effect.
- Decorate Cake: Use the large piping bag with a star tip filled with colored frosting to pipe decorative borders and designs around the cake. Add Wilton Halloween sprinkles, red edible eyes, bloody skull and bones sprinkles, and finish with green glitter piping gel for spooky accents.
Notes
- Ensure cakes are completely cool before leveling and frosting to avoid melting the buttercream.
- Use gel food coloring for vibrant colors without thinning the frosting.
- You can prepare the cake layers a day ahead and store wrapped in plastic wrap to save time.
- Monitor baking closely after 25 minutes to prevent overbaking; cake is done when a toothpick comes out clean.
- Customize decorations based on your Halloween theme or personal preference.
