Description
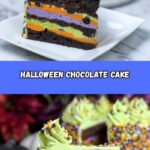
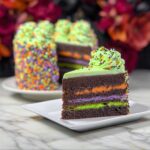
This Halloween Cake is a festive, rich dark chocolate layered cake perfect for spooky celebrations. It features moist chocolate cake layers made from boxed mix, lavishly frosted with a vibrant, colorful buttercream tinted in Halloween-themed shades and decorated with themed sprinkles and edible accents to bring festive fun to your dessert table.
Ingredients
Scale
Cake Ingredients
- 2 boxes of Dark Chocolate Cake mix
- 6 large eggs
- 2 cups water
- 2/3 cup canola oil
- 3 9-inch round cake pans
Frosting Ingredients
- 3 cups unsalted sweet cream butter, softened
- 6 cups powdered sugar
- 5-7 tablespoons heavy whipping cream
- 1 tablespoon pure vanilla extract
- Green, purple, and orange gel food coloring (Americolor Electric Green, Electric Purple, Electric Orange)
Decoration Supplies
- 1 large piping bag with star tip
- 3 disposable piping bags
- 3 bowls
- 1 angled spatula
- 1 10-inch round cake board
- 1 cake leveler
- 1 container Wilton Halloween sprinkles
- 1 package red edible eyes sprinkles
- 1 container Wilton bloody skull and bones sprinkles
- 1 tube green glitter piping gel
Instructions
- Preheat and Prepare Pans: Preheat your oven to 350°F (175°C), then spray the three 9-inch round cake pans thoroughly with PAM baking spray to ensure the cakes release easily after baking.
- Mix Cake Batter: Follow the directions on the back of the two boxes of dark chocolate cake mix, combining the mix with eggs, water, and canola oil as specified to create a smooth batter.
- Divide Batter: Evenly distribute the cake batter among the three prepared 9-inch pans, smoothing the tops for even baking.
- Bake the Cakes: Bake the cake layers in the preheated oven for 25-35 minutes, or until a toothpick inserted into the center comes out clean, indicating they are fully baked.
- Cool Cakes: Remove the cakes from the oven and allow them to cool completely in their pans for about 15 minutes, then turn them out onto a cooling rack to cool fully before leveling and decorating.
- Level Cakes: Once cooled, use a cake leveler to trim off the domed tops from each cake layer to ensure flat, even surfaces for stacking the layers neatly.
- Prepare Frosting: In a large bowl, beat together the softened butter, powdered sugar, vanilla extract, and 5 tablespoons of heavy whipping cream until creamy and smooth. Add additional heavy cream as needed to reach desired consistency.
- Color Frosting: Divide the buttercream evenly into three bowls and tint each one with a few drops of green, purple, and orange gel food coloring, stirring to achieve vibrant colors.
- Assemble Cake: Place one leveled cake layer onto the cake board. Spread a generous layer of one colored frosting over the top, then repeat stacking and frosting with the remaining layers, alternating the colored frostings for a fun Halloween effect.
- Decorate Cake: Use the large piping bag with a star tip filled with colored frosting to pipe decorative borders and designs around the cake. Add Wilton Halloween sprinkles, red edible eyes, bloody skull and bones sprinkles, and finish with green glitter piping gel for spooky accents.
Notes
- Ensure cakes are completely cool before leveling and frosting to avoid melting the buttercream.
- Use gel food coloring for vibrant colors without thinning the frosting.
- You can prepare the cake layers a day ahead and store wrapped in plastic wrap to save time.
- Monitor baking closely after 25 minutes to prevent overbaking; cake is done when a toothpick comes out clean.
- Customize decorations based on your Halloween theme or personal preference.