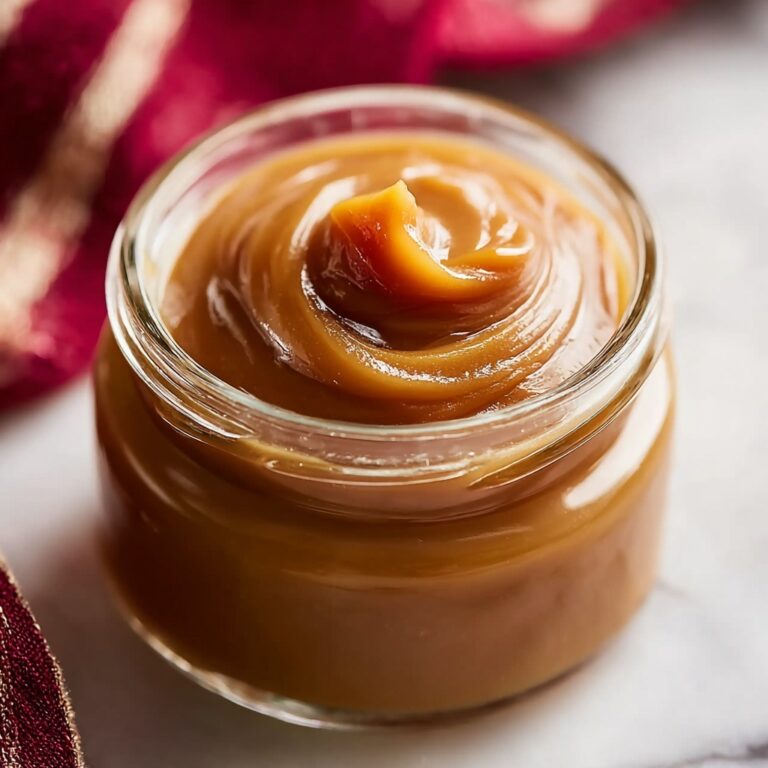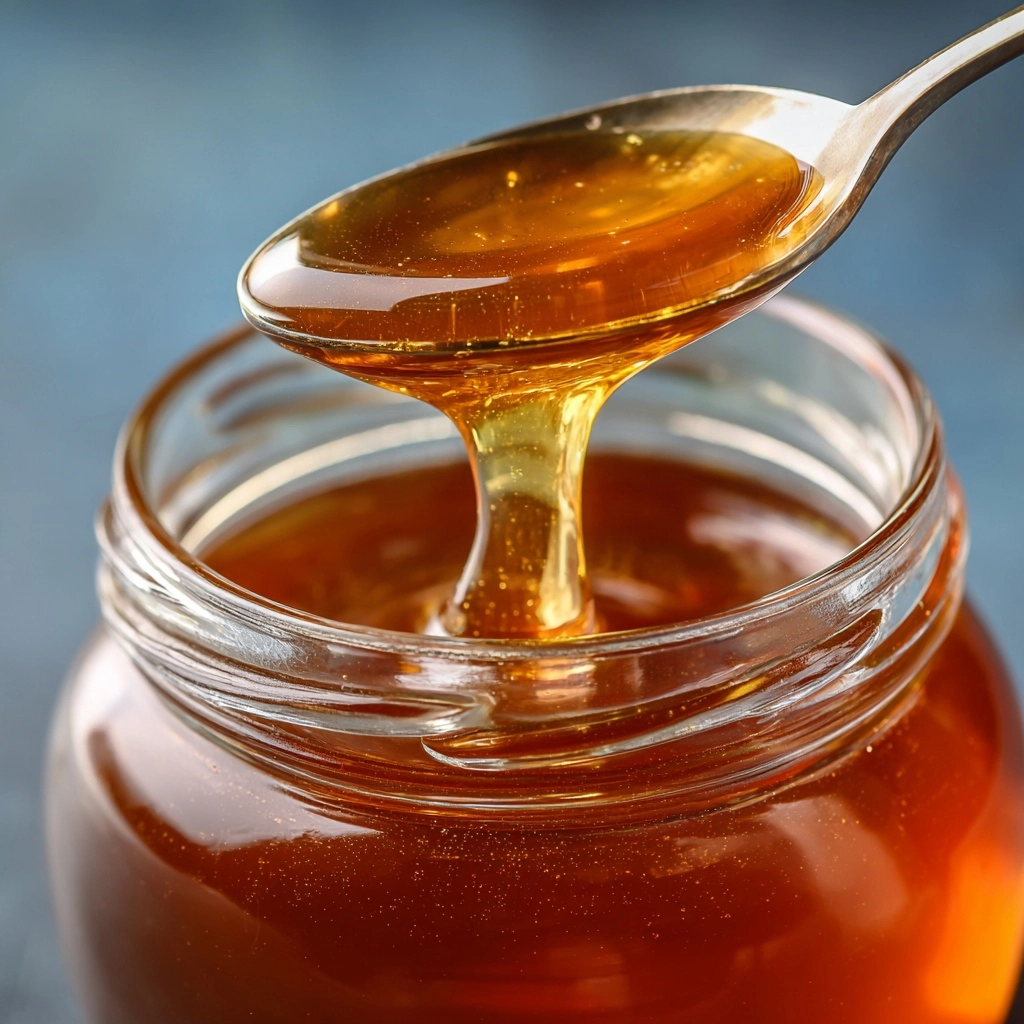
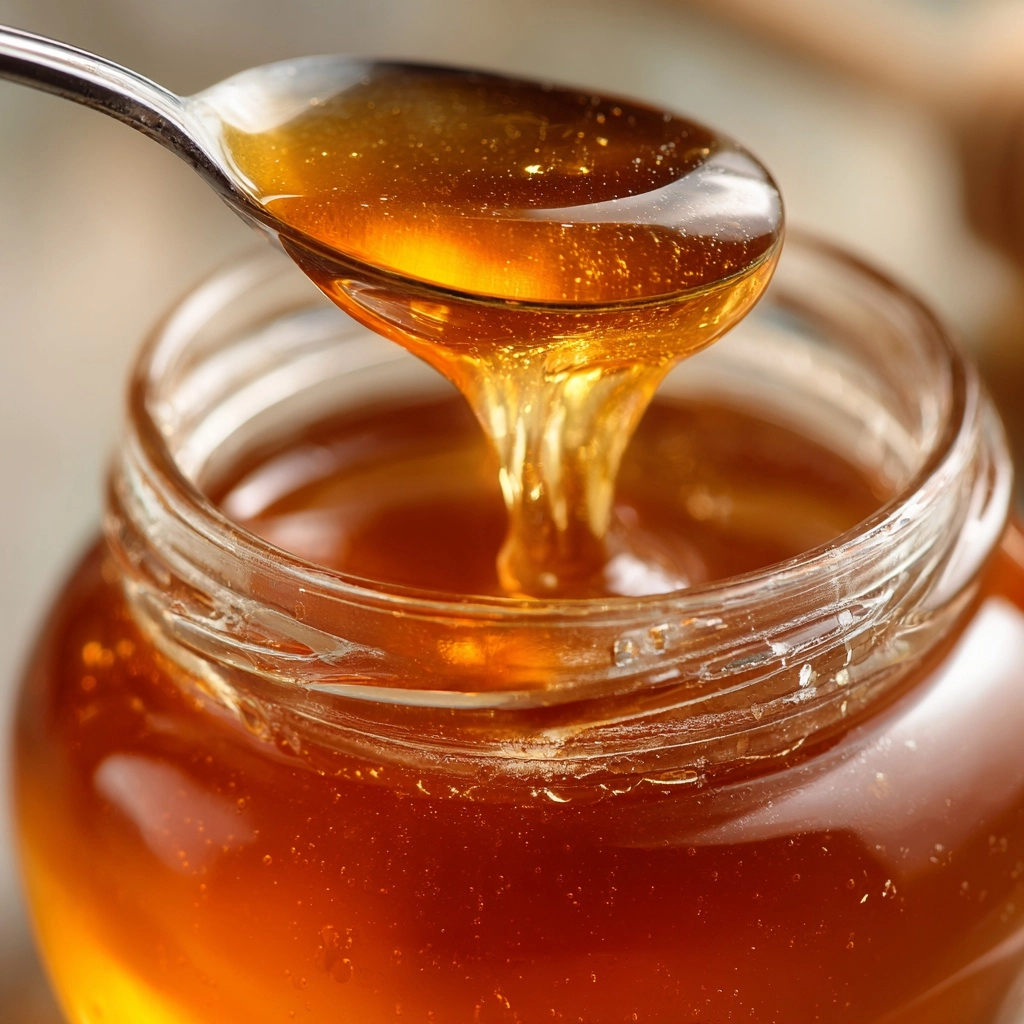
If you’ve ever reached for a specialty coffee sweetener or drizzled syrup over a stack of pancakes and wondered if you could make it better yourself, then welcome to your new favorite kitchen staple: Home Made Syrup. This easy, versatile recipe gives you a sweet, silky syrup in just ten minutes, perfect for swirling into coffee, mixing cocktails, or brightening up breakfast treats. With only a handful of ingredients and endless possibilities for customizing, you’ll never go back to store-bought again.
Ingredients You’ll Need
Everything that goes into this Home Made Syrup is likely already in your pantry, but don’t let the simplicity fool you—each ingredient plays an important part in crafting just the right flavor, consistency, and golden sheen. Here’s what you’ll want and why:
- Granulated sugar: The heart of the syrup, providing sweetness and that classic crystal-clear finish.
- Water: Dissolves the sugar smoothly and creates the perfect pourable texture.
- Vanilla extract (optional): Adds warmth and aroma; use it for an extra boost of flavor.
- Pinch of salt: Just a touch balances the sweetness and deepens the syrup’s profile.
How to Make Home Made Syrup
Step 1: Combine Sugar and Water
Start by grabbing your smallest saucepan and pouring in the granulated sugar and water. This duo does all the heavy lifting, and getting them together early means your Home Made Syrup will come together evenly. Give it a quick stir to help the sugar start dissolving before turning on the heat.
Step 2: Heat and Dissolve
Set your saucepan over medium heat and bring the mixture to a steady boil. Stir occasionally—this helps the sugar dissolve quickly and keeps the mixture smooth. You’ll know it’s ready when the liquid looks clear and you can no longer spot any rogue sugar crystals swirling around.
Step 3: Simmer and Infuse
Once the mixture is boiling, drop the heat to low and let it simmer quietly for 5 minutes. This short simmer gives the syrup a slightly thicker body, making it perfect for anything from coffee to pancakes. If you’re dreaming up creative flavor additions like citrus peels or cinnamon sticks, now’s the time to add them so they can infuse as the syrup simmers!
Step 4: Finish with Vanilla and Salt
Remove your pan from the heat and stir in that optional vanilla extract and a tiny pinch of salt. The vanilla lends a bakery-like warmth, and the salt cuts any flatness to bring out the sweetness in a balanced way. Take a whiff—the aroma should already have you planning what to use it on first!
Step 5: Cool and Store
Let your Home Made Syrup cool to room temperature in the pan. Once it’s cool, carefully pour it into a clean jar or bottle. Stash it in the fridge and enjoy the satisfaction of homemade sweetness waiting for you whenever inspiration strikes. It keeps beautifully for up to a month!
How to Serve Home Made Syrup

Garnishes
This syrup truly shines with the right finishing touch. Add a sprig of fresh mint or a stick of cinnamon to the bottle for a pop of color and a subtle hint of flavor. If serving at brunch, set out small bowls of diced fruit or edible flowers to sprinkle over your pancakes and pour over with the syrup—your guests will swoon.
Side Dishes
Pair Home Made Syrup with a classic stack of pancakes or crispy waffles, or keep things simple and drizzle over oatmeal or Greek yogurt. It’s also wonderful over roasted fruit or even vanilla ice cream, turning everyday dishes into special occasions.
Creative Ways to Present
Show off your Home Made Syrup by decanting it into glass bottles with fun labels—perfect for gifting or brightening up your breakfast table. For a cocktail hour, set up a DIY syrup bar with add-ins like citrus peels, fresh herbs, or even espresso powder, letting everyone stir up their own creation.
Make Ahead and Storage
Storing Leftovers
Once you’ve made your batch of Home Made Syrup, store it in a clean, airtight glass jar or bottle. Keep it in the refrigerator where it will stay fresh, clear, and ready for up to a month. Be sure to always use a clean spoon or pour directly from the bottle to prevent introducing any unwanted bacteria.
Freezing
If you made a large batch or want to have Home Made Syrup on hand for months, transfer cooled syrup to a freezer-safe container, leaving a little room for expansion. It freezes well and can be thawed overnight in the fridge. Just leave out the vanilla extract if you plan to freeze, adding it fresh after thawing for best results!
Reheating
If your syrup has thickened or crystallized in the fridge, simply warm it gently on the stove or in the microwave, stirring every few seconds to restore its smooth consistency. Avoid boiling—gentle heat is all you need to bring back that gorgeous pour.
FAQs
Can I use another sweetener instead of granulated sugar?
Absolutely! You can substitute brown sugar for a deeper, caramel-like flavor, or try coconut sugar or maple syrup for something unique. Just keep in mind that each swap will slightly change the color and thickness.
Is Home Made Syrup vegan?
Yes, the basic recipe uses only plant-based ingredients! Just double-check the sugar you use is vegan-certified if this is important in your household.
How do I make flavored versions?
For endless flavor adventures, try simmering the syrup with cinnamon sticks, citrus peels, vanilla beans, or even fresh herbs. Strain out the infusions before bottling the syrup so it stays clear and smooth.
Why did my syrup crystallize?
This can happen if the sugar didn’t dissolve fully or if it’s stored for a long time. A quick reheat with a splash of water usually brings it back to a silky pour.
Can I double the recipe?
Yes! This syrup scales up beautifully. Simply double (or triple!) the ingredients, making sure your saucepan is big enough, and follow the same method. You’ll have plenty to share or stash away.
Final Thoughts
Once you taste the difference with your own Home Made Syrup, you’ll want to share it from weekend pancakes to weekday coffees. It’s impossibly simple, endlessly versatile, and guaranteed to become a kitchen treasure. Pour, share, and enjoy every sweet moment!