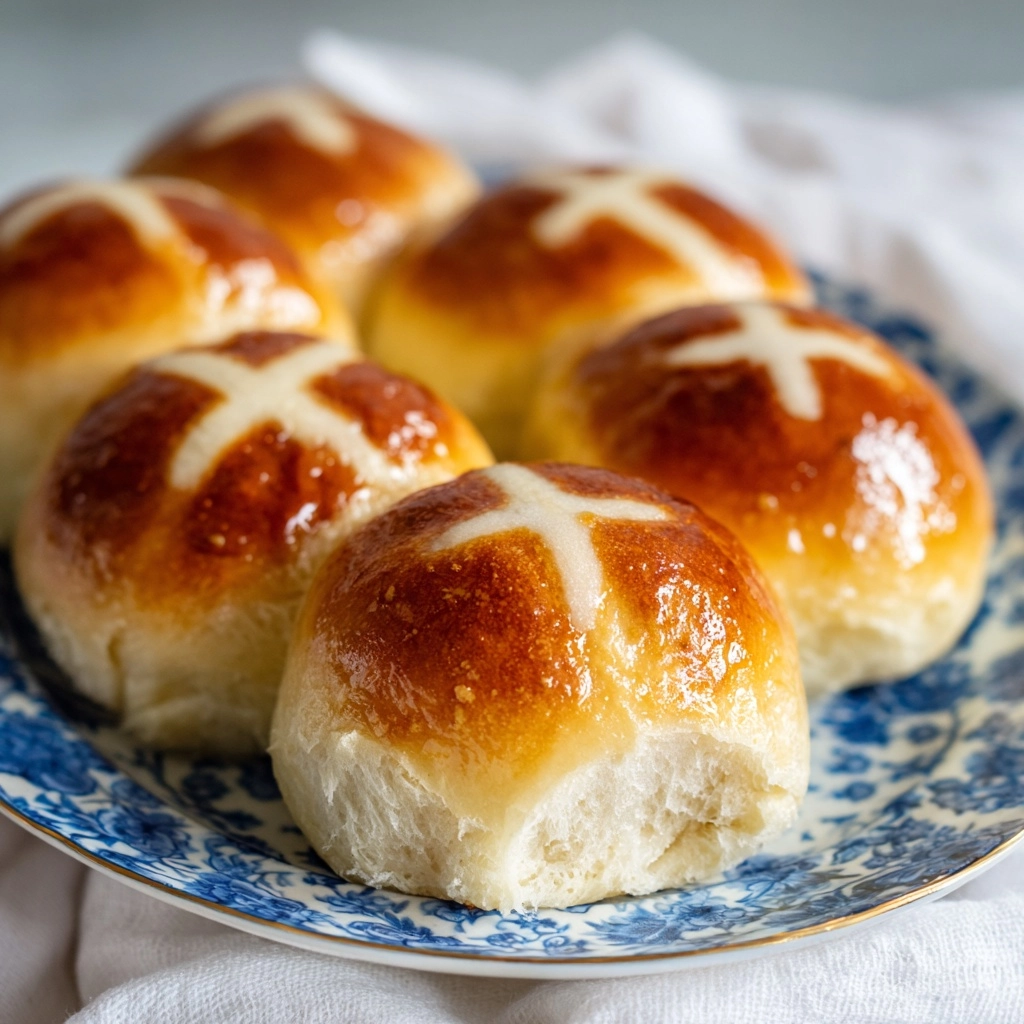
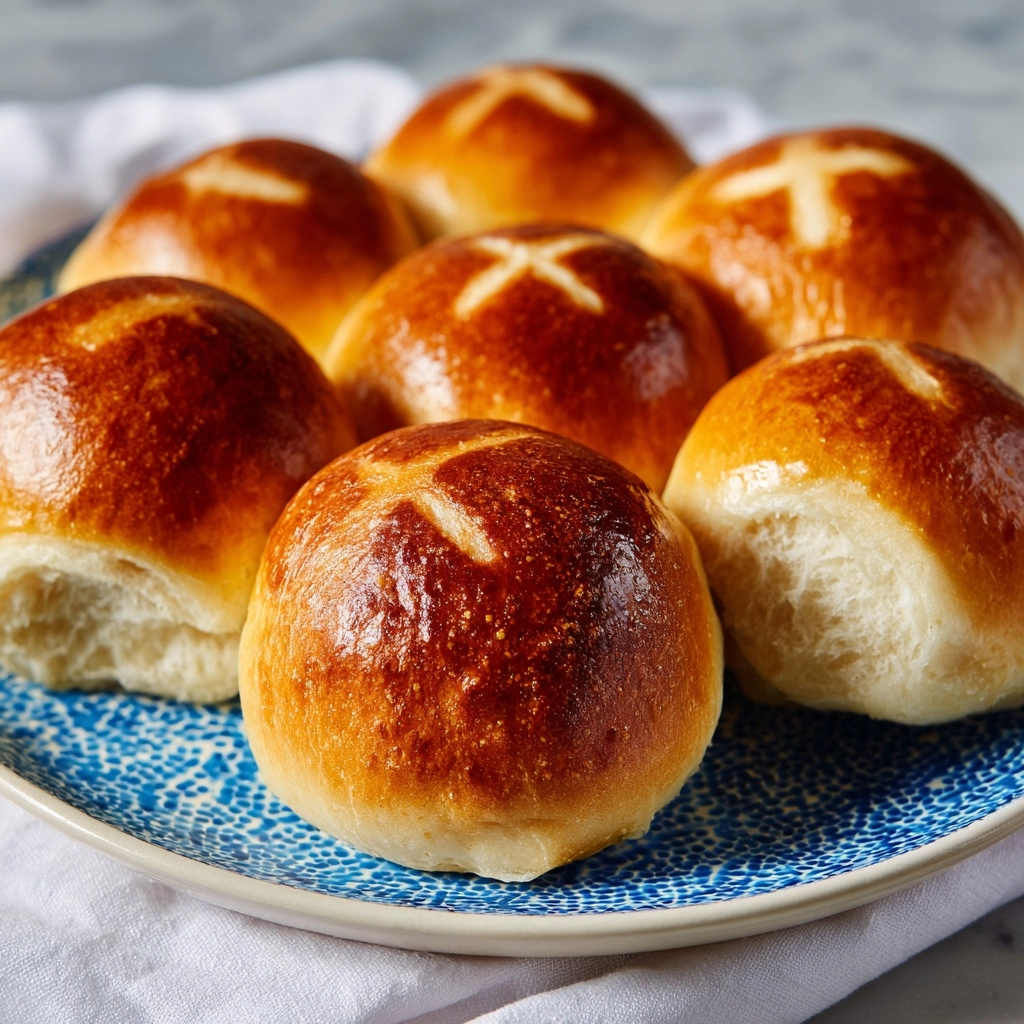
If you’ve ever longed for that irresistible aroma of spices and sweet fruits wafting through your kitchen, Hot Crossed Buns are the answer. These golden, pillowy beauties are a cherished British classic, typically enjoyed around Easter, but honestly, they’re far too delightful to reserve for once a year! Soft inside, filled with warm spices, studded with currants, and finished with their iconic cross and shiny glaze, each bun offers comfort and nostalgia in every bite. Whether you grew up eating Hot Crossed Buns or you’re making them for the first time, this recipe is guaranteed to bring a little magic and togetherness to your table.
Ingredients You’ll Need
Don’t let the ingredient list intimidate you—Hot Crossed Buns get their incredible flavor and signature fluffy texture from simple ingredients with big personalities! Each one has its own special job, helping to create that unforgettable bite in every bun.
- Warm milk (1 cup, about 110°F): Acts as the liquid foundation that awakens and feeds the yeast, giving the buns their essential lift.
- Active dry yeast (2 1/4 teaspoons): The miracle worker that helps the dough rise and become perfectly airy.
- Granulated sugar (1/2 cup): Sweetens the dough and gives the buns that lovely hint of sweetness with every mouthful.
- All-purpose flour (4 cups): The sturdy backbone of your buns, bringing structure and chew.
- Salt (1/2 teaspoon): A pinch goes a long way—enhances all other flavors.
- Ground cinnamon (1 teaspoon): Warmth and depth—a must for that classic Hot Crossed Buns flavor.
- Ground nutmeg (1/2 teaspoon): Lends a gentle, fragrant spice, balancing the sweetness beautifully.
- Ground allspice (1/4 teaspoon): Adds another dimension of cozy, aromatic spice.
- Unsalted butter (1/4 cup, softened): Creates a tender crumb and a subtle richness.
- Large eggs (2): Help bind the dough together and provide color and softness.
- Dried currants or raisins (1 cup): Sweet little bursts of fruit in each bite, delivering chewy texture and tang.
- Mixed candied peel (1/4 cup, optional): For a citrusy zing and festive color—feel free to use orange zest instead!
- Egg yolk mixed with water (1 yolk + 1 Tbsp water): Brushed on top for a golden, shiny finish before baking.
- All-purpose flour for the cross (1/2 cup): Mixed with water to make the iconic decorative cross.
- Water for the cross (5–6 Tbsp): Helps make a thick paste that’s easy to pipe.
- Sugar for the glaze (1/4 cup): Dissolved with water for a sticky-sweet, glossy finish.
- Water for the glaze (1/4 cup): Blends with sugar to create that perfect bun shine.
How to Make Hot Crossed Buns
Step 1: Activate the Yeast
Begin by combining your warm milk and yeast in a small bowl. Let them mingle for 5 to 10 minutes, until the mixture becomes foamy. This frothy layer means your yeast is alive and ready to help your Hot Crossed Buns rise to the occasion, so don’t skip this moment—it’s your launching pad for perfectly puffy buns!
Step 2: Mix the Dry Ingredients
In a large mixing bowl, whisk together the flour, sugar, salt, cinnamon, nutmeg, and allspice. This gives you a head start on even flavor distribution. The fragrance already hints at the spicy, cozy treat waiting at the end.
Step 3: Bring Everything Together
Add in the softened butter, eggs, and that freshly foamed yeast milk mixture. Stir and mix until a soft, slightly sticky dough forms. If you prefer modern kitchen shortcuts, a stand mixer with a dough hook works wonders at this stage. Don’t overwork the dough—just mix until everything is happily combined.
Step 4: Knead for Elasticity
Turn your dough onto a floured surface and knead by hand for 8 to 10 minutes, or let your mixer do the job. You’re looking for a dough that feels smooth and elastic—a surefire sign your Hot Crossed Buns will bake up high and fluffy.
Step 5: Add Fruits
Knead in the dried currants (or raisins) and candied peel (or zest) until evenly distributed. This step transforms every bite into a little celebration with pockets of sweet, tangy fruit scattered throughout.
Step 6: First Rise
Place the dough in a greased bowl and cover it with a clean towel or plastic wrap. Set it somewhere warm and let it rise for about 1 to 1.5 hours, or until it doubles in size. It’s worth the wait—this is where the dough turns magical and airy.
Step 7: Shape the Buns
Punch down the risen dough and divide it into 12 equal portions. Roll each into a ball and arrange them in a greased 9×13-inch baking pan, leaving a bit of space between each. Cover and let them rise again for 30 to 45 minutes, until they look puffy and eager for their bake.
Step 8: Prepare the Cross
While the buns are having their second rise, mix the flour and water together to make a thick, pipe-able paste. Spoon into a piping bag or even a ziptop bag with the corner snipped—and pipe that iconic cross over each bun. This is the moment when your Hot Crossed Buns will look unmistakably traditional.
Step 9: Apply Egg Wash and Bake
Brush each bun gently with your egg yolk and water wash. Slide your pan into a preheated 375°F oven and bake for 20 to 25 minutes. Watch for that beautiful golden hue—that’s your sign they’re almost ready!
Step 10: Glaze for Shine
While the buns are baking, combine sugar and water in a saucepan. Heat just until the sugar dissolves, then set aside. The second the buns come out of the oven, brush them generously with this glossy glaze for that tempting, professional finish.
How to Serve Hot Crossed Buns
Garnishes
For a little extra flourish, you can dust your Hot Crossed Buns with a touch of powdered sugar after glazing, or add a pat of butter right before serving. If you really want to emphasize the spices, a whisper of extra cinnamon on top never hurts!
Side Dishes
Hot Crossed Buns are lovely alongside softly scrambled eggs, fresh fruit, or even a creamy yogurt parfait. For a British twist, serve with a pot of black tea or a creamy café latte—it’s pure breakfast bliss.
Creative Ways to Present
Try piling the buns high on a cake stand for an eye-catching centerpiece at brunch. If you’re feeling playful, tie little ribbons around each bun or tuck sprigs of edible flowers on the platter for a stunning springtime touch.
Make Ahead and Storage
Storing Leftovers
To keep your Hot Crossed Buns fresh for the next day or two, store them in an airtight container at room temperature. They’ll stay soft and delicious, especially if you wrap them in a bit of wax paper to prevent sticking.
Freezing
These buns are freezer-friendly! Simply let them cool completely, wrap individually in plastic wrap, and pop into a ziplock bag or airtight container. They’ll keep well for up to three months, so you always have a sweet treat on hand.
Reheating
For the best results, gently reheat Hot Crossed Buns in a low oven (about 300°F) for 5 to 10 minutes, or microwave one at a time for a few seconds. They’ll regain that just-baked warmth and softness—the perfect excuse for a second serving!
FAQs
Can I make the dough ahead of time?
Absolutely! You can let the dough do its first rise overnight in the refrigerator. Just bring it back to room temperature before continuing with shaping and baking.
What can I use instead of candied peel?
If candied peel isn’t your thing, try orange or lemon zest. It adds a fresh, citrusy note that brightens the spicy sweetness of the Hot Crossed Buns perfectly.
Are Hot Crossed Buns only for Easter?
No way! While they’re traditional at Easter, there’s no reason you can’t bake them up for a cozy weekend breakfast, a special brunch, or any time you want to treat yourself to something special.
How do I make sure my buns are extra-soft?
Don’t skimp on kneading—the dough should feel smooth and springy before its first rise. Also, be careful not to overbake, as this can dry out the buns. A watchful eye and thorough knead makes all the difference.
Can I use other dried fruits?
Absolutely! Try swapping in chopped dried apricots, sultanas, or dried cranberries for a tasty twist on classic Hot Crossed Buns. It’s a great way to use up what’s in your pantry and personalize your batch.
Final Thoughts
If you love baking or simply want to bring a little old-fashioned comfort to your table, you owe it to yourself to try Hot Crossed Buns. Whether it’s your first time or your hundredth, there’s nothing quite like the sweet, spiced scent filling your kitchen and the delight of sharing warm, homemade buns with people you love. Don’t wait for a holiday—make these anytime you crave something a little special and a whole lot delicious!