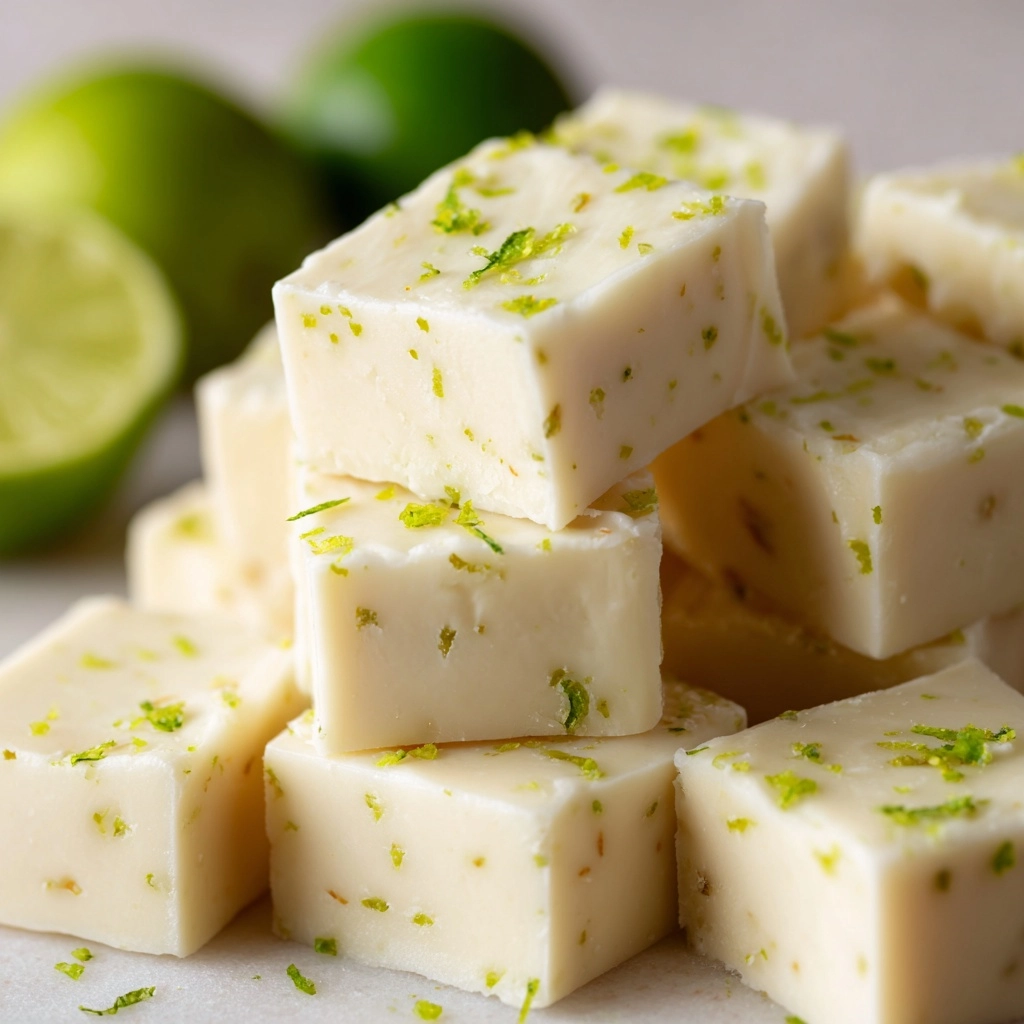
If you’re obsessed with all things citrusy and sweet, Key Lime Fudge is about to become your new dessert crush. Each bite is silky-smooth and bursts with that signature zingy key lime flavor, perfectly balanced by dreamy white chocolate and lush sweetened condensed milk. It’s the kind of treat that makes every day feel like a beach vacation, whether you’re sharing it at a party or savoring a sneaky square straight from the fridge. Get ready to fall in love with this irresistible lime fudge that’s as vibrant to look at as it is delicious to eat!
Ingredients You’ll Need
Let’s talk about how just a few simple ingredients come together to create a show-stopping Key Lime Fudge. Each brings something special: creamy decadence, citrus brightness, and that soft-yet-firm texture everyone adores. The secret? Don’t skip the fresh zest and definitely keep an eye on the color if you want that signature green pop!
- 3 cups white chocolate chips: These melt into a velvety base and give the fudge its rich, creamy texture and sweet flavor that lets the lime shine.
- 1 (14 oz) can sweetened condensed milk: Acts as the binder and sweetener, making the fudge extra luscious and smooth.
- 2 tablespoons unsalted butter: Adds a touch of richness and helps everything blend beautifully together.
- Zest of 2 key limes: Packs a punch of bright, fresh flavor and gives the fudge those telltale citrusy notes.
- 1/3 cup key lime juice (fresh or bottled): Brings the tartness—use fresh if you’ve got ‘em, but bottled works in a pinch.
- 1/8 teaspoon salt: Just a pinch to keep flavors balanced and prevent the fudge from being too sweet.
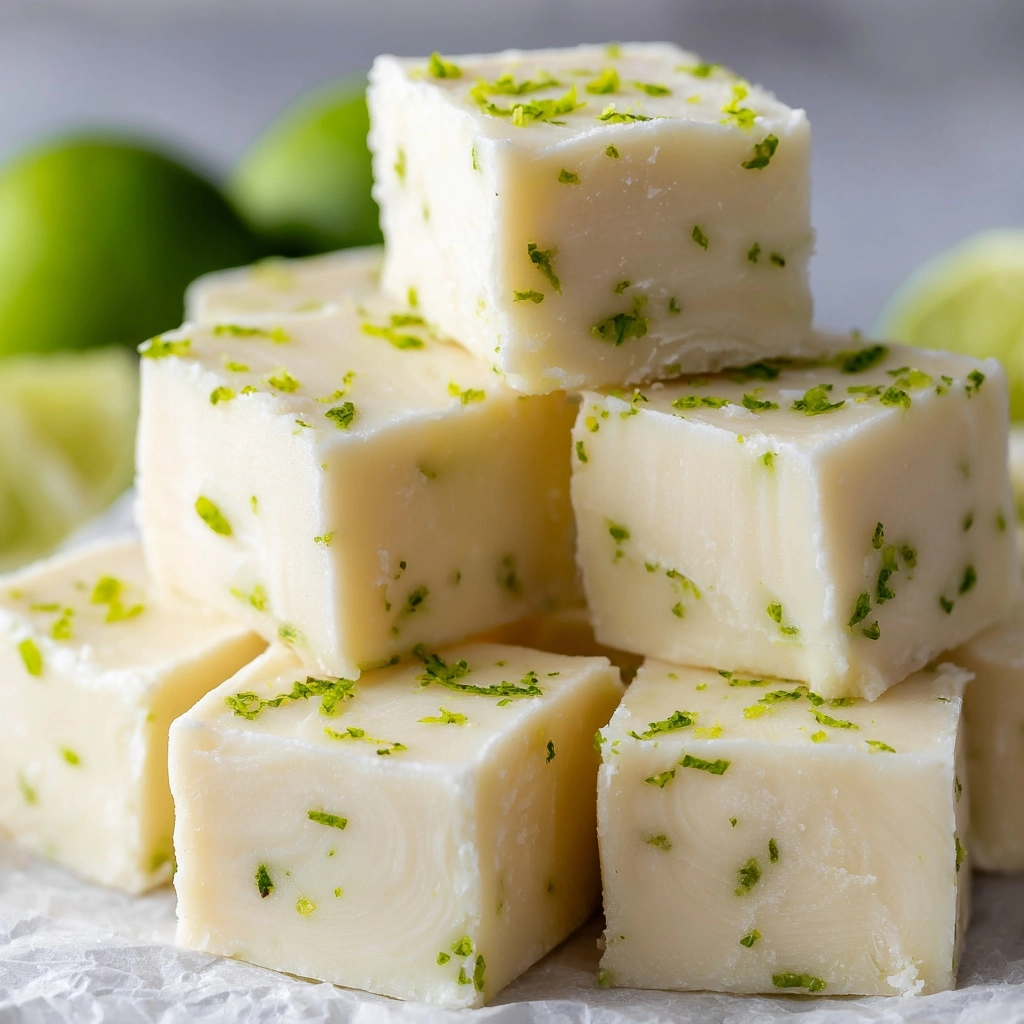
- Optional: a few drops of green food coloring: For that eye-catching pastel green, add a drop or two (totally optional, but fun!).
- Extra lime zest for garnish: Gives each square a burst of color and a little extra citrus spark on top.
How to Make Key Lime Fudge
Step 1: Prepare Your Pan
Start by lining an 8×8-inch baking pan with parchment paper. This simple trick makes it easy to lift out your Key Lime Fudge after it sets, meaning no sticky corners or crumbling edges—just perfect squares every time!
Step 2: Melt the Base
In a medium saucepan set over low heat, combine the white chocolate chips, sweetened condensed milk, and butter. Stir constantly as the chips melt and the mixture transforms into a glossy, smooth foundation. Keep it gentle and be patient—slow and steady is the secret to avoiding scorched chocolate.
Step 3: Add the Citrus Magic
Once your base is fully melted and smooth, remove the pan from the heat. Quickly stir in the key lime juice, lime zest, salt, and food coloring if you’re using it. The zest and juice wake up the creamy sweetness, giving the fudge that signature Key Lime Fudge zing. Stir until everything is completely combined and no streaks remain.
Step 4: Pour and Garnish
Pour the fudge mixture into your prepared pan, using a spatula to spread it evenly to all the edges. Sprinkle extra lime zest over the top for a pop of color and a hint of fresh citrus aroma that greets you with every bite.
Step 5: Chill Out
Now for the hardest part—waiting! Refrigerate your Key Lime Fudge for at least 3 hours, or until it’s firm to the touch. Chilling gives the fudge its classic, sliceable texture and melds all those bright flavors together.
Step 6: Slice and Serve
Once set, lift the fudge out of the pan using the parchment handles, then use a sharp knife to cut it into 36 tidy squares. Try not to sneak too many as you go (or do, I won’t tell!).
How to Serve Key Lime Fudge

Garnishes
For a fresh, vibrant finish, sprinkle each piece with a little extra lime zest right before serving. If you’re feeling fancy, add a twist of thinly sliced lime or a sprinkle of graham cracker crumbs for a nod to classic pie. The bright green flecks make each bite so inviting!
Side Dishes
Key Lime Fudge pairs beautifully with light, fruity sides. Serve it alongside a bowl of fresh berries or a tangy fruit salad for a cool, refreshing contrast. If you want to go all out, a scoop of vanilla ice cream creates the ultimate summer treat.
Creative Ways to Present
Turn Key Lime Fudge into a party showstopper by arranging the squares on a colorful platter or nestling them in mini cupcake liners. Want to wow your guests? Stack the fudge pieces in a pyramid or tuck them into cellophane bags with a little ribbon as a cheerful homemade gift.
Make Ahead and Storage
Storing Leftovers
Key Lime Fudge keeps best in an airtight container in your refrigerator. It’ll stay fresh, creamy, and bold for up to a week—though I guarantee it won’t last that long! Layer wax paper between layers to avoid sticking.
Freezing
If you’d like to make your fudge ahead or save some for later, Key Lime Fudge freezes beautifully. Wrap the squares tightly in plastic wrap and then place them in a freezer-safe container or zip-top bag. They’ll be good for up to 2 months—just thaw in the fridge when you’re ready to enjoy.
Reheating
Reheating isn’t usually necessary, as this fudge is meant to be enjoyed chilled. If your Key Lime Fudge is frozen, let it thaw in the refrigerator for a few hours before serving. It’ll taste just as fresh and fabulous as the day you made it.
FAQs
Can I use regular lime juice instead of key lime juice?
Yes! While key lime juice has a unique tartness, regular lime juice works wonderfully in a pinch. The flavor will still be bright, zesty, and delicious.
What if I don’t have parchment paper for lining the pan?
No worries—use aluminum foil or waxed paper as an alternative. Just remember to leave enough hanging over the edges so you can lift the fudge out easily once it’s set.
Can I make Key Lime Fudge without food coloring?
Absolutely. The food coloring is just for that classic pastel green appearance; it doesn’t affect the flavor. Your fudge will still be stunning and tasty without it!
Is there a dairy-free option for this recipe?
You can try making it dairy-free by using plant-based white chocolate and coconut condensed milk—just note that the final texture and flavor might vary a bit from the original, but you’ll still get that lovely lime zing.
How do I keep my fudge from getting grainy?
Cook gently over low heat, stirring constantly. High heat can cause the chocolate to seize and the texture to become gritty. Take your time, and you’ll be rewarded with smooth, luscious Key Lime Fudge.
Final Thoughts
There’s a certain magic in homemade Key Lime Fudge—the way each piece captures that perfect blend of creamy sweetness and tart citrus, ready to brighten any moment. Trust me, it’s a recipe that sparks instant smiles. Give it a try, and don’t be surprised if it disappears within hours. Happy fudge-making!