If you have a soft spot for nostalgic treats, you are in for a real delight with this Peanut Butter and Jelly Cookies Recipe. These cookies capture the magic of the classic sandwich, but in a perfectly bite-sized, chewy, and sweet form that’s nothing short of addictive. Each cookie boasts a rich, creamy peanut butter base with a gooey center of your favorite jelly, creating a marriage of flavors that’s both comforting and exciting. Whether for an afternoon snack or a crowd-pleasing cookie tray, this recipe promises a fun baking adventure and a delicious payoff.
Ingredients You’ll Need
The beauty of this Peanut Butter and Jelly Cookies Recipe lies in its straightforward ingredients, each playing an essential role in crafting the perfect balance of taste and texture. From the creamy peanut butter to the luscious jam and the right blend of baking essentials, these components come together harmoniously to bring your cookies to life.
- 1 cup creamy peanut butter (not natural): This provides the rich, nutty flavor and smooth texture essential for the cookie’s signature taste.
- ½ cup unsalted butter, softened: Contributes to the cookie’s tender crumb and adds moisture for that perfect chew.
- ¾ cup granulated sugar: Adds sweetness and helps create a slight crunch on the outside.
- ½ cup brown sugar, packed: Brings a hint of molasses flavor and helps keep the cookies soft and chewy.
- 1 large egg: Binds all the ingredients together and adds structure.
- 1 teaspoon vanilla extract: Enhances the overall flavor with a warm, aromatic touch.
- 1 ½ cups all-purpose flour: Forms the base of the cookie dough, providing shape and body.
- ½ teaspoon baking soda: Helps the cookies rise and achieve a light texture.
- ½ teaspoon baking powder: Works alongside baking soda to ensure a perfect lift.
- ½ teaspoon salt: Balances sweetness and intensifies flavors.
- ½ cup jam or jelly: Use your favorite flavor like strawberry, raspberry, or grape for that iconic peanut butter and jelly combo.
- Optional toppings: Extra peanut butter drizzle, powdered sugar dusting, or crushed peanuts add flair and texture to your cookies.
How to Make Peanut Butter and Jelly Cookies Recipe
Step 1: Prepare Your Baking Setup
First things first, you want to get your oven ready by preheating it to 350°F (175°C). Line a baking sheet with parchment paper to prevent sticking and make cleanup easier. This simple prep step sets you up for smooth baking without any hiccups.
Step 2: Cream the Butters and Sugars
In a large bowl, combine the creamy peanut butter, softened unsalted butter, granulated sugar, and brown sugar. Beat these together until the mixture becomes smooth, light, and fluffy – this aeration is key to tender cookies that still pack flavor.
Step 3: Add the Egg and Vanilla
Next, crack in the egg and pour the vanilla extract. Mix thoroughly until fully incorporated. The egg helps bind the dough while the vanilla injects a lovely warmth that enhances the peanut butter’s natural richness.
Step 4: Combine Dry Ingredients Separately
In another bowl, whisk together the all-purpose flour, baking soda, baking powder, and salt. This step ensures your leavening agents are evenly distributed throughout the flour, which promotes even rising and prevents overdone spots.
Step 5: Mix Dry Ingredients into Wet
Gradually add your flour mixture into the peanut butter blend, stirring until everything comes together to form a soft, pliable dough. Your dough should hold its shape but remain tender enough to mold easily.
Step 6: Shape Your Cookie Dough
Using about one tablespoon of dough per cookie, roll the dough into neat balls. Place them on your lined baking sheet, spacing them roughly 2 inches apart to give them room to spread.
Step 7: Create the Jelly Pocket
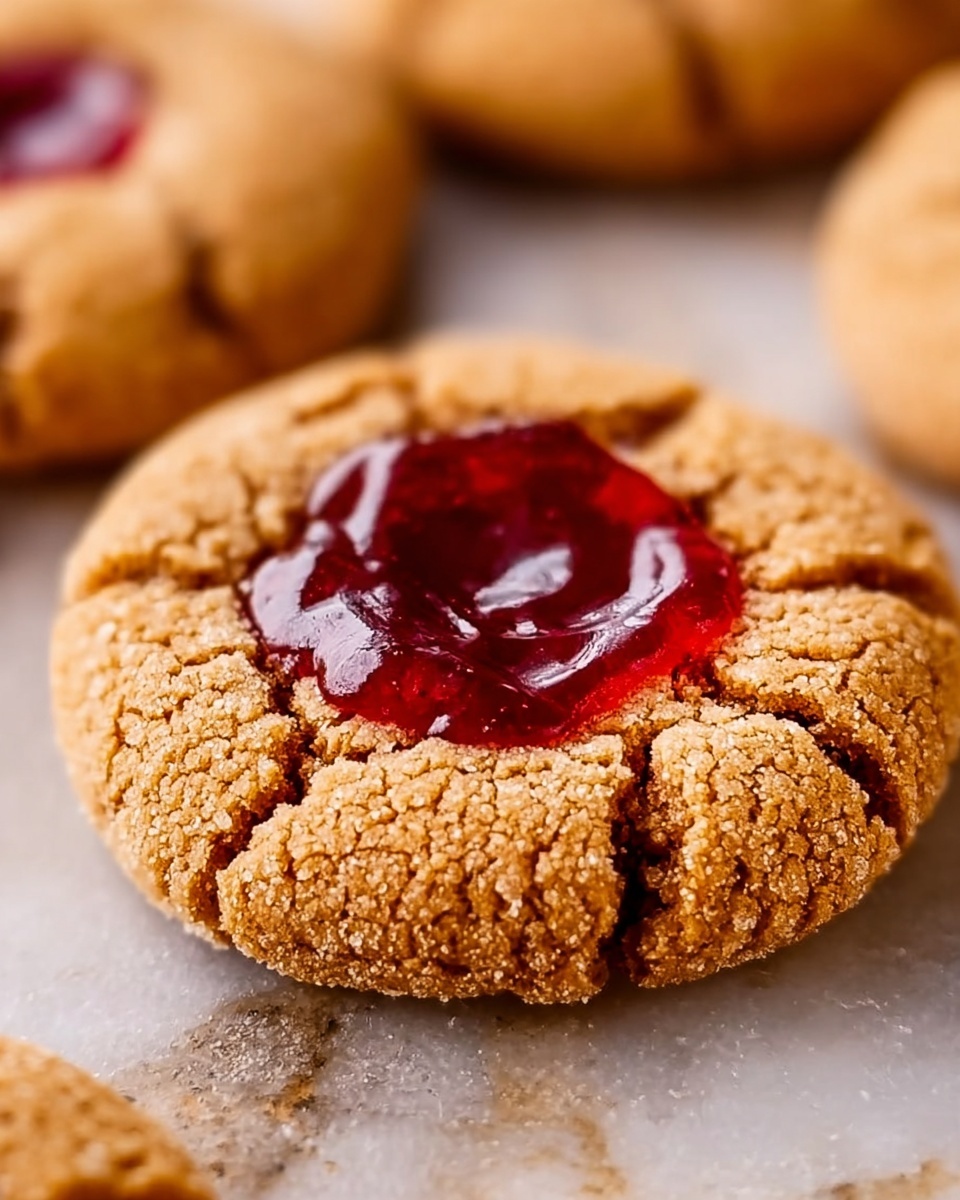
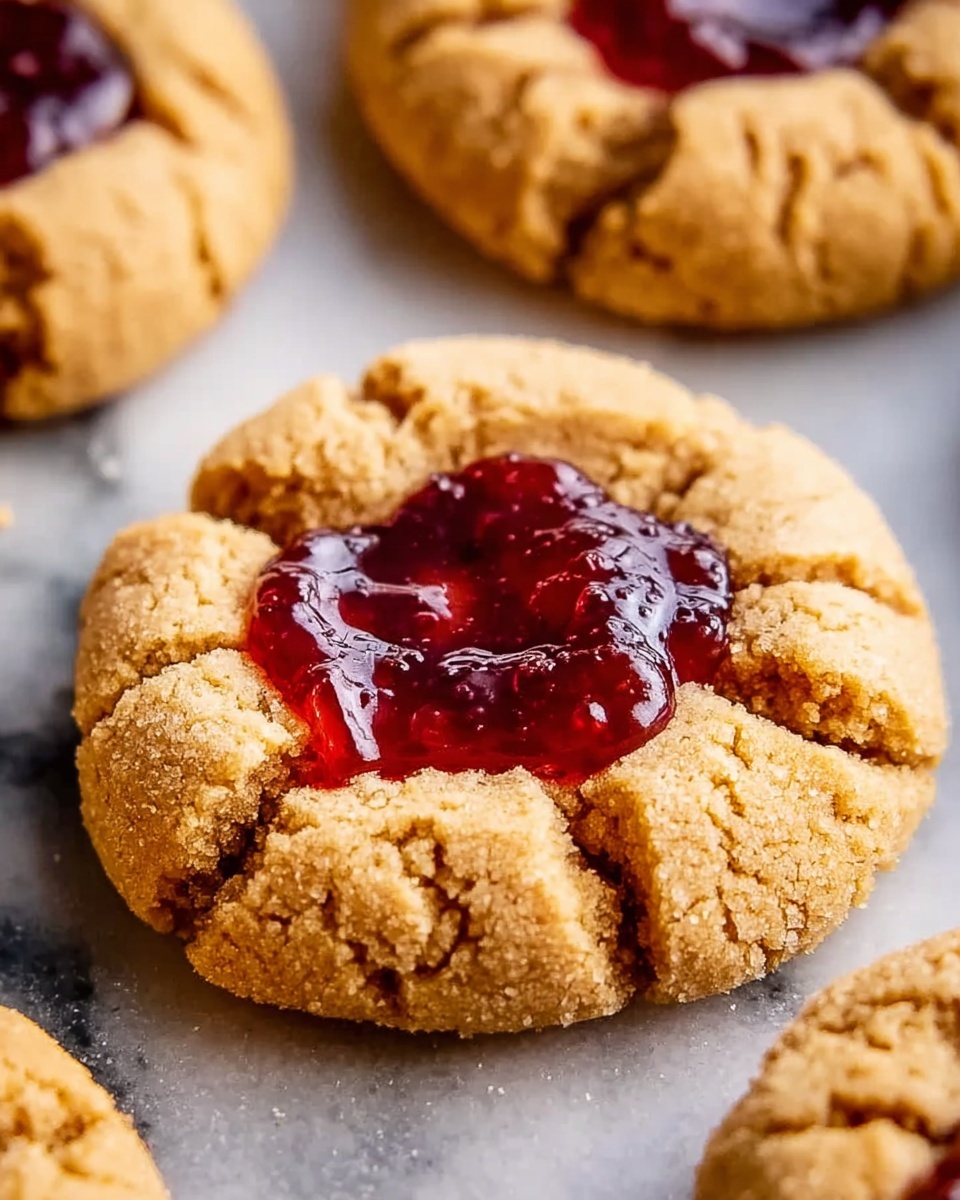
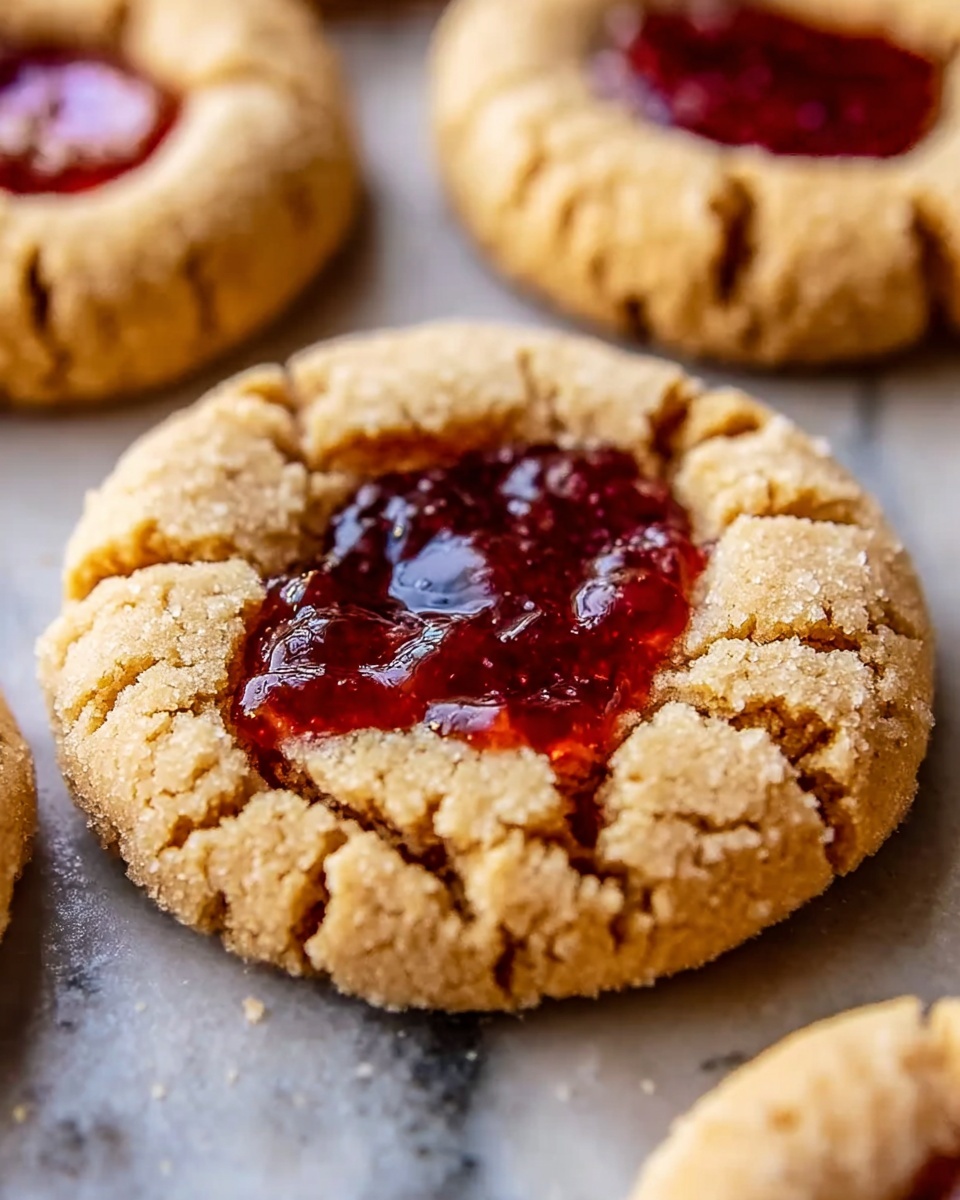
Press your thumb or the back of a spoon gently into the center of each dough ball to create a small well. Be careful not to push all the way through. This indentation is where your jelly will shine without oozing all over.
Step 8: Fill with Jelly
Fill each indentation with about half a teaspoon of your chosen jam or jelly. If you want a cleaner look, it’s a great idea to use a piping bag to add the jelly precisely. Avoid overfilling as it can cause spreading and messiness during baking.
Step 9: Bake to Perfection
Pop the cookies into your preheated oven for about 10 to 12 minutes. You’re looking for lightly golden edges — that’s your cue they are perfectly baked, tender inside, and deliciously crisp outside.
Step 10: Cooling and Final Touches
Allow the cookies to cool on the baking sheet for 5 minutes before transferring them to a wire rack to cool completely. Once cool, consider drizzling with melted peanut butter, dusting with powdered sugar, or sprinkling crushed peanuts to elevate the texture and appearance.
How to Serve Peanut Butter and Jelly Cookies Recipe
Garnishes
Enhancing these cookies is all about personal flair; a drizzle of warm peanut butter adds creaminess while powdered sugar dusting offers a delicate sweetness and a bakery-worthy finish. Crushed peanuts bring an irresistible crunch that contrasts beautifully with the soft cookie.
Side Dishes
Serve these cookies alongside a cold glass of milk or a hot cup of coffee or tea for the ultimate comfort combo. They also pair wonderfully with fresh fruit for a balanced snack or dessert platter.
Creative Ways to Present
Consider stacking the cookies with a little extra jelly spread between two to create a mini sandwich effect, a playful nod to the original sandwich itself. You can also arrange them on a festive platter with colorful garnishes for gatherings — they’ll disappear in no time.
Make Ahead and Storage
Storing Leftovers
Once completely cooled, store your Peanut Butter and Jelly Cookies Recipe in an airtight container at room temperature. They will stay fresh and chewy for about 4 to 5 days, perfect for packing a tasty treat on the go.
Freezing
These cookies freeze beautifully, making them a convenient option for busy days. Place baked and cooled cookies in a freezer-safe container or bag and freeze for up to 3 months. Thaw at room temperature when ready to enjoy.
Reheating
If you want to enjoy them warm, reheat the cookies in a microwave for 10-15 seconds or in a low oven for a few minutes. This will revive the gooey center and fresh-baked feel that makes the Peanut Butter and Jelly Cookies Recipe so special.
FAQs
Can I use natural peanut butter in this recipe?
Natural peanut butter tends to have more oil and less sugar, which affects the texture and consistency of the dough. Using creamy, non-natural peanut butter helps maintain the cookie’s structure and chewy texture.
What type of jam works best in these cookies?
Any favorite jam or jelly like strawberry, raspberry, or grape works wonderfully. Choose one with a smooth consistency to make filling easier and to avoid overly runny cookies.
How can I prevent the jelly from spilling over during baking?
Create a well-sized indentation and fill it with just enough jelly—about half a teaspoon. Using a piping bag can help you control the amount and placement precisely, keeping the jelly nicely contained.
Are these cookies gluten-free?
This particular recipe calls for all-purpose flour, which contains gluten. However, you can experiment with gluten-free flour blends, but be aware that the texture might vary slightly.
Can I make the dough ahead of time?
Absolutely! You can prepare the dough and refrigerate it for up to 24 hours before baking. This can even enhance the flavors and help the cookies maintain their shape better during baking.
Final Thoughts
There is something truly heartwarming about mastering a Peanut Butter and Jelly Cookies Recipe that delivers pure joy in every bite. Combining familiar flavors in cookie form opens up delicious new possibilities that you and your loved ones will enjoy again and again. So go ahead, bake a batch, and watch how these charming treats bring smiles to everyone around your kitchen table.